Role Security Screen Detail
 Clicking Role Security displays the Role Security screen. This feature allows a mailer to limit the editing capabilities of its operators within their PWDD software. Role Security is an optional feature for all mailers.

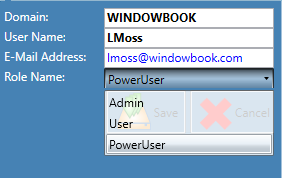
There are three available roles: Admin, Power User, and User:
-
User – All functionality of PWDD will be available to those assigned the ‘User’ role except for the QuickFix feature and the ability to manage distribution lists. Users assigned a ‘User’ role will not be able to fix files and resubmit them to PostalOne! using QuickFix, nor will they be able to access the feature to Suspend Notification for distribution list members within PWDD.
-
PowerUser – Power users will have access to all PWDD functionality.
-
Admin – Acts the same as the 'PowerUser.' There is no differentiating feature of the Admin role.
User information gets added to this screen in two ways: 1) The first time a user logs into PWDD, their log-on information is automatically added and assigned the role of ‘PowerUser’; or 2) preemptively added through this screen.
Add Users
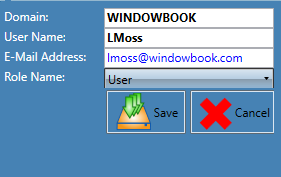
To add PWDD users to Role Security, click  Add. A list properties window will display information to identify the user who must be added.
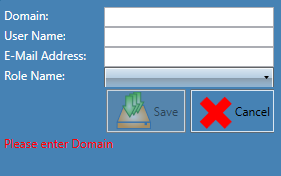
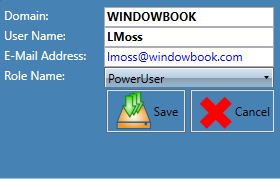
Enter the Domain associated with the user, the User Name, and the E-Mail Address for the user, and select the Role Name from the drop-down list. After all the fields have been populated and the Role Name selected, click Save.
The Role Security screen will update and display the newly added user.

Edit User Settings
To edit an existing user’s settings, select (highlight) the user in the list and click  Edit.
Edit.

The list properties window will display. Make any necessary changes to the Domain, User Name, E-Mail Address, or Role assignment and click Save when finished (in the example here, Role Name was changed from 'PowerUser' to 'User').
Delete Users
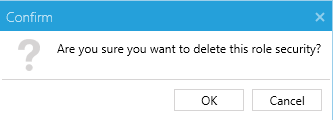
Select (highlight) the user in the list to delete an existing user and click  Delete.
Unless a user never uses PWDD again, do not delete a user.

A Confirm dialog will display. Click OK to continue with the delete process and close the dialog.
The Role Security screen will display the changed user list.

Continue Advanced Settings Screen Detail