Advanced Navigator - Utilities > Apply Mass Update
Within the Advanced Navigator View, Apply Mass Update accessed either from the Utilities menu or the Vertical Panel allows you to make quick updates to your job. For example, you have a customer that sends Mail.dats with their information but not yours, and before you can submit to PostalOne! you can use the Apply Mass Update to make the changes. For instance, you need to update the MPA to have your CRID in the Mail Preparer CRID field.
If the Mail.dat files you receive have both the MID and the CRID populated, please verify that the MID is correct. You may need to update the MID in your Mass Update Profile too.
We recommend that the Mail Owner MID and CRID only be populated in one place. Either blank out the Mail Owner MID and CRID in the Component File (CPT) or the Mailer Postage Account File (MPA).
If you are unsure whether you need the MID populated for a USPS program, please check with PostalOne! For example, for ACS Tracking, you need to populate the MID.
Here is a list of some of the fields we see mailers update on jobs they receive from outside sources.
| Mail.dat Files |
Field Name |
|---|---|
| Header File (HDR) | eDoc Sender CRID (HDR-1183) |
| Component File (CPT) | Mail Owner CRID (CPT-1149) |
| Component File (CPT) | Mail Owner MID (CPT-1148) |
| Mailer Postage Account File (MPA) |
Mail Preparer CRID (MPA-1124) |
| Mailer Postage Account File (MPA) | Mail Preparer MID (MPA-1123) |
| Mailer Postage Account File (MPA) |
Permit Number (MPA-1103) |
| Mailer Postage Account File (MPA) |
Payment Account Number (MPA-1127) |
| Segment File (SEG) | Verification Facility Name (SEG-1118) |
| Segment File (SEG) | Verification Facility ZIP+4 (SEG-1119) |
-
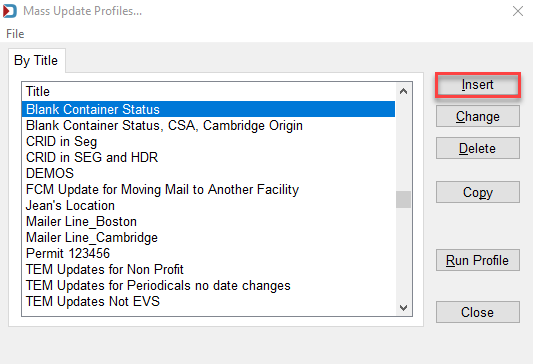
When you select Apply Mass Update in the Advanced Navigator's Utilities menu, the Mass Update Profiles window appears. In addition, you can Insert, Change, Delete, Copy, and Run Profile.
Apply Mass Update is also available in the Advanced Navigator's Vertical panel.
-
Click Insert (shown in the image above) to walk through an example of updating the eDoc Sender CRID, Mail Preparer CRID, Mail Owner CRID, and removing the Mail Owner MID in both the CPT and MPA. The Define Mass Update Profile window will appear.
Please proceed with caution. You can modify fields in almost every Mail.dat file. This tool is great for updating PostalOne! payment-related and By/For fields. While you can update other files/fields you may impact postage or misrepresent the mail's preparation, check with the USPS that these changes are allowed. Change fields at your own risk.

-
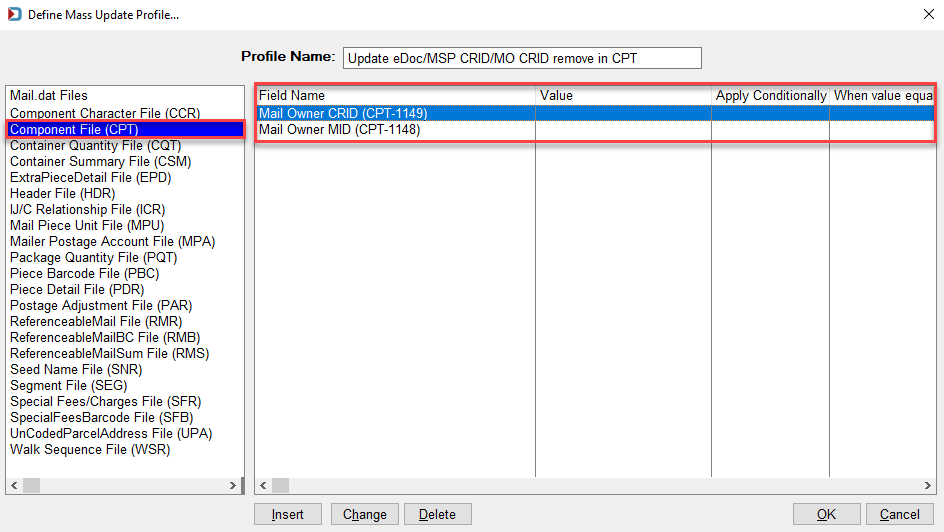
For example, give the profile a name, "Update eDoc/MSP CRID/MO CRID remove in CPT," then highlight the Component File (CPT) and click Insert.

-
In the Field Name column, click the drop-down and select Mail Owner MID (CPT-1148), then click Insert and select Mail Owner CRID (CPT-1149). Leave the Value column blank to remove any populated values in the Mail.dat file.

After fields are added:
-
Highlight the Header File (HDR), click Insert, then select the eDOC Sender CRID (HDR-1183) from the drop-down list and tab over to the Value column, enter your CRID, and hit the Tab or Enter key until the line turns blue.

-
Repeat the same steps for the Segment File (SEG) eDoc Send CRID (SEG-1140).

-
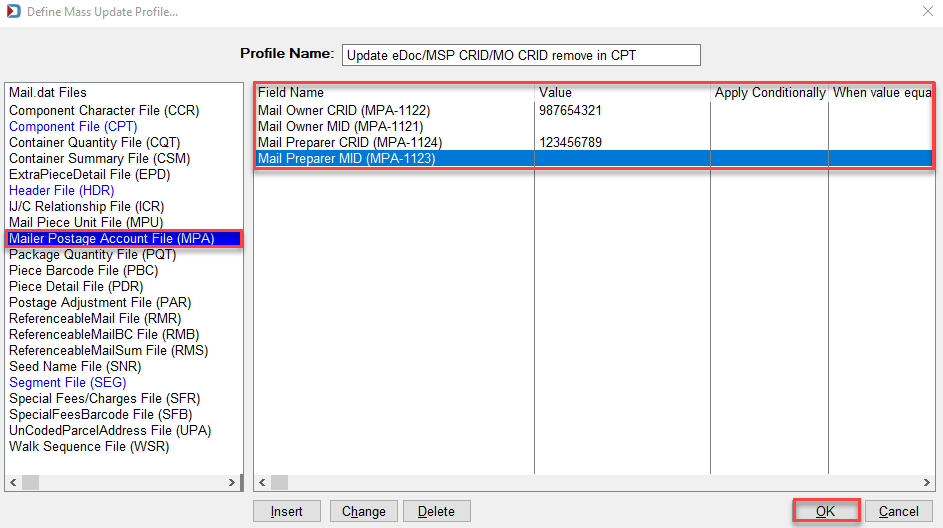
Now update the Mail Postage Account File (MPA)'s Mail Preparer CRID (MPA-1124) and Mail Owner CRID MPA-1122) (if applicable). Either remove the value in the Mail Preparer MID (MPA-1123) and Mail Owner MID (MPA-1121) or enter the correct value. When finished, click OK.
If both the MID and CRID fields are populated, the MID determines the by/for relationship. If it is blank, then PostalOne! looks to the CRID fields.
-
Highlight the new mass update profile in the Mass Update Profiles window. Click Run Profile to update your job.

-
The Apply Status dialog will appear. Click OK.
-
And then click Close to exit the Mass Update Profiles screen. You can also run another profile.
Apply Mass Update can also be run on more than one job at the same time using Apply Mass Update from DAT-MAIL's Utilities menu.
Return to Advanced Navigator - Utilities Menu