Assign Pallets to Manifests - Reports & Utilities - Export/Import CSV
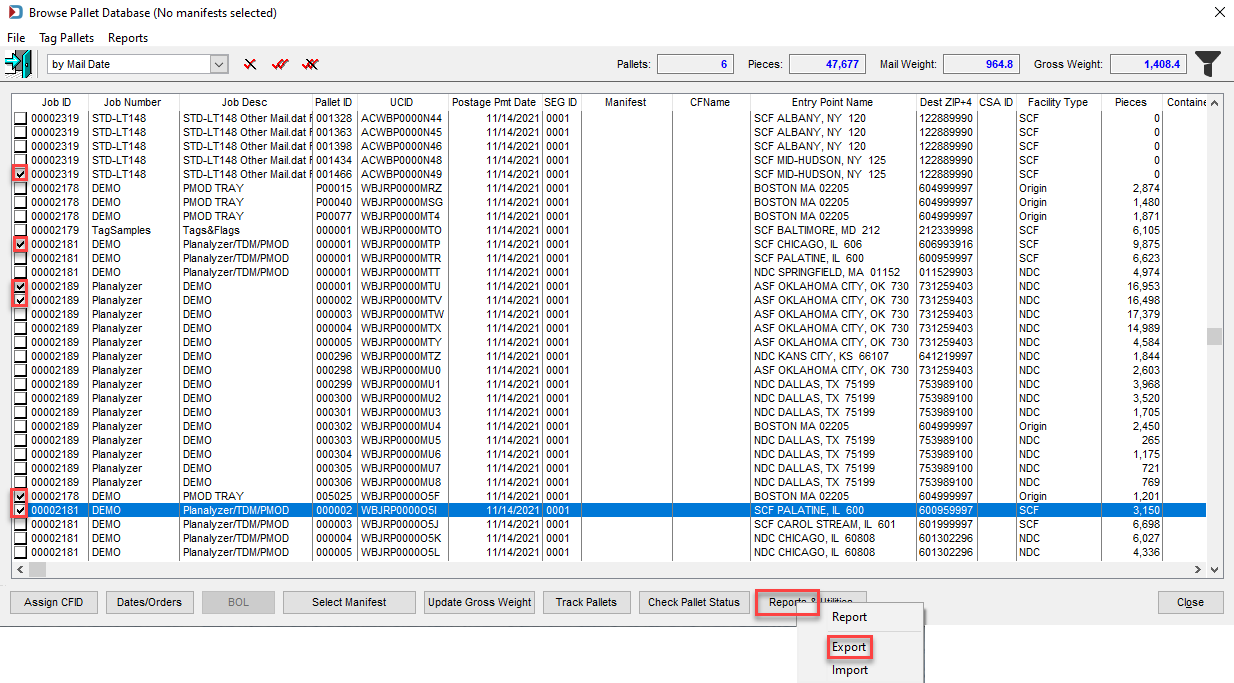
Besides generating the "Trailer Pallet Report," the Reports & Utilities button allows you to export and import a CSV file with date fields. The dates can be updated and then imported into the Browse Pallet Database screen. This feature is helpful when you do not know the dates and the person who knows does not have access to DAT-MAIL.
You can add columns to the right of the last column of the CSV file for internal purposes. For example, if you use a carrier that does not have an API in Multi-Carrier Trailer Manifesting (MCTM), they can add Truck and Stop numbers columns. However, any added columns will be ignored when imported. This function only updates date fields.
Export Option
-
Users can also select one or more pallets in the filtered Browse Pallet Database screen and export their corresponding data to a CSV file by using the Export option.
Suppose you provide the CSV to someone else and need to keep working on other pallets. Before exporting, add filters to make it easier to re-select the pallets for reimporting the CSV. A print screen of the Filter Pallet List window may be helpful. Below is just a random example.
-
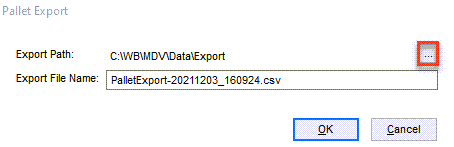
A Pallet Export prompt will display. The default location where the CSV files are saved is ‘…WB\MDV\Data\Export.’ This path can be changed by the user, if preferred by using Browse.
In addition, a file name consisting of "Pallet Export," the date (YYYYMMDD) and the time (HHMMSS).csv is automatically applied (see screen image below). You can also change the filename. When ready, click OK to close the screen and export the data.
-
Confirmation does not display when the export completes. Instead, navigate to the 'Export Path' folder designated in the Pallet Export screen on the computer where DAT-MAIL is installed to locate the exported CSV file.
The pallet data that is exported is (the fields that can be updated are highlighted in yellow:
Pallet ID
In-Home Date (End)- This will change to the In-Home Range (number of days) when imported.
IMB - Intelligent Mail Barcode
Carrier
UCID - User Container ID
Manifest ID
Job ID and List ID
CFID - Consolidation Facility ID
Job Name
Facility Type
Postage Statement Mailing Date
Facility ZIP
Estimated Ship Date
Containers - will be 0, if not a mother pallet
Induction Date (Start)
Copies
Induction Date End Mail Weight In-Home Date (Start)
Gross Weight
Example:

The major dates reported in the CSV file can be updated. These changes can then be imported back into DAT-MAIL/MCTM for the same pallets using the Import option (refer to Import Option for instructions). The major dates as displayed in the CSV export file are: Postage Statement Mailing Date, Estimated Ship Date, Induction Date, and In-Home Date.
The "major dates" called out above correlate to the field names found in the Browse Pallet Database screen in MCTM as:
| CSV File - Column Names | Browse Pallet Database - Field Names |
|---|---|
| Postage Statement Mailing Date | Postage Pmt Date |
| Estimated Ship Date | Mail Date |
| Induction Dates (Start and End) | Drop Dates (Earliest and Latest) |
| In-Home Dates (Start and End) | In-Home Dates (From and Thru) |

Import Option
Users can use the Import option to update any of pallet's "major dates" displayed in the Browse Pallet Database screen with changes made in a previously exported CSV file.
-
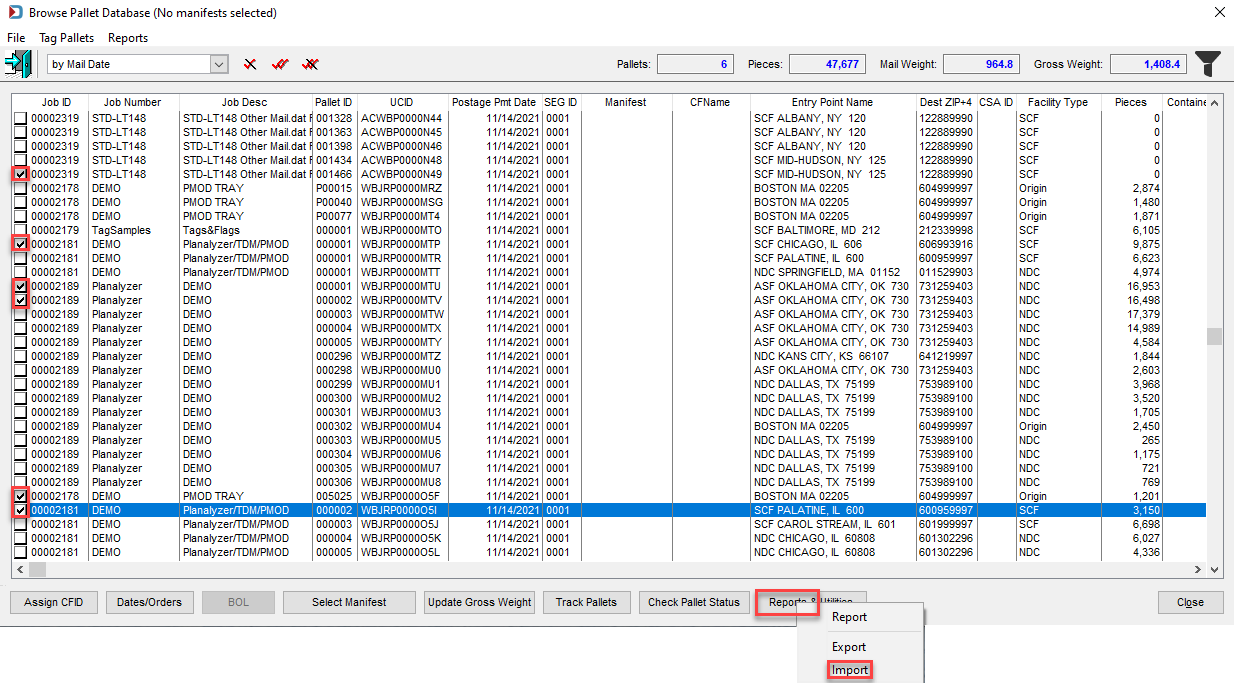
Tag the pallets in the Browse Pallet Database screen that correspond to those exported to the CSV file (refer to Export Option above) and select the Import option.
-
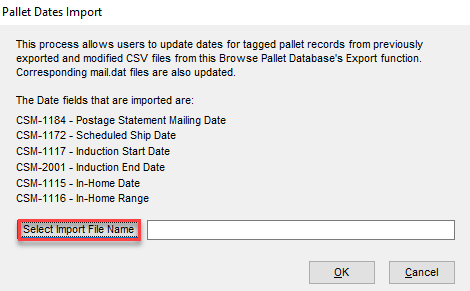
A Pallet Dates Import screen will display. Click Select Import File Name to navigate and select the updated CSV file to import.
-
Once the file is selected, click OK to close the screen and import the updated data.

-
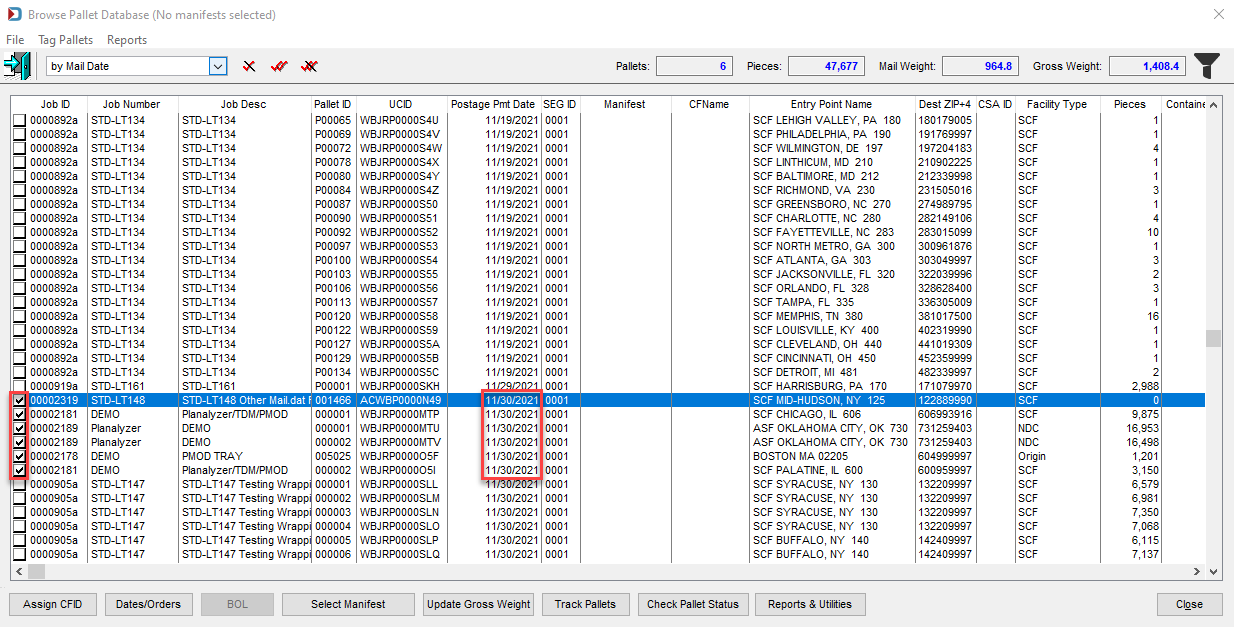
Confirmation does not display when the import completes; however, the Browse Pallet Database screen will update with the changed dates.
In this example, the Estimated Ship Date (Mail Date) changed from 11/14/2021 to 11/30/2021. As a result, the pallets selected moved down from where they were in the image above. However, so they are easier to find, they remain selected until you deselect the pallets using  Untag All Pallets.
Continue View/Dispatch Manifests - Use