My Dashboard > My Profile > Personal Info
Role Access: ALL
Allows the user to enter or edit contact information.
When all items have been entered or edited in the Personal Information screen, the user must click Done for the changes to take effect.
Clicking on Personal Info will bring you to the Member Profile screen within the Personal Information section.

Personal Information
An explanation of each option or field is shown below the print screen:
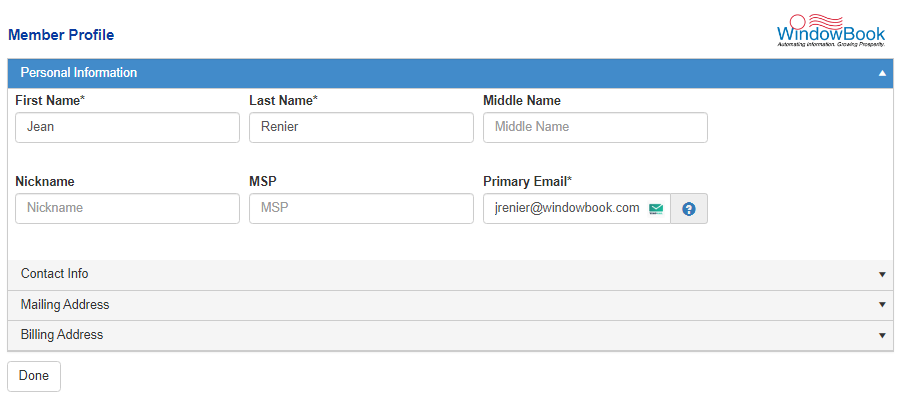
First Name: First name of the user
Last Name: Last name of the user
Middle Name: Middle name or initial of the user
Nickname: A custom, substitute name the user prefers to be referred to
Company: Typically, the name of the user’s employer
Primary Email: The user’s primary Company email address. This email address is used for various communications purposes, including system notifications and identity verification.
It is essential to enter a valid, functioning email address. If the user forgets their password or user name, the information needed to resume using the account will be sent to this email address.
Contact Info
To select the Contact Info screen, click on the Contact Info tile.
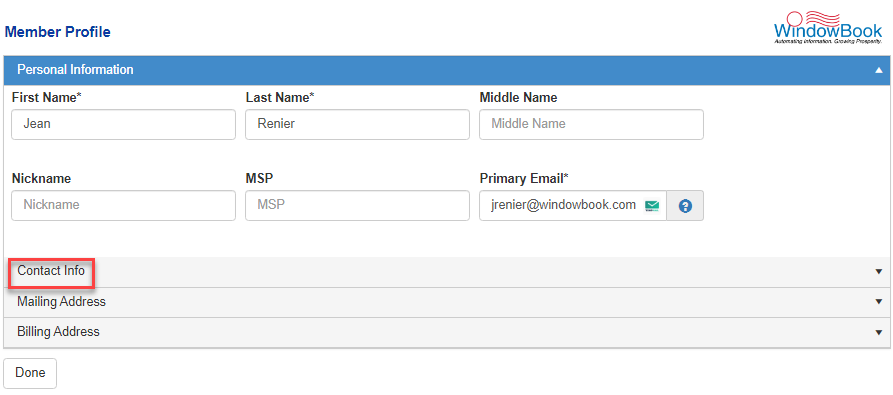
A new section will display with the items in Contact Info.
An explanation of each option or field is shown below the print screen:
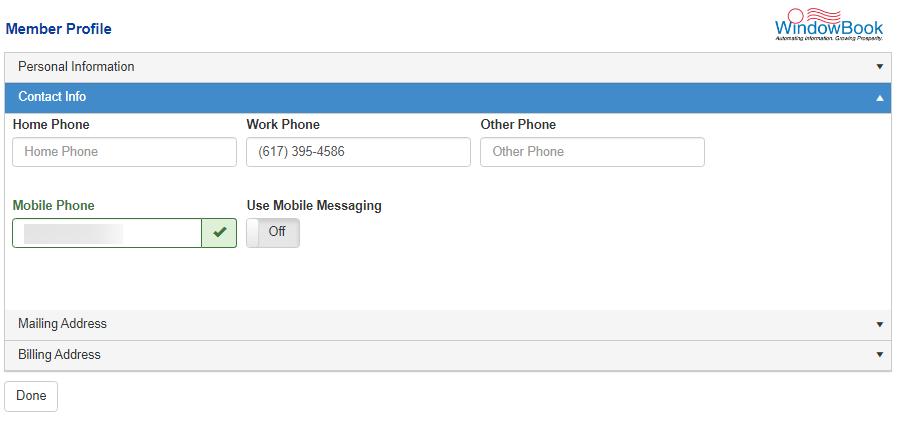
Home Phone: The user’s home phone number
Work Phone: The user’s work phone number
Other Phone: A secondary phone if available
Mobile Phone: The user’s mobile cell phone, if available
Use Mobile Messaging: Select this option if the user desires to receive text messages via their mobile phone. Click the button graphic to toggle between  On and
  Off.
Off.
Mailing Address
To select the Mailing Address screen, click on the Mailing Address tile.
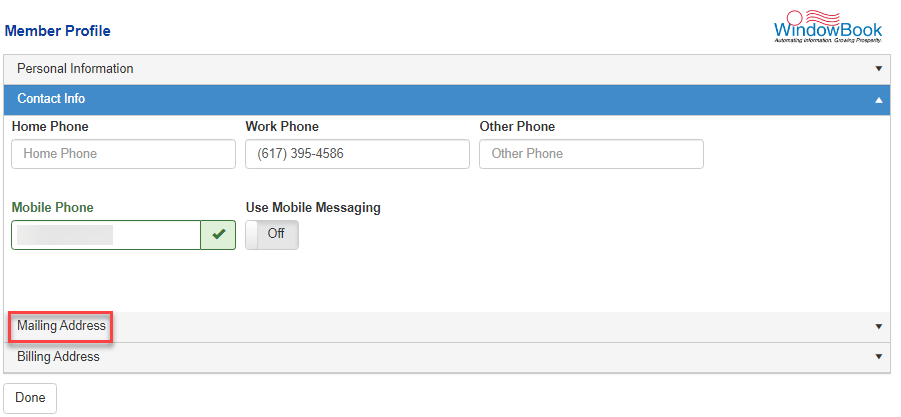
A new section will open to display with the items in Mailing Address.
An explanation of each option or field is shown below the print screen:
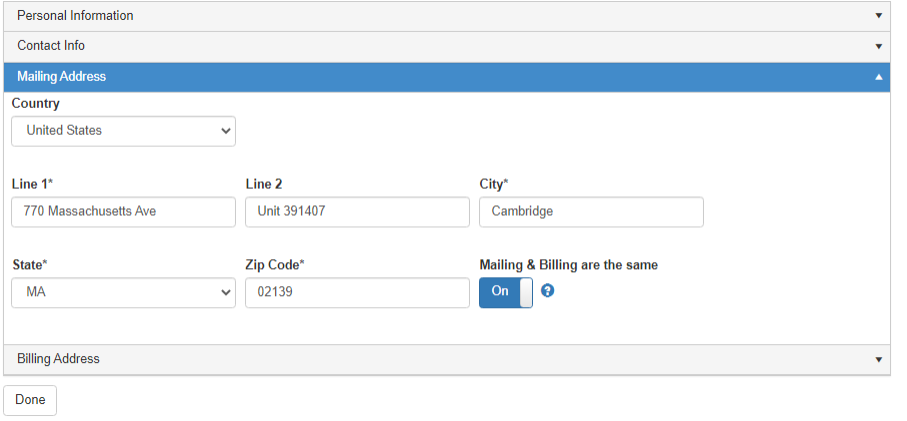
The address entered here should be the address of the Company location where the user is currently working. This information is used to send correspondence, statements, etc.
Country: Select the Company's country resides in using the drop-down menu, either the United States or Canada. This selection changes the display of some of the other entries noted below.
If United States:
Line 1: Street Address of the Company
Line 2: Secondary street address, if necessary
City: The city of the Company’s location
Mailing & Billing are the same: If the mailing and billing address are the same, set the toggle to  On. The mailing information entered on this screen will be copied to the Billing Address screen.
If Canada:
Line 1: Street Address of the Company
Line 2: Secondary street address, if necessary
City: The city of the Company’s location
Province: Select the Canadian province the Company resides in from the drop-down menu selection.
Postal Code: The Canadian postal code the Company resides in.
Billing Address
To select the Billing Address screen, click on the Billing Address tile.
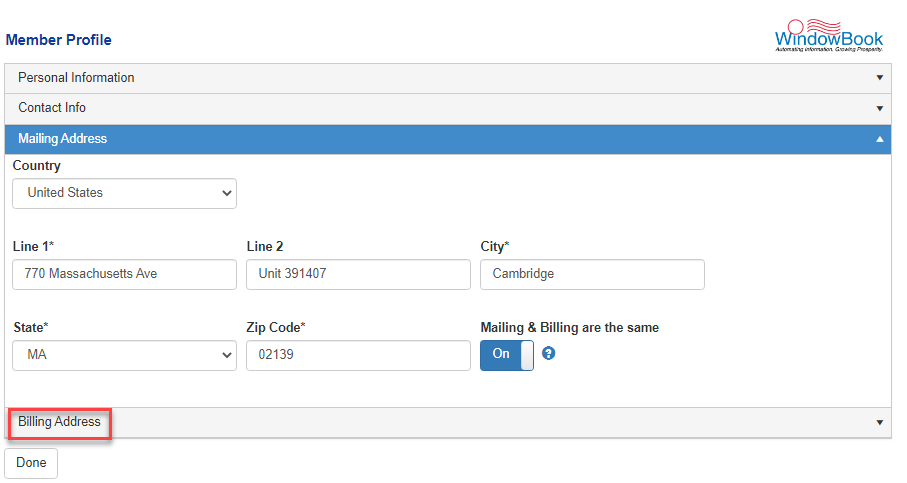
A new section will display the items in Billing Address.
An explanation of each option or field is shown below the print screen:
If the toggle is  On for Mailing & Billing Address are the same, when you click Done, if your Mailing Address changed, the Billing Address changes too. If you click on Billing Address before clicking Done, it will show the old billing address.
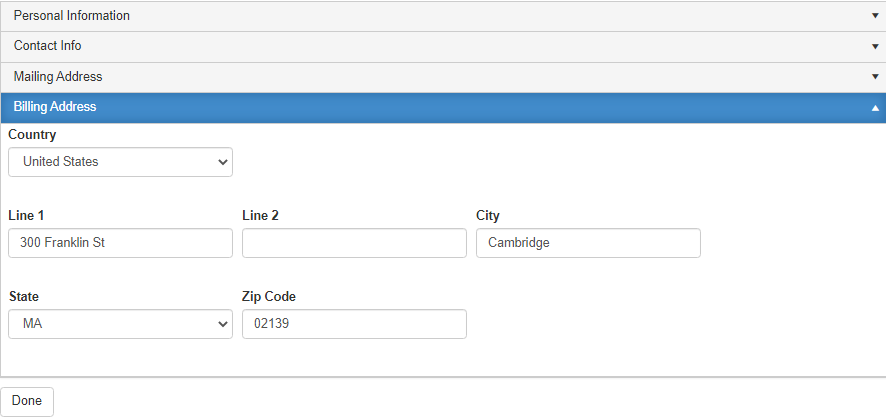
Line 1, Line 2, City, State, and ZIP Code (for US) or Province and Postal Code (for Canada): The Company address to send billings to.
The address entered here should be the location's address to which billables, statements, etc., should be sent.
When changing the Billing Address, the Mailing & Billing are the same option in the Mailing Address section needs to be set to  Off.
Off.
When all items have been entered or edited in the Personal Information screen, the user must click Done for the changes to take effect.
A confirmation message will display, and the changes have been saved.

Return to My Dashboard > My Profile