Scheduler Required Setup - Deleting Trays or Spoiling Pieces
To use wbSCAN to delete trays or spoil pieces, DAT-MAIL and the Scheduler IM Scan Manager Plug-In require setup. This page provides instructions for the Scheduler.
Scheduler
If you use the IM Scan Manager for Spoilage accounted for during production and wish to account for spoilage after reaching your shipping department, you need to have a new configuration for this plug-in exclusive for wbSCAN. Whether you have or have not set up a previous configuration, the instructions are the same.
With each configuration, the folders specified for each configuration must be unique, with the possible exception of where you archive your wbSCAN log files. This folder can be the same as other configurations.
-
Open Scheduler and
 Stop the Service.
 -
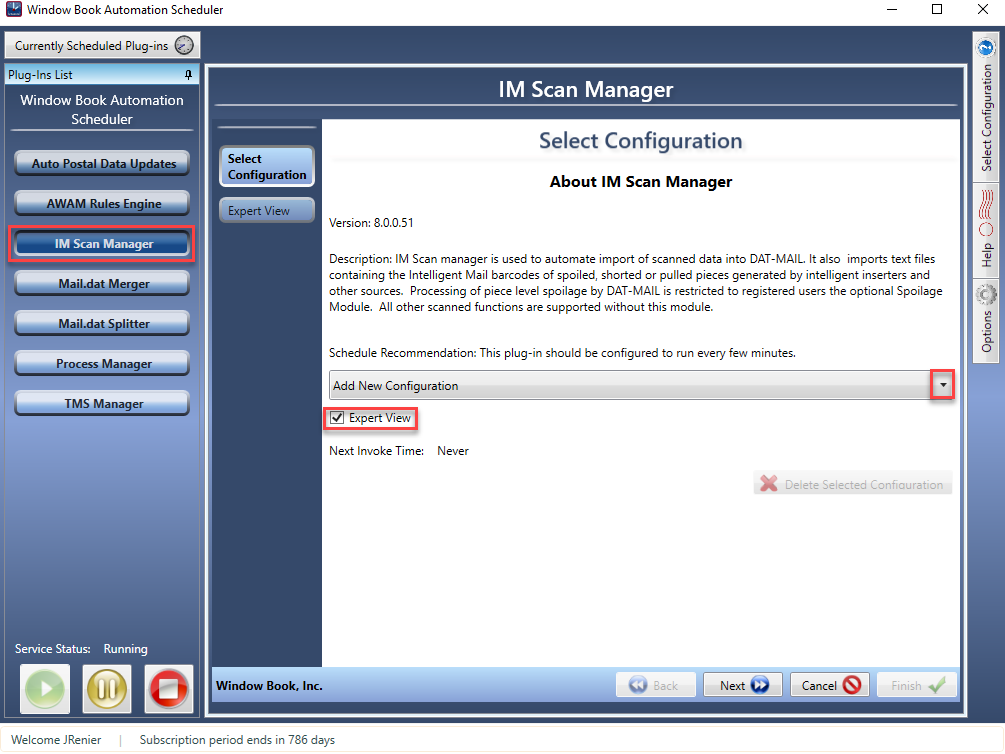
then click on IM Scan Manager, and for applicable IM Scan Manager configuration previously set up, select the Expert View checkbox. If you already have existing configurations, click the drop-down to select Add New Configuration.
-
In the Expert View screen, enter a
 Name for this configuration. In this example, the name is “IM Scan Manager – wbSCAN Piece Spoilage and Tray Deletion.” Next, make any changes to options labeled with 2 to 7. When complete, click Next.
Window Book does not recommend enabling the function to Run at start-up unless directed by a Window Book Support representative. However, if this option is enabled and the Scheduler is stopped and started for whatever reason, the plug-in will run every time the Scheduler starts regardless of the plug-in’s frequency settings.
Below the print screen is a description of each option:
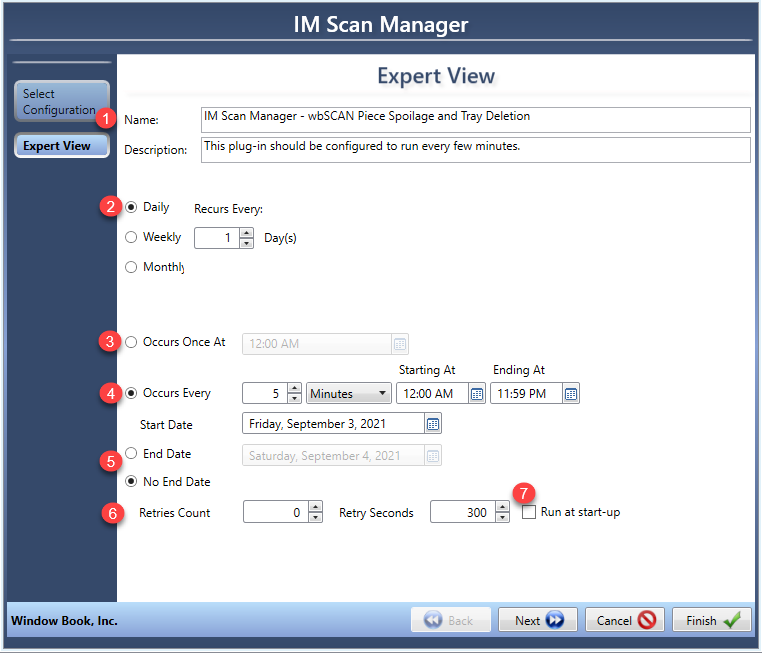
 Recurs every: The default is Daily; leave this setting unless you prefer not to have the Scheduler running every day, then you could change it to Weekly and select the days of the week it should be looking for tagger files.
 Occurs Once At: If you only want to look for scan files once a day at a set time, you would select the time here.
 Occurs Every: The default is 5 minutes and the Starting At 12:00 AM and Ending At 11:59 PM. You can adjust to suit your environment. For example, if you run a nightly backup, you change the Starting At and Ending At to ensure the Scheduler is not running.
 End Date and No End Date: The default is No End Date. If you are using this configuration for a specific project and after this time you do not want this configuration to run, you could set an End Date.
  Retries Count and Retry Seconds: If a user could open a job as someone sends spoiled pieces or deleted trays to IM Scan Manager, then the processing of the tagger file may error because the job is locked. Also, a virus scan could lock the process.
 Run at Startup: Never select this option unless a Window Book Support Representative asks you to do so.
 -
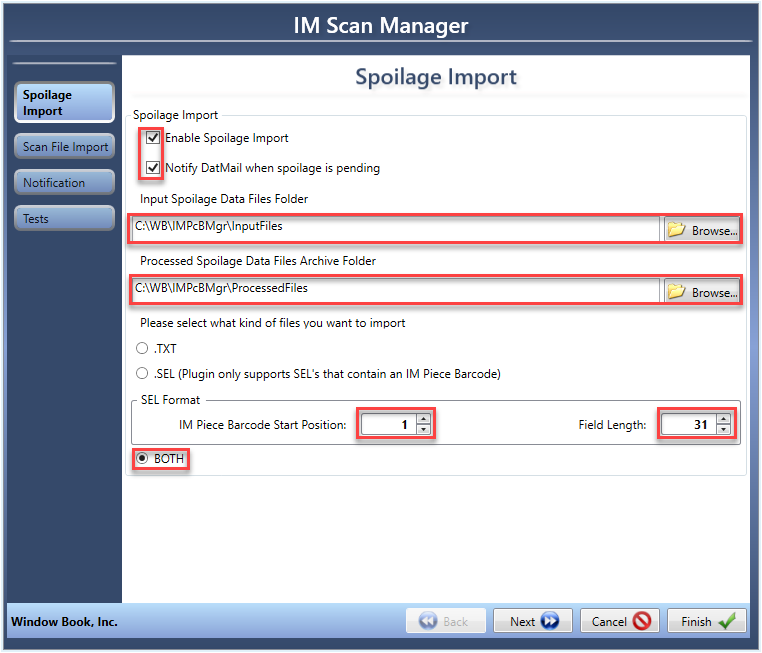
In the Spoilage Import screen, select the Enable Spoilage Import and Notify DatMail when spoilage is pending checkboxes. We recommend using C:\WB\IMPcBMgr\InputFiles for the Input folder and C:\WB\IMPcBMgr\ProcessedFiles for the Archive folder. Unless you use a different spoilage log that does not have the Intelligent Mail Barcode only, leave the SEL format set to start position 1 and field length at 31. Also, keep the default of BOTH radio button selected.
-
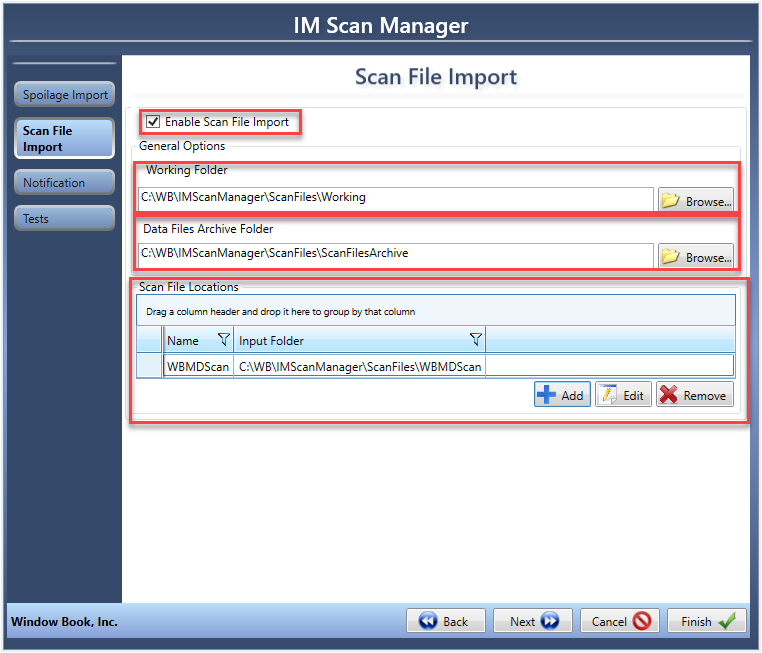
Click Next to move to the Scan File Import screen. Select the folder where the wbSCAN logs (scan files) are saved; it should match what you put in DAT-MAIL in wbScan Settings - IM Scan Manager Submission Folder. When finished, click Next.

If you use Whittier taggers, create a separate folder for the wbScan IM Scan Manager scan files.
-
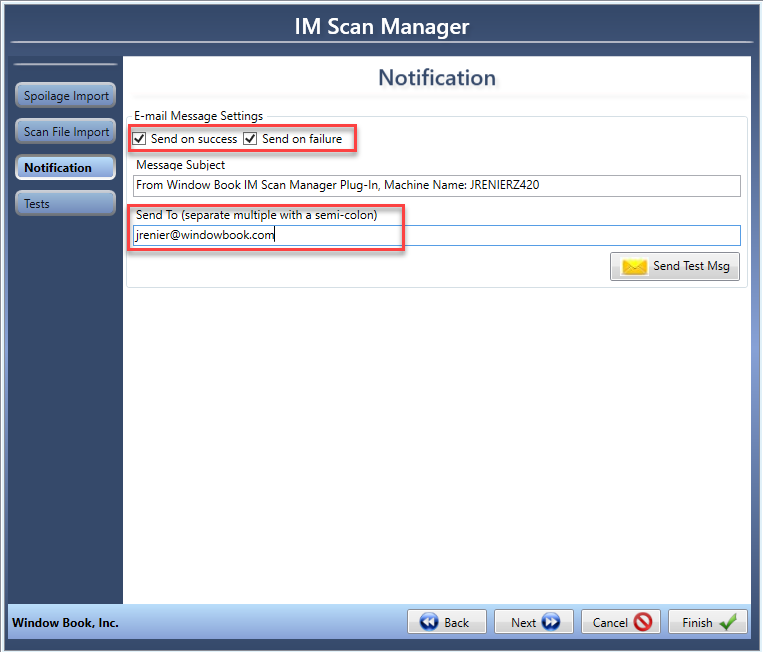
When the Notification screen appears, enable either or both checkboxes and enter email addresses to receive notifications. Click Next when complete.
-
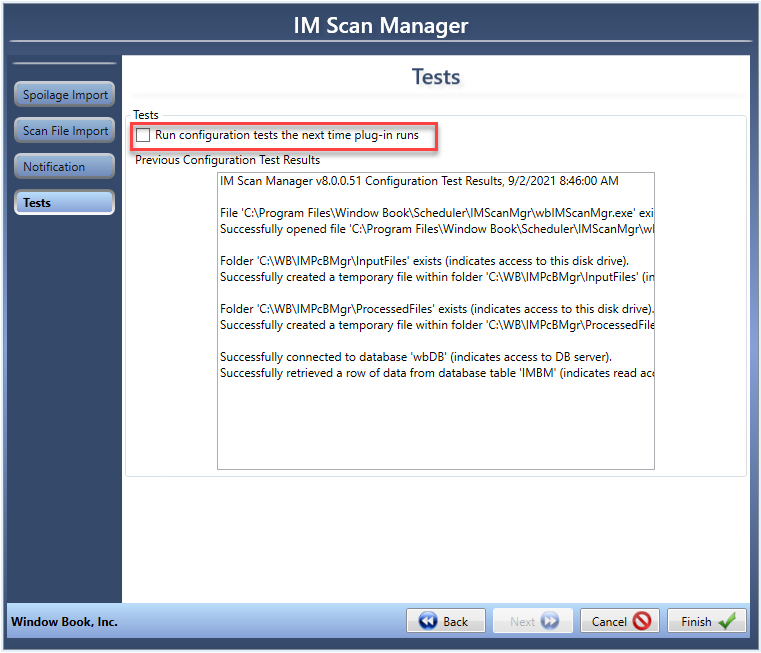
If you want to run a configuration test, select the Run configuration tests the next time plug-in runs checkbox in the Test screen and then click Finish. The print screen below shows what you will receive when this checkbox is selected.
-
The Finished screen will appear, confirming the setup is complete (image not shown here).
-
 Start the Scheduler Service.
See also