Events Notification Screen Detail
 Clicking Events Notification displays the Events Notification screen. The Events Notification feature frees you from continually looking at submission logs in PWDD or on the MDR Client site to make certain jobs have been processed successfully by PostalOne!. Instead, users can receive Passed or Failed Receipt Events notifications, Passed or Failed Log Event notifications, and Warning notifications through email. In addition, each Receipt Events Notification email contains the eDocs Submitter CRID in the subject line so that mailers with multiple locations will know which location the event pertains to at a glance.
There are some essential differences between Receipt Events and Logged Events:
-
The MDR Client generates Logged Events, and PostalOne! generates Receipt Events.
-
Logs get created by the MDR Client sooner than PostalOne! Receipt Events.
-
There are only four Logged Events that will trigger a notification, unlike Receipt Events where there are more of and contain more detailed information for the mailer.
Below the print screen is an explanation:
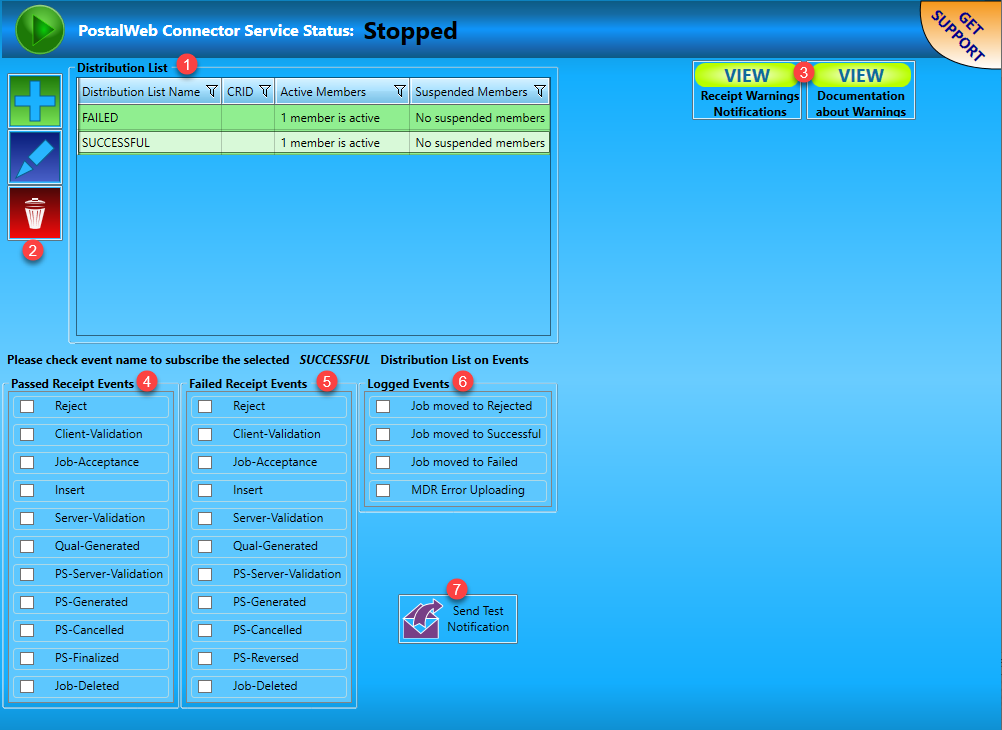
![]() Distribution List: This panel displays the list of all existing distribution lists. The panel is comprised of 3 columns:
Distribution List: This panel displays the list of all existing distribution lists. The panel is comprised of 3 columns:
-
Distribution List Name: The name entered for the distribution list by the user.
-
Active Members: Provides the number of active members that make up each list.
-
Suspended Members: Provides the number of list members for which notifications have been suspended (refer to Suspend Notifications for more information).
The PWC automatically creates two distribution lists called FAILED and SUCCESSFUL for ease of use.
These distribution lists can be renamed (refer to Edit a Distribution List for more information).
Events Notification always requires that at least one distribution list exist. Members can be suspended or deleted if you do not want to receive event notifications.
![]() Functions: These following buttons allow you to Add, Edit, or Delete:
Functions: These following buttons allow you to Add, Edit, or Delete:
 Adding a list (refer to Adding a Distribution List)
 Editing a list (refer to Edit a Distribution List)
 Deleting a list (refer to Delete a Distribution List)
![]() Warnings & Documentation: This area of the screen contains two items: Receipt Warnings Notifications and Documentation about Warnings:
Warnings & Documentation: This area of the screen contains two items: Receipt Warnings Notifications and Documentation about Warnings:
Since these warnings do not cause a job to fail, mailers will not be aware of these warnings using the PWC’s Receipt and Logged Events Notification functions.
-
Receipt Warnings Notifications: Intended for, but not limited to, mailers participating in Seamless and E-Induction Mailings, these notifications provide information to mailers in the way of warnings that will not fail a job but will negatively impact mailings, scorecards, and other performance measurement criteria used by the USPS. Clicking VIEW displays the existing Distribution Lists created by the user. To have warning notifications sent to a specific distribution list, select the corresponding checkbox for that list. If a user wishes to create a distribution list specifically for warnings, refer to Adding a Distribution List for more information. To hide the distribution lists (which lists are and are not going to receive warning notifications), click HIDE.
Distribution List of Events Notification Screen 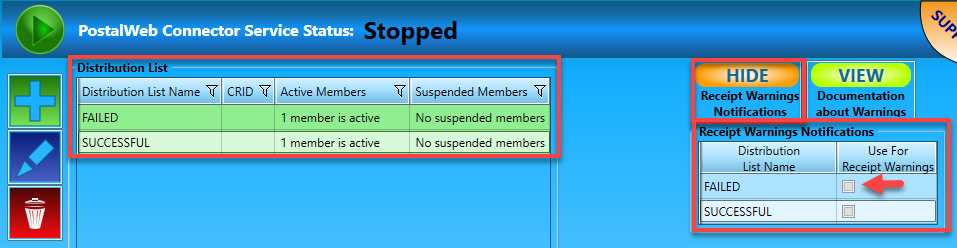
-
Documentation about Warnings: Clicking corresponding VIEW opens a scrollable window that displays a table containing the various warnings that can be reported. The table includes the error code itself, the warning message, the action that the mailer should perform to resolve the issue that caused the warning, and the location of the error. To close the window, click HIDE.
Below the print screen is an explanation of each of the Receipt and Logged Events available in Events Notification:

![]() Passed Receipt Events: These are notifications (emails) sent for submitted jobs based on specific receipt files containing an event value that corresponds with ‘passed,’ generated by PostalOne! during the batch validation and upload process. Email notifications will contain submission-specific header information, including the eDoc Submitter CRID. The user can identify which submission or job the notification pertains to and which location (beneficial to Clients with multiple locations). Decide which Passed notifications should be sent and to whom, and assign a distribution to that receipt event accordingly. If one group needs a different set of Passed Receipts, create another distribution list.
Passed Receipt Events: These are notifications (emails) sent for submitted jobs based on specific receipt files containing an event value that corresponds with ‘passed,’ generated by PostalOne! during the batch validation and upload process. Email notifications will contain submission-specific header information, including the eDoc Submitter CRID. The user can identify which submission or job the notification pertains to and which location (beneficial to Clients with multiple locations). Decide which Passed notifications should be sent and to whom, and assign a distribution to that receipt event accordingly. If one group needs a different set of Passed Receipts, create another distribution list.
![]() Failed Receipt Events: These are notifications (emails) sent for submitted jobs based on specific receipt files containing a value corresponding with a failed status generated by PostalOne! during the batch validation and upload process. Email notifications will contain submission-specific header information, including the eDoc Submitter CRID. The user can identify which submission or job the notification pertains to and which location (beneficial to Clients with multiple locations).
Failed Receipt Events: These are notifications (emails) sent for submitted jobs based on specific receipt files containing a value corresponding with a failed status generated by PostalOne! during the batch validation and upload process. Email notifications will contain submission-specific header information, including the eDoc Submitter CRID. The user can identify which submission or job the notification pertains to and which location (beneficial to Clients with multiple locations).
If a distribution list is not selected for a Receipt Event, no notification will be sent when that particular Receipt Event occurs.
![]() Logged Events: These are notifications (emails) sent for submitted jobs based on important events identified by debug logs generated by the MDR Client.
Logged Events: These are notifications (emails) sent for submitted jobs based on important events identified by debug logs generated by the MDR Client.
Submissions triggering a ‘Job moved to Successful’ notification are still subject to other failures (server validation failure, database insert failure, etc.). These failures can be identified by activating the corresponding Receipt Event notification.
If a distribution list is not selected for a Logged Event, no notification will be sent when that particular Logged Event occurs.
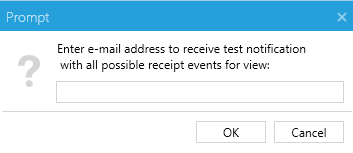
![]() Send Test Notification: This is different from the Notifications screen. You do not need to choose an event to send a test notification, nor do you need to create a distribution list to see an example. When you click Send Test Notification, a Prompt dialog will appear where you can enter an email address to send an example.
Send Test Notification: This is different from the Notifications screen. You do not need to choose an event to send a test notification, nor do you need to create a distribution list to see an example. When you click Send Test Notification, a Prompt dialog will appear where you can enter an email address to send an example.
Adding a Distribution List
-
To add a distribution list, click
Add in the Events Notification screen under the Distribution List section. 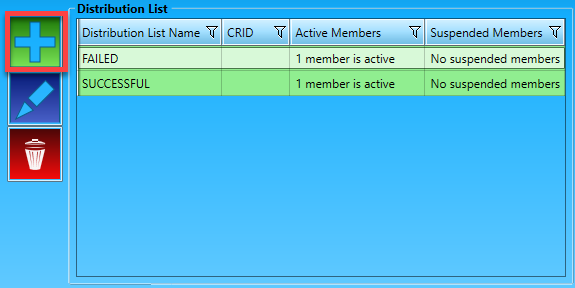
-
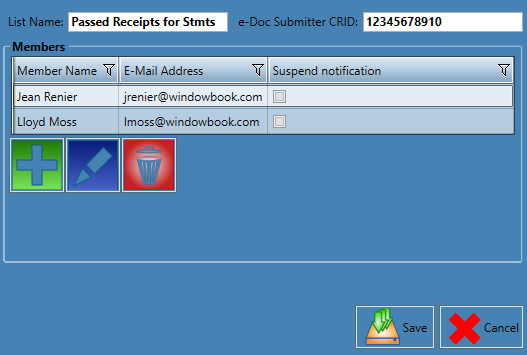
A list properties window will display, enter a List Name and e-Doc Submitter CRID, then click
Add to bring up the list properties window to add members to the list. 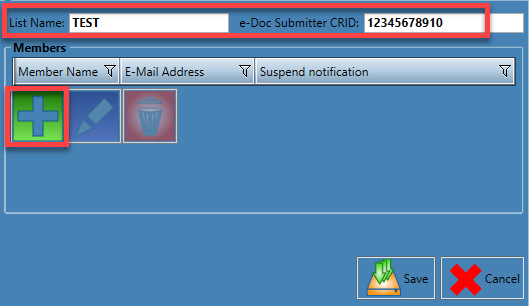
-
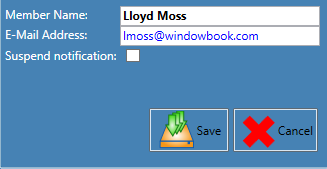
When finished with adding a member, click Save.
-
Click
Add and enter members until finished. Once your list is complete, confirm everything is correct and click Save.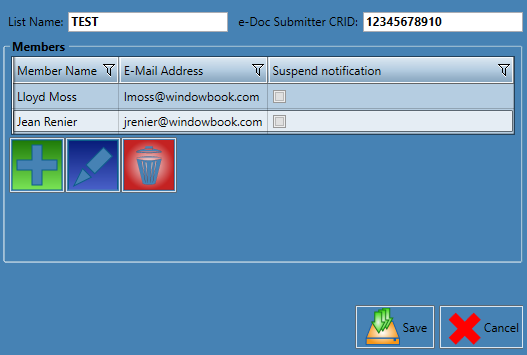
If you do not know who will receive the email notifications, distribution lists can still be created, and members add later.
Existing Outlook distribution lists can be added. For example, if you have a distribution email list called 'maildepartment@veryfineCompany.com'. 'Mail Department' could be entered as the Member Name, and the E-Mail Address would be 'maildepartment@veryfineCompany.com.'
Edit a Distribution List
-
To edit an existing distribution list, in the Events Notification screen, highlight the list under the Distribution List section and click
Edit.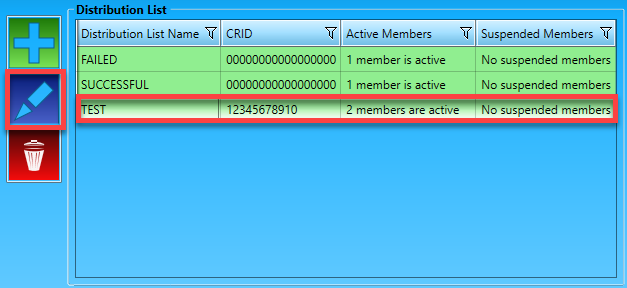
-
The list properties window will appear. Once the changes have been made, click Save.
You have the following options:
-
Change the name of the distribution list.
-
Add a new member by clicking
Add.
-
Edit an existing list member by highlighting the member in the list and clicking
Edit .
-
Delete an existing list member by highlighting the member in the list and clicking
Delete.
-
Suspend notifications for any member (see note below for more information).
If a member needs to be added, edited, or deleted from the distribution list, highlight the member and select the appropriate action.
Suspend Notifications:
Suppose a member is going on vacation or extended leave. You can suspend notifications until they get back. Highlight the member, click Edit and then select the Suspend notification checkbox. -
Delete a Distribution List
For ease of use, the PWC automatically creates two distribution lists. They are: FAILED, and SUCCESSFUL. These lists can be renamed to suit you (refer to Edit a Distribution List for more information). The PWC requires that at least one distribution list be present at all times, even if it does not contain any members. Therefore, if only one existing distribution list and a user attempts to delete it, the system will automatically re-create the FAILED and SUCCESSFUL lists. Even though the lists exist, no notifications will be sent as long as they are not selected for any of the Event or Warning notifications.
-
To delete a distribution list from the Events Notification screen highlight the distribution list and click
Delete .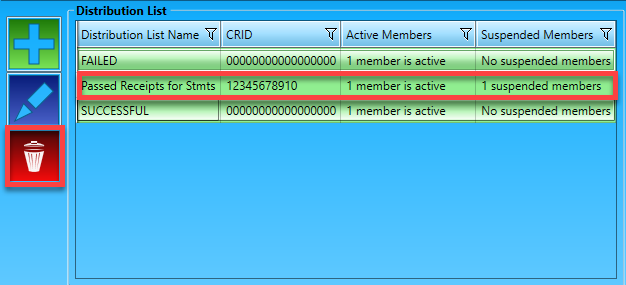
-
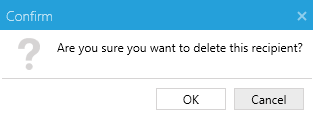
After clicking Delete, a Confirm dialog will display click OK.
Continue Data Transfer Screen Setup