Scheduler Setup to Transfer Data
To transfer the data to DAT-MAIL, the steps to set up the Scheduler IM Scan Manager plug-in are below.
-
Open Scheduler and
 Stop the Service.
 -
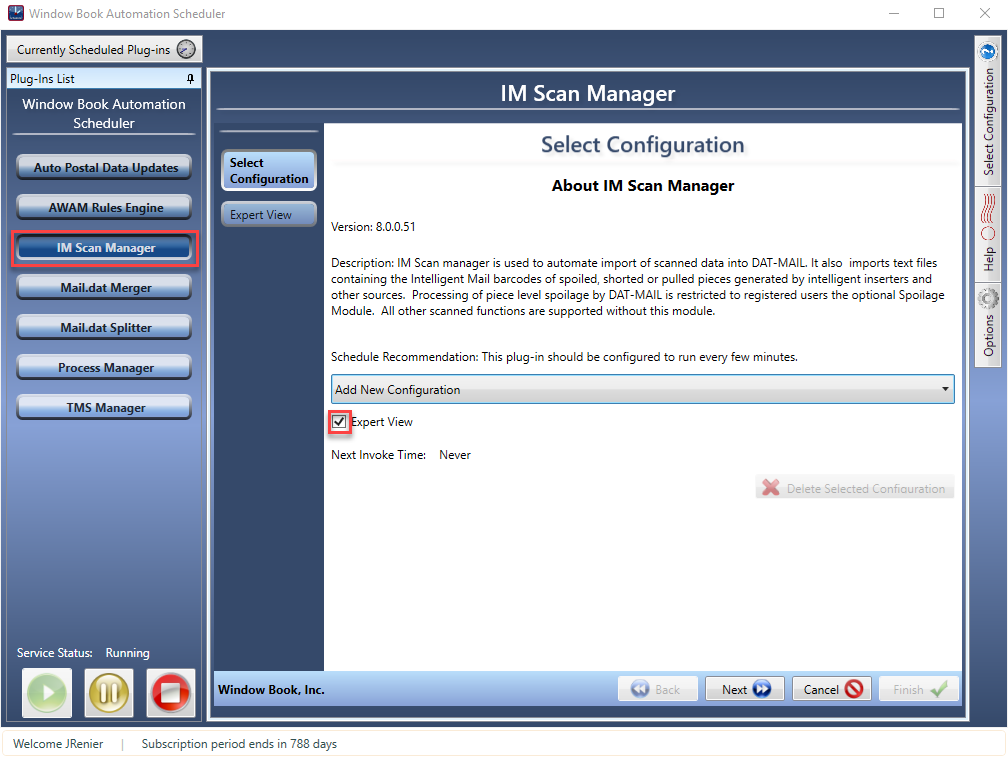
Select IM Scan Manager in the Plug-Ins List, then in the Select Configuration screen, select the Expert View checkbox.
-
The Expert View screen will display. Enter a
 Name specific to the configuration being created. Then specify when and how often the plug-in’s process will run. Click Next to continue.
Window Book does not recommend enabling the function to Run at start-up unless directed by a Window Book Support representative. However, if this option is enabled and the Scheduler is stopped and started for whatever reason, the plug-in will run every time the Scheduler starts regardless of the plug-in’s frequency settings.
Below the print screen is an explanation:
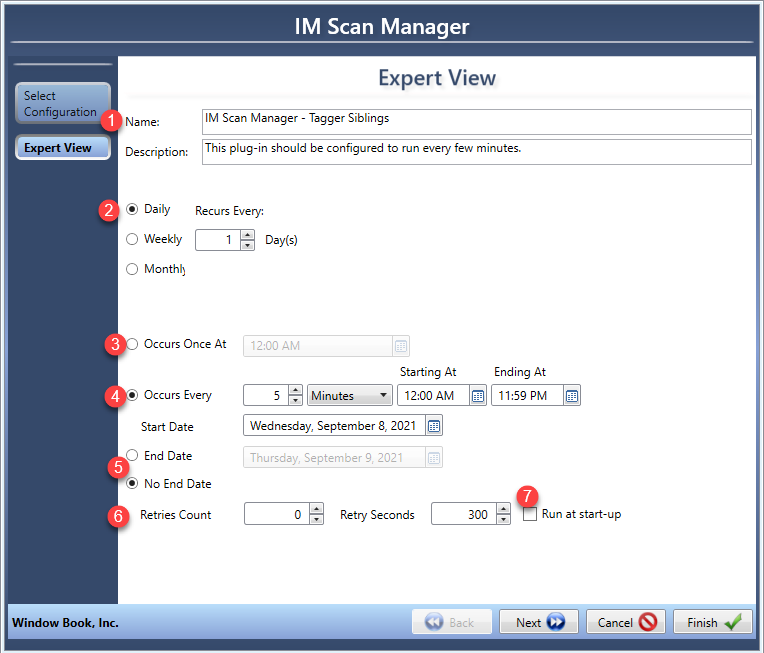
Recurs every: The default is Daily; leave this setting unless you prefer not to have the Scheduler running every day, then you could change it to Weekly and select the days of the week it should be looking for scan files.
 Occurs Once At: If you only want to look for scan files once a day at a set time, you would select the time here.
 Occurs Every: The default is 5 minutes and the Starting At 12:00 AM and Ending At 11:59 PM. You can adjust to suit your environment. For example, if you run a nightly backup, you change the Starting At and Ending At to ensure the Scheduler is not running.
 End Date and No End Date: The default is No End Date. If you are using this configuration for a specific project and after this time you do not want this configuration to run, you could set an End Date.
  Retries Count and Retry Seconds: If a user could open a job as someone sends spoiled pieces or deleted trays to IM Scan Manager, then the processing of the scan file may error because the job is locked. Also, a virus scan could lock the process.
 Run at Startup: Never select this option unless a Window Book Support Representative asks you to do so.
 -
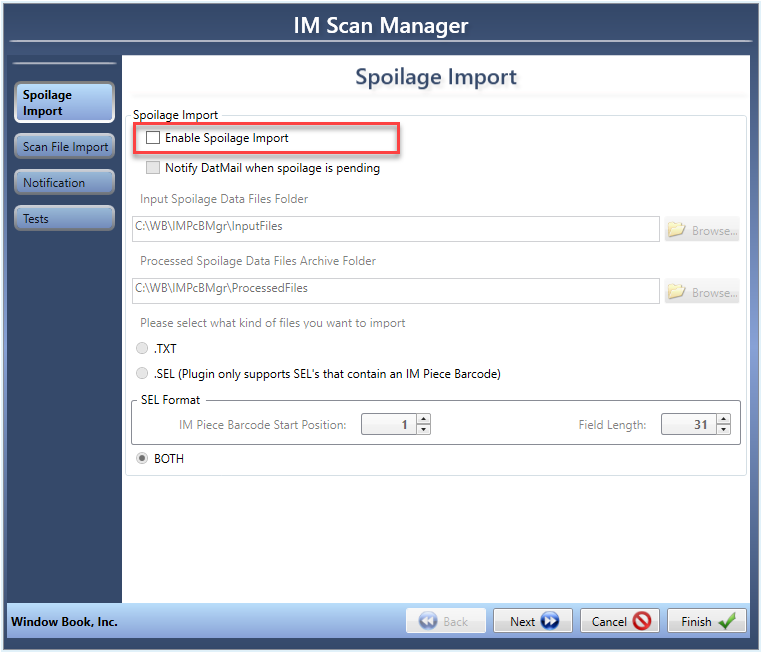
The Spoilage Import screen will display. This is for spoilage and should be disabled, deselect the Enable Spoilage Import checkbox. Click Next to continue.
-
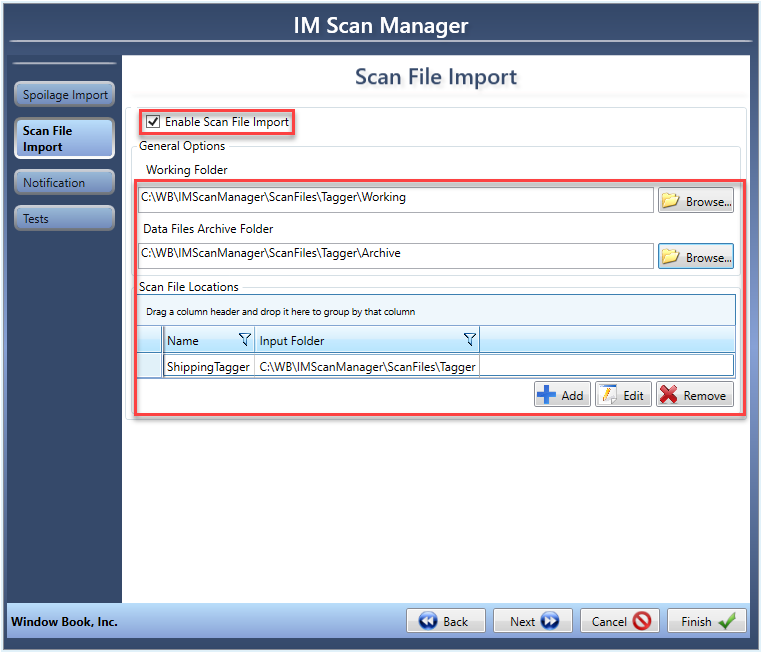
Click Next to move to the Scan File Import screen. Select the folder where the tagger files (enter in the Scan File Locations field) are saved; it should match what you put in DAT-MAIL in the Other Programs menu > IM Scanning > Tagger Interface Setup. As well as where to put the files during processing and completion. When finished, click Next.
-
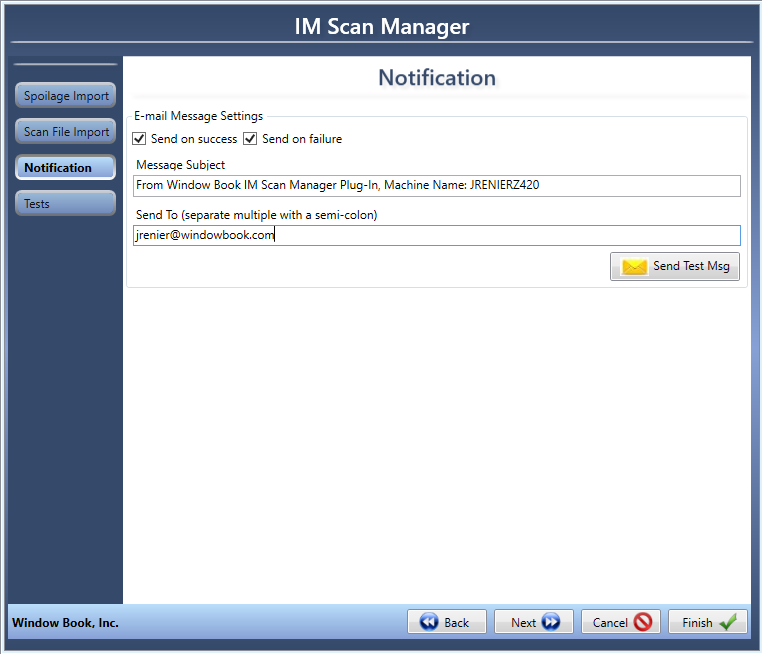
The Notification screen will display. Using this feature, automatic notifications will be sent to a series of people via email when the plug-in runs and the process completes without encountering errors (Send on success) or when the plug-in encounters an error(s) and the process does not complete (Send on failure). Once emails are entered, click Send Test Msg to confirm the email addresses are correct.
-
The Tests screen displays. Select the Run configuration tests the next time plug-in runs checkbox (optional). When the test occurs, the test results will display in the Previous Configuration Test Results window (an example is shown below). Click Finish.

-
The Finished screen will display.
If you do not have other plug-ins to set up, click
 Start the service and the Scheduler can be closed.
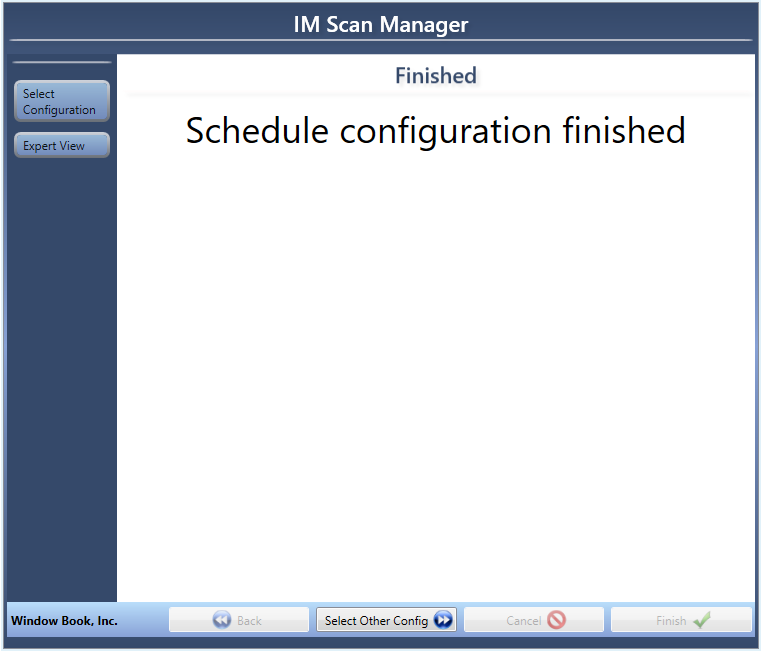
See also