Set Up a Network Share & Connect with the Tagger
The following set up instructions were performed on a PC/Server with a Windows 10 operating system (OS). Screen layouts and menu options may vary if the set up is being performed on a PC/server that has an OS other than Windows 10. Please refer to your local IT Administrator with any questions.
Create a User Account on the Local PC/Server
(For simplicity, an account called ‘user’ with a password of ‘pw1234!’ is created/used.)
-
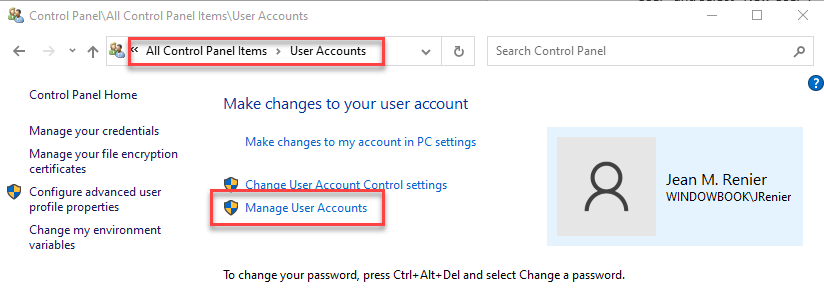
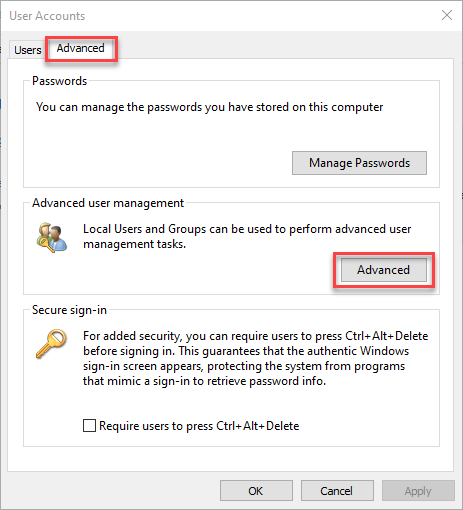
Open the Advanced User Management window on the local PC/server - Start > Control Panel > User Accounts > Manage User Accounts > Advanced > Advanced.
-
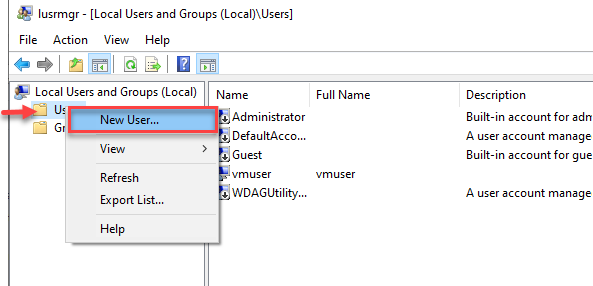
The Local Users and Groups window will display. To create the user account, right click on User and select New User.
-
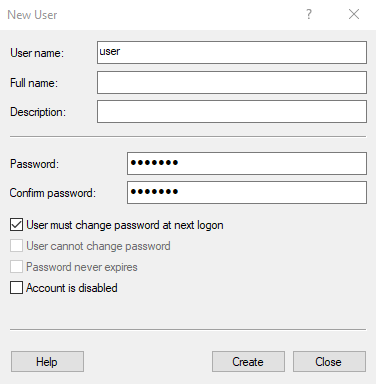
Enter the User info, for example: User name: = user.
-
Create the password for the account (example: Password1#).
-
-
Click Create and then Close.
Add ‘User’ to the Local Machine Administrator Group
-
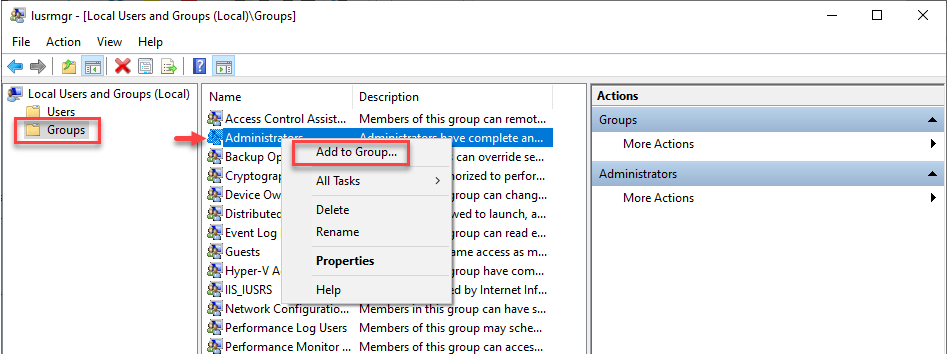
In the Local Users and Groups (Local) window, double click on Groups.
-
Locate the Administrators group and right click on it. Select Add To Group.
-
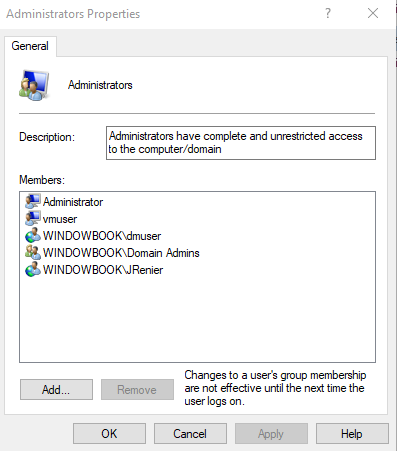
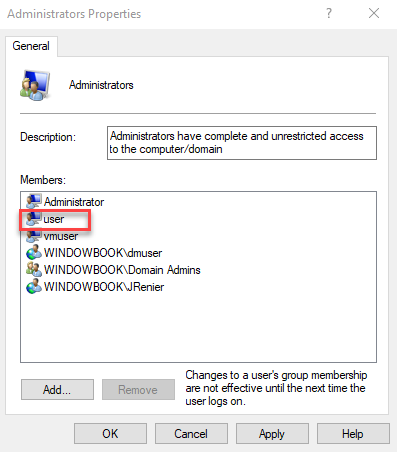
The Administrators Properties window will display. Click Add.
-
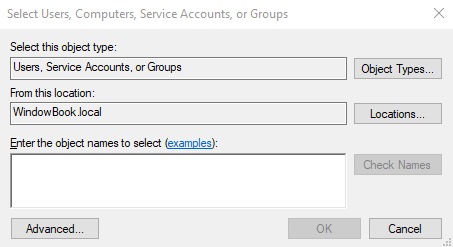
The Select Users, Computers, Service Accounts, or Groups window will display Click Locations.
-
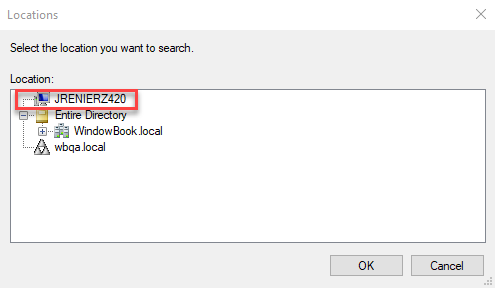
The Locations window will display. Locate the computer's name of the user account created in the list and single-click on it to highlight it. Click OK.
-
You will be returned to the Select Users, Computers, Service Accounts, or Groups window. Click Advanced.
-
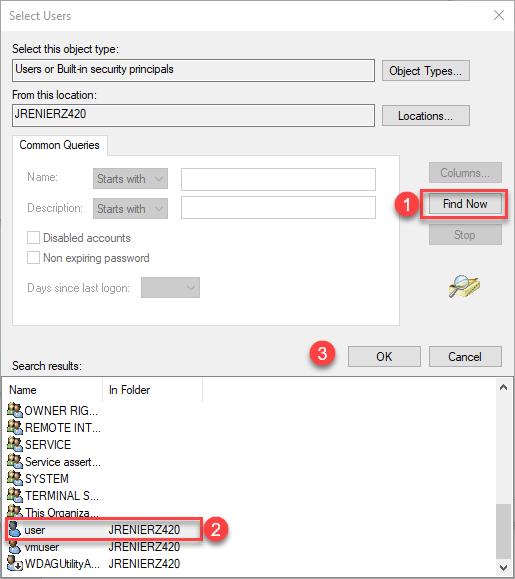
The Select Users window will display. Click Find Now.... The 'Search results:' portion of the screen will populate with existing users. Scroll down until you find the user account created above and highlight it. Click OK.
-
You will be returned to the Select Users window. Note the newly created user account is displayed. Click OK.
-
Click OK, when returned to the Administrators Properties window appears.
Create a Folder on the PC/Server and Share It to the New User Account
For illustration purposes, a new folder called 'Tagger' is created and used.
When creating your own folder, the name of the folder should be something that correlates to what you are doing.
-
On the local PC/server, click Start and select File Explorer > This PC.
-
In the This PC window, locate and select the drive that DAT-MAIL is installed on (in this example, that drive is ‘c:\’).
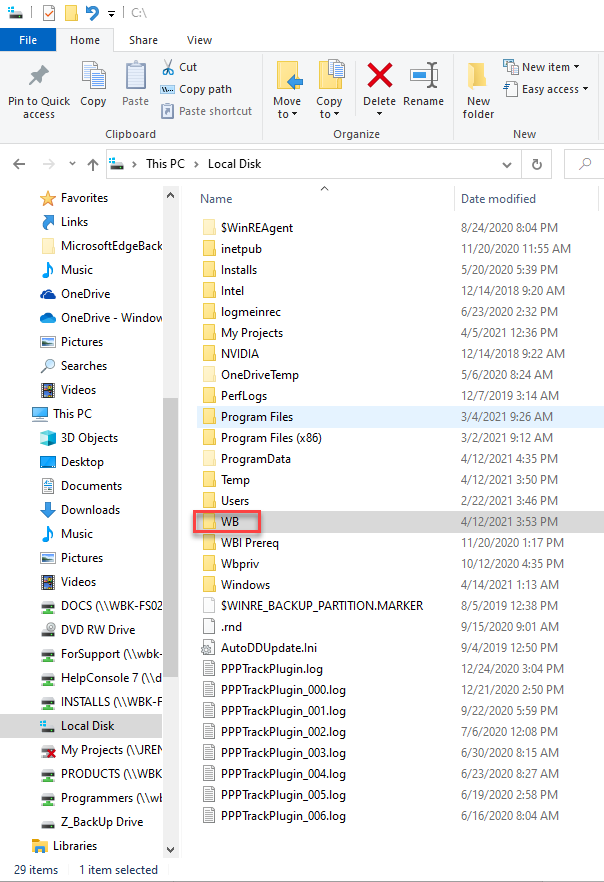
The DAT-MAIL installation will always be identified as a folder named ‘WB’.
-
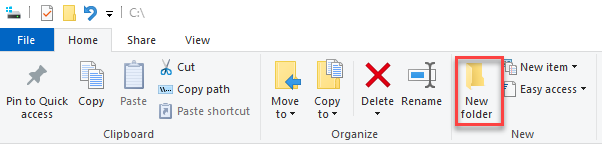
Click New Folder or right click anywhere in the white area of the window and selecting: New -> Folder. The new folder should be created in the root of the drive, not the ‘WB’ folder. For this example, name the new folder ‘Test’.
When creating your own folder, the name of the folder should not be test, but should be something that correlates to what you are doing, e.g. “Tagger1”.
-
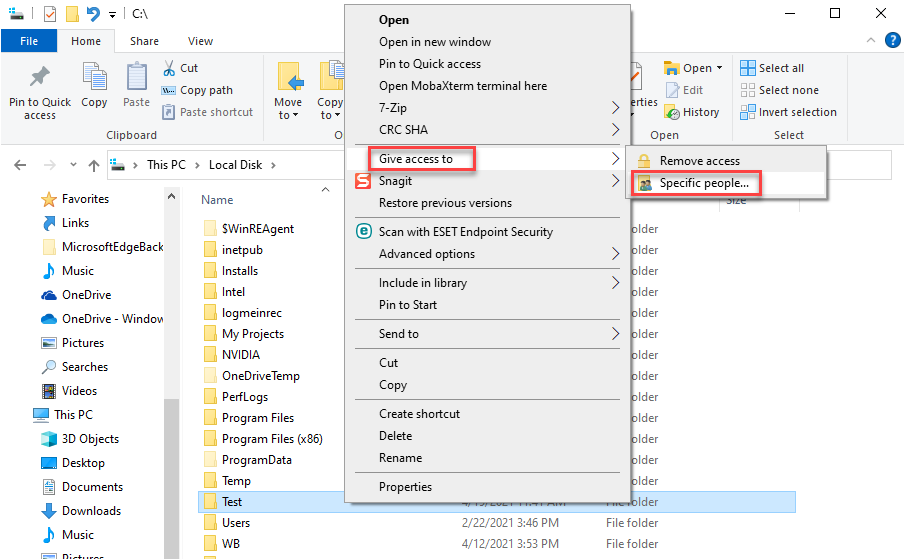
Right click on the new folder (Test) and select Give Access to > Specific people.
-
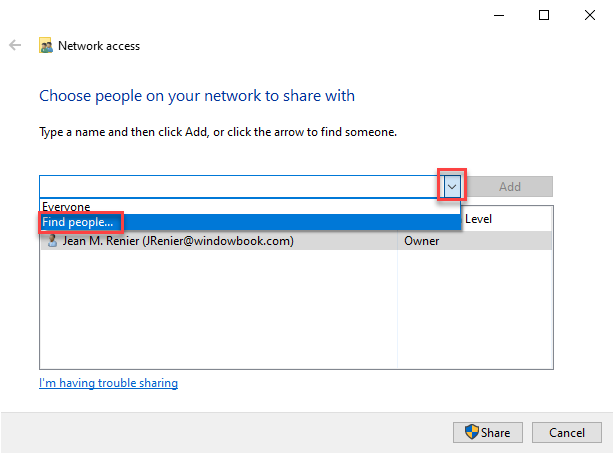
A Network access window will display. Click the drop-down arrow and select Find people.
-
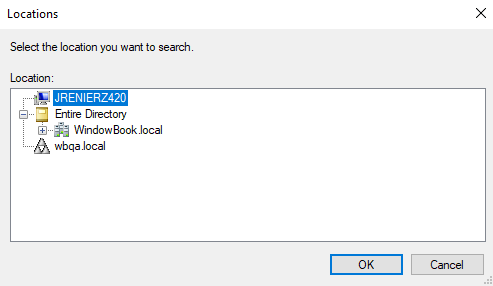
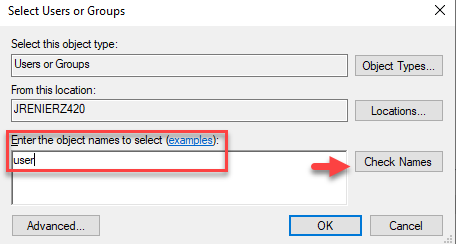
A Select Users or Groups window will display. Click Locations.

-
A Locations window will display. Select or highlight the local machine name and click OK.
-
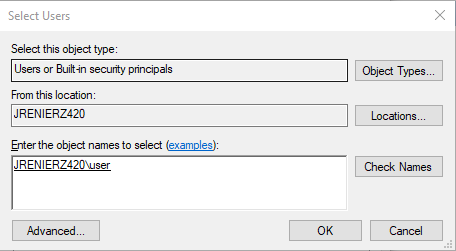
You will be returned to the Select Users or Groups window. Type in the user name ("user") and click Check Names.
-
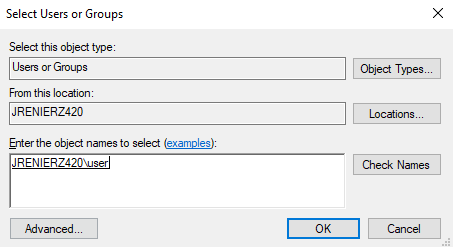
When the computer locates the user account on the local computer it will display it as: LocalComputerName\user or in this example: JRENIERZ420\user. Click OK.
-
You will be returned to the Network access window. The user account will be listed with a Permission Level of "Read". Click the drop-down next to Read and change the Permission Level to Read/Write.
-
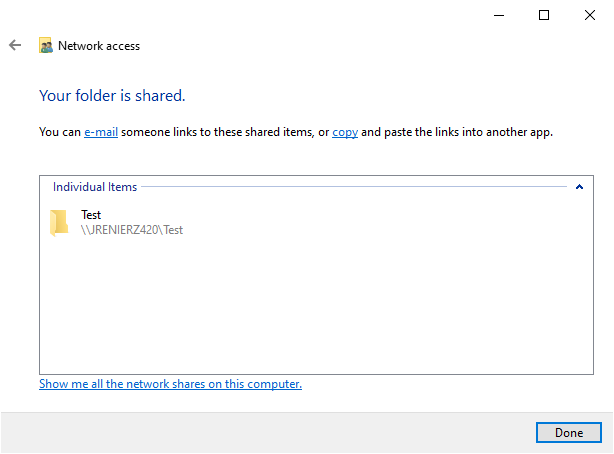
Click Share. You will be returned to the Network access window which will confirm that your folder (in this example Test) has been shared.
-
Click Done.
Set Up the Network Configuration on the Tagger
Network configuration of the Tagger is performed from the Tagger’s Main Menu screen:

-
To begin, select 6 for System Settings.
-
From the Tagger's System Setting screen, select 5 for Network Settings.
-
From the Tagger's Network Setting screen, select 5 for TCP/IP Settings.
-
Select 1 for Connect and select Wired option.
-
Select 2 for Source. Depending if your network has a DHCP server or not, pick the appropriate choice for either DHCP or STATIC IP (this example uses STATIC IP).
-
Select 3 to enter Tagger IP (our example will use a STATIC IP OF 192.168.1.10 for the Tagger). Make sure that the PC/server is configured to use the IP subnet addressing. This example assumes the PC/Server has a static IP of 192.168.1.20 and a subnet of 255.255.255.0.
-
Select 4 to enter the Subnet Mask (this example uses 255.255.255.0).
-
Select 7 to Apply the settings.
Consult with your IT Person/Network Expert to find out whether your network uses a DHCP server or not.
Configuring the Windows Folder Share Settings on the Tagger
To configure the Windows folder share settings, perform the following:
-
From the Tagger's Main Menu screen, select 6 for System Settings.
-
From the Tagger's System Settings screen, select 5 for Network Settings.
-
From the Tagger's Network Settings screen, select 2 for Windows Share Settings.
-
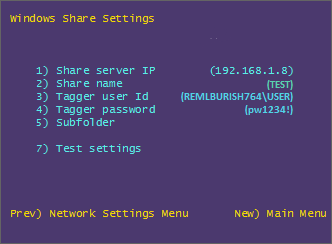
From the Tagger's Window Share Setting screen, select 1 to enter the Share Server IP (example: 192.168.1.8).
-
Select 2 to enter the shared folder name (example used above: Test).
-
Select 3 to enter the Tagger's user ID of "JRENIERZ420\user". This is the local "user" account created above for the local machine called "JRENIERZ420".
-
Select 4 to enter the Tagger's password (example: pw1234!).
-
Select 7 to test the settings. When there is no error present and the test reverts back to the Tagger's Windows Share Setting screen, all the network configuration and information is correct.
If you see the following error screen during testing either the network /share folder configuration has been entered incorrectly on both the PC/server and/or the Tagger or there is some network component or faulty hardware (network card, cabling, etc).

For a direct connection to the Tagger from a PC (not recommended) you will need to use a crossover cable, rather than a regular network cable.
Compared to standard Ethernet cables, the internal wiring of Ethernet crossover cables reverses the “transmit” and “receive” signals. The reversed color-coded wires can be seen through the RJ-45 connectors at each end of the cable: Standard cables have an identical sequence of colored wires on each end whereas crossover cables have the 1st and 3rd wires (counting from left to right) crossed, and the 2nd and 6th wires crossed. For simplicity on this page, an account called user with a password of pw1234! is used.
See also