Setup - PMOD Tab - Add Pitney Bowes (PB)
For PB, you will set up one account.
-
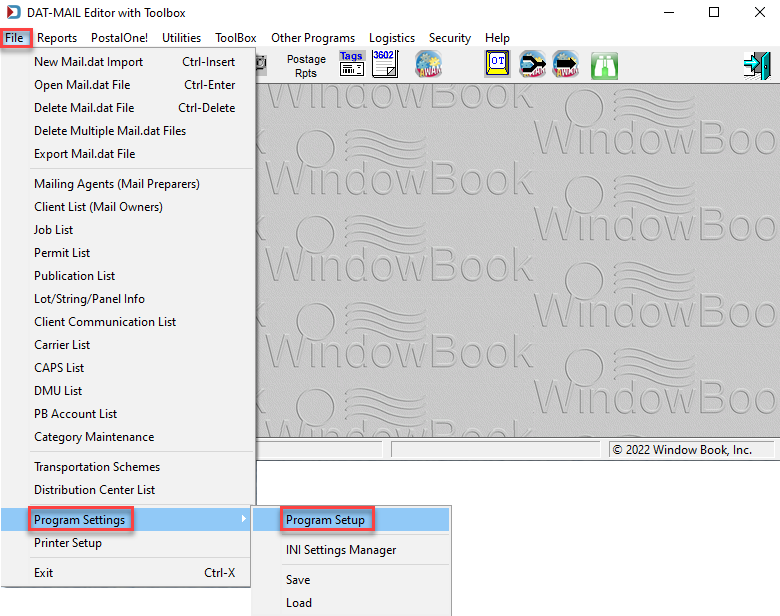
Go to File > Program Settings > Program Setup.
-
When the Setup screen appears, click on the PMOD tab and select Pitney Bowes as the Provider. And then click Browse to create a PB account.
In this example, we are setting up the Test Mode.
Top Portion of the Setup Screen - PMOD Tab Selected 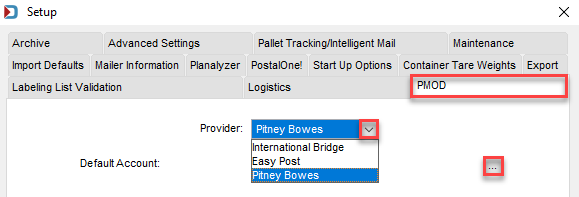
-
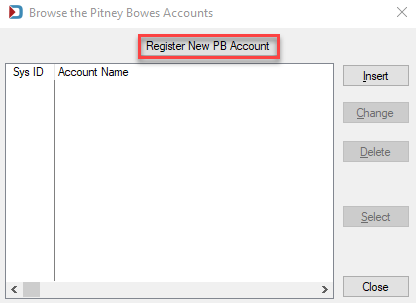
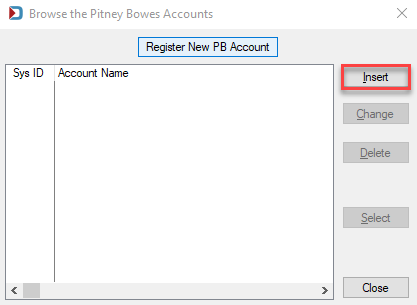
When the Browse the Pitney Bowes Accounts window appears, click Register New PB Account.
-
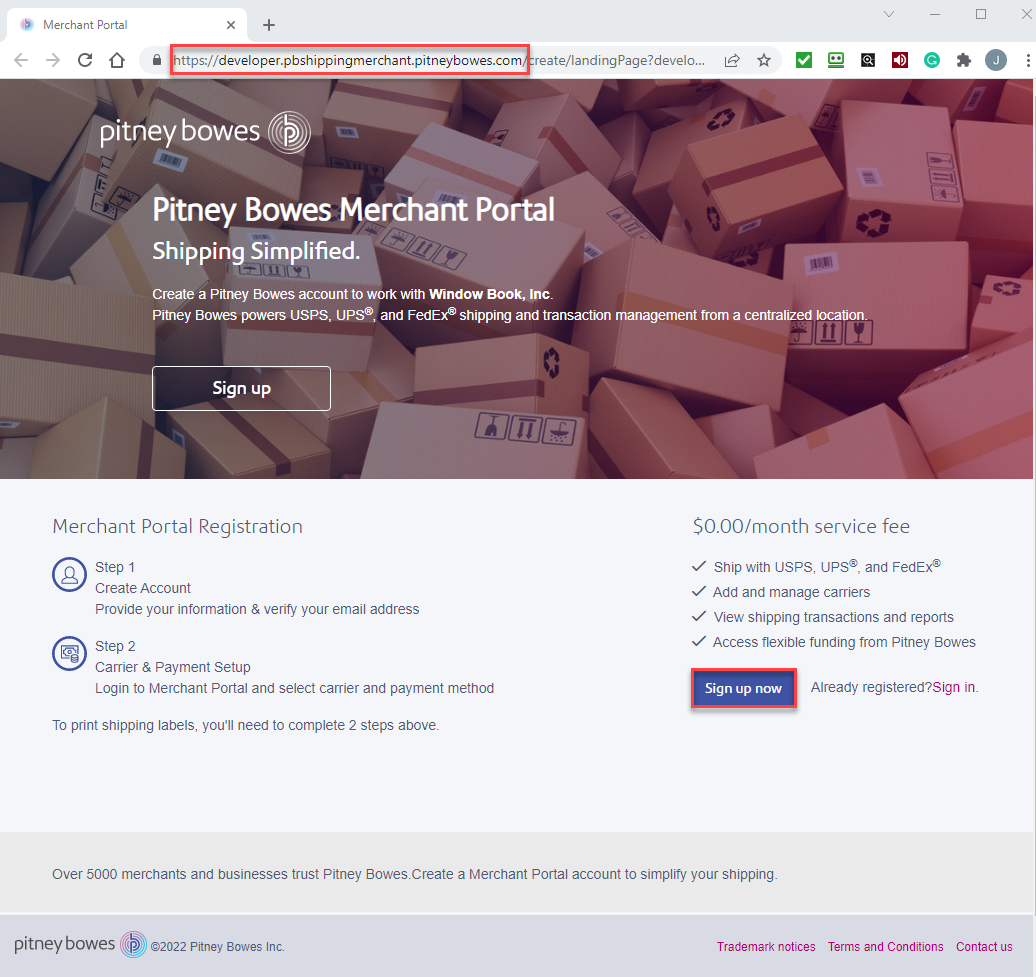
The Pitney Bowes Developer site will appear to register for a test account. Click Sign up now and complete their registration. When you get to the Let's setup your account page, see How to fund a Pitney TEST Account (below) for information on creating a payment method for testing.
-
After completing registration, click on your Email Address and select Account Information. Account Information is where you will find the Merchant ID you need to enter.

-
Click Insert in the Browse the Pitney Bowes Accounts window.
-
When the Record Will Be Added screen appears, enter your PB Test account information. After this information is entered, click OK.

-
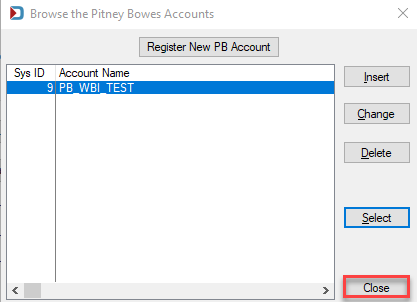
You are returned to the Browse The Pitney Bowes Accounts window. You can continue to Setup - PMOD Tab - Set Default Account (Optional) if you want to set this as your default account. Click Close if not adding a default account.
If you are not sure whether you want to set a default account, you can always do it later.
How to fund a Pitney TEST Account
-
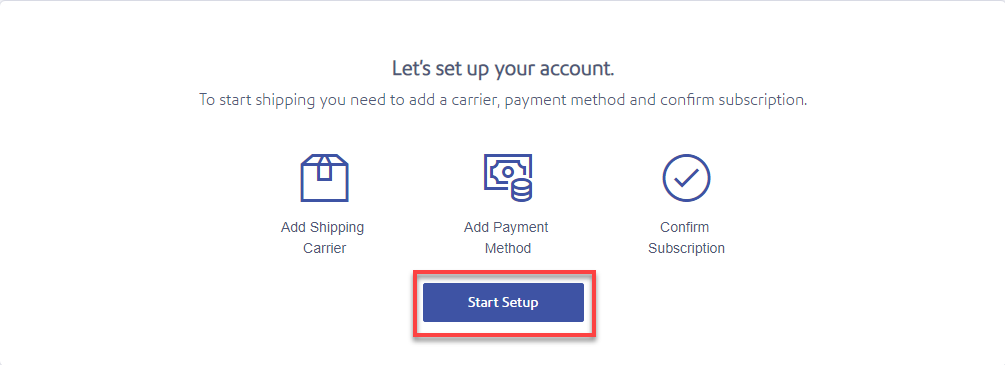
When the Let’s set up your account page appears, click Start Setup to continue.
-
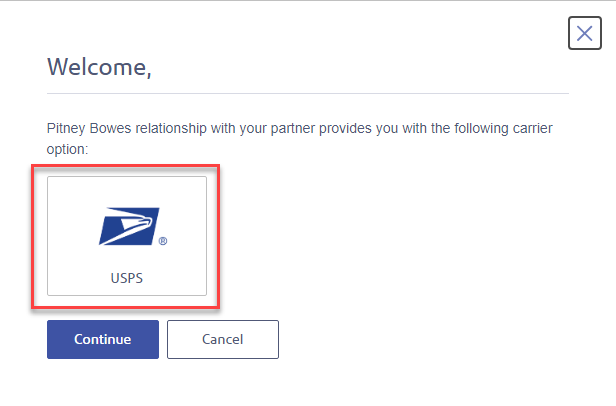
The Welcome window will appear, click on USPS and then click Continue.
-
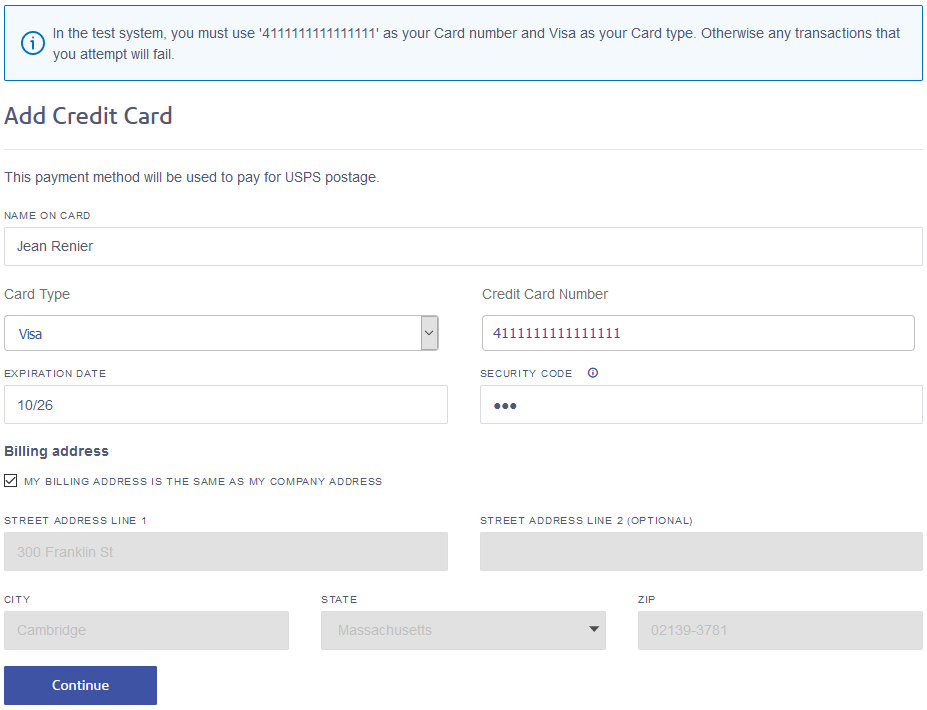
When setting up a Production account, you have multiple payment options. However, when setting up a Test account, this is the information you need to fund it:
Select Credit Card for the Payment Method.
Name on Card: Enter your name.
Card Type: Select 'VISA'.
Credit Card Number: Enter '4111111111111111'.
Expiration Date: We do not know if this matters, so enter a date a few years out.
Security Code: Enter '123'.
-
Click Continue.
-
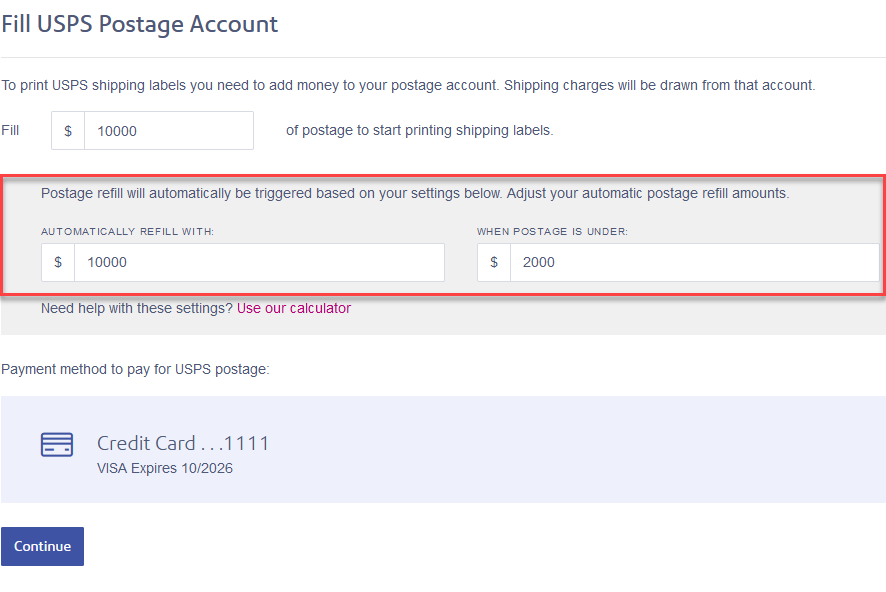
When the Fill USPS Postage Account page appears, put postage into your test account and set up auto-replenishment. When ready, click Continue.
-
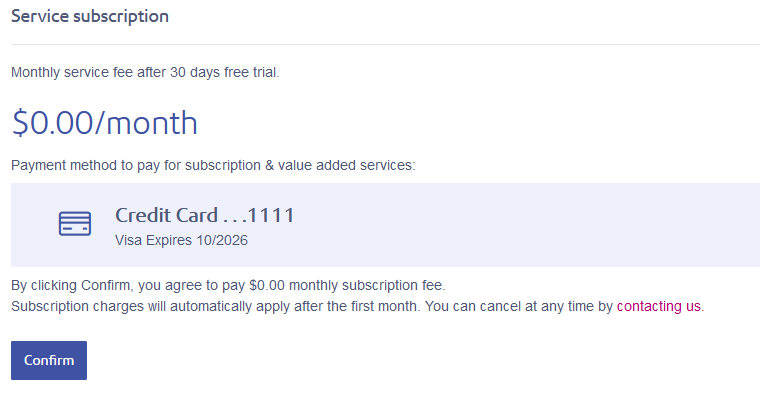
When the Service subscription page appears, click Confirm.