Setup - Import Defaults (continued)
In the initial Import Defaults page, we covered the settings most commonly used. This will still include those, but in less detail. We will start with the options in the left column and then cover the options in the right column.
To access the Setup screen, from DAT-MAIL main menu go to File > Program Settings > Program Setup, then click on the Import Defaults tab.

Default Single File Path: This button allows you to set options for a single file import. You will need to set this file path so DAT-MAIL will know where to look for your Mail.dat files that are ready for import. The path can be set and changed at any moment. Click the Default Single File Path and select the path where you will be keeping your Mail.dat files. After you select the path, it will be displayed next to the button.

Default Processed Path (optional): This path is set so DAT-MAIL will know where to move the original Mail.dat files, once they have been imported. A default single file path is required, the default processed path is not. Click the Default Processed Path and select the path where you will be moving your original Mail.dat files. After you select the path, it will be displayed next to the button.

Mail.dat files can be imported from any directory, this is simply an option to go directly to the most commonly used path.

Fast Network Option: If you are using DAT-MAIL on a network and your default import directory (where new Mail.dat files are placed) is also on a network, you should check this option. When it is checked, the Mail.dat files you have chosen to import are automatically copied to the temp directory of your local hard drive, then our indexed work file is created during the import process. When the import is done, the work file is copied back to the network and listed in DAT-MAIL's Mail.dat list so anyone on the network can access it. Performing the disk-intensive import process locally is faster and doesn't slow down your network. No temp files will be stored on your local computer.
Allow Changes to Data During Import: Selecting this checkbox allows DAT-MAIL to make corrections to Mail.dat files as they are imported, which allows you to correct some common errors and make the Mail.dat usable for production. If you are using DAT-MAIL specifically to test and troubleshoot Mail.dat files, deselecting this checkbox will give you a complete report of all errors found without making any automatic repairs. Unless you are specifically troubleshooting files, we recommend that this option remains turned on.
Set In-Home Date to Zero: Your single file imports will automatically be stripped of the In-Home date that was preset in the Container Summary file (CSM) so that you may set this date at a later time. We suggest using our Mail Schedule View to set your mailing, shipping and in-home dates.
Set Ship Date to Zero: Your single file imports will automatically be stripped of the Mail Date that was preset in the Container Summary file (CSM) so that you may set this date at a later time. We suggest using our Mail Schedule View to set your mailing, shipping and in-home dates.
Delete Mother Pallets: This option will strip Mother Pallets that were created from the presort so you may perform your own Palletization in DAT-MAIL. Once you select this option, you can choose to delete which Mother Pallet levels you would like removed.
Recalc Container Weights After Import: This is a handy option if you find that you are getting inaccurate tare weights from your presort which are skewing report information. There is an option at our Container Summary File View to run this process should you choose not to make this a default import option.
Run Quick Plan After Import (Editor Version): Allows you to assign entry points based on entry rules and minimums.
Run Freight Plan After Import (Toolbox Version): Allows you to use Planalyzer to assign entry points based on entry rules, minimums and freight cost. Also, allows you to evaluate whether to copalletize any of the mail and send origin containers Priority Mail Open & Distribute (PMOD).
Run PMOD Export: This option will automatically export container information from your imported Mail.dat that will be mailed via Open and Distribute.
Auto Export PostalOne! Original File After Import: When selected, the program automatically creates a PostalOne! release file immediately after the import is completed which you can then submit to PostalOne! as your Original file submission. You will need to specify the export directory at our PostalOne! tab.
Mark All Pallets for eInduction:
-
Only Dropship
-
All Pallets
Run Batch Reports After Import: This great automation feature gives you access to batch reporting right after Mail.dat import. Set up your Batch Report profile, then activate this feature.
-
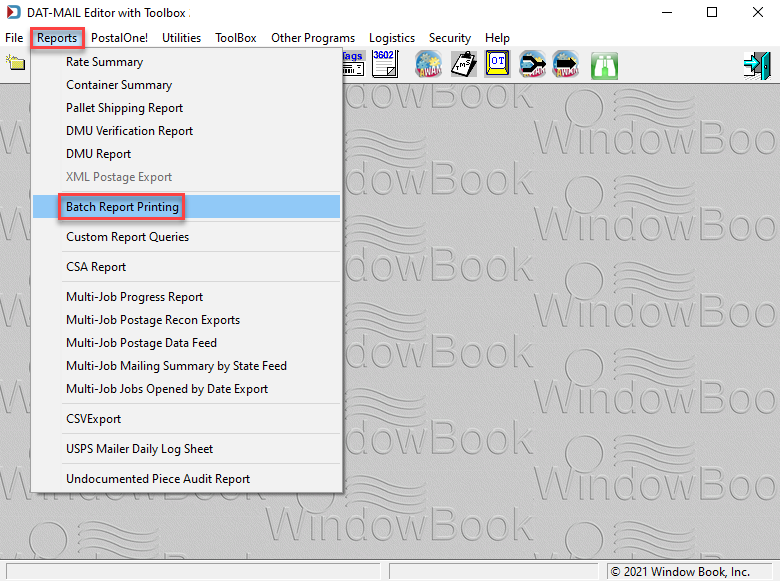
To setup a Batch Report Profile, go DAT-MAIL's Reports > Batch Report Printing.
-
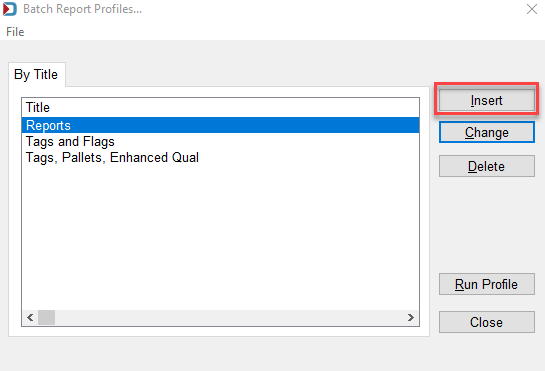
In the Batch Report Profiles screen, click Insert.
-
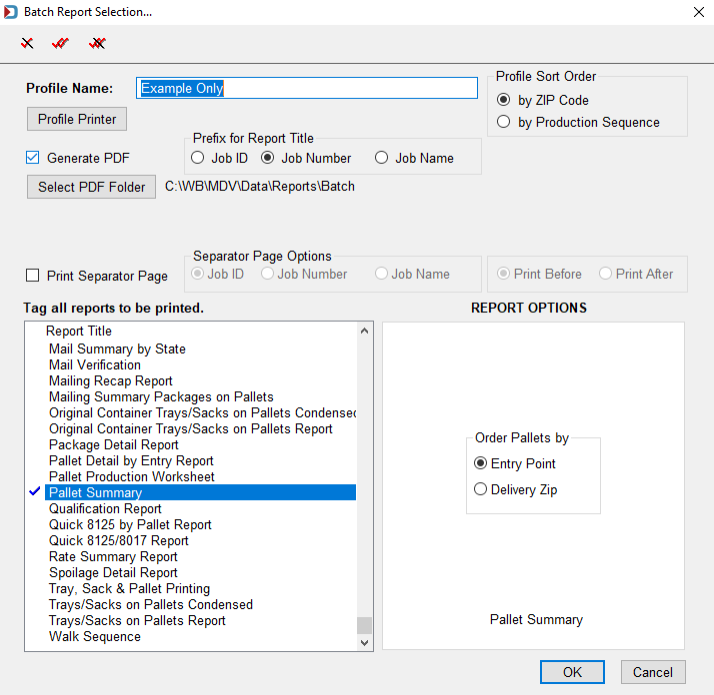
The Batch Report Selection screen will appear, there are several settings that can be utilized, which will be covered in more detail in the DAT-MAIL - User Guide, see . In short summary, you will enter a Profile Name, choose whether to print or generate PDF and as you select (by double clicking) various reports, you may see report options available in the REPORT OPTIONS pane (for example, whether to order the Pallet Summary report by entry point or delivery zip).
Mark all pallets for eInduction: When chosen, we will mark your pallets for eInduction entry, you can do this for all your pallets or only the drop ship pallets.
Create Sibling Records on Import: If we find container types marked as Logical, we will automatically create physical siblings for each of those Logical containers. You can specify which default sibling container type should be used in the Advanced Settings tab.
Mark CSM's Included in Other Docs: This option will update your Container records with a value of I (copal is done at the Originator's site) or O (copal is done at another site). Choose I or O in the PostalOne! tab.
QuickFix file path: This allows you to select the path where the quick fixed Mail.dats will be placed.
AWAM Server Name: When using AWAM, the service requires the server name be populated.
Now the options on the left:
Conformance Testing: Conformance Testing examines and analyzes your Mail.dat files in great depth to look for errors upon import - without a performance penalty. Also present is a new error log format that is much easier to read and print. Use this valuable data to pinpoint and ultimately correct errors in your Mail.dat files.
We offer conformance testing at four levels:
-
Referential Integrity testing only: No field level validation
-
Field Checking: Required fields, proper data types in populated fields and referential integrity testing
-
Mail.dat Conformance testing: Adds checks for valid values in populated fields according to the specifications outlined by DTAC.
-
PostalOne!® Level Testing: All of the above validation, plus checks PostalOne! required fields.
-
Special Circumstances: Not available at this time.
Mark Container Status: This setting defaults to No Change but you can alter it to Preliminary or Blank.
Do Not Import Piece Detail File: You can choose to not import the PDR file. This saves time during the import process and will not diminish the value of the data if you are not submitting the file to PostalOne!.
Park Piece Detail File: This option is to 'Park' this file. When the file is Parked, it will then be retrieved when you perform a PostalOne! release upload. This cannot be used, if you are tracking undocumented pieces or have to apply spoilage or shortage at the piece level.
Do Not Import Piece Barcode File: You can choose to not import the PBC for similar reasons as with PDR. You can reduce the time it takes for the import, but again this cannot be used, if submitting to PostalOne!.
Park Piece Barcode File: This option is to 'Park' this file. When the file is Parked, it is retrieved when you perform a PostalOne! release upload. This cannot be used, if you are tracking undocumented or have to apply spoilage or shortage at the piece level.
Do not Import OCI: When selected, the program will not import the Original Container Identification (OCI) Record, this file is used for copal.
Category: If you are using categories and would like to set a Job Category for Mail.dats being manually imported:
Click Browse  and when the Browse Categories screen appears, highlight the category and click Select. The Category field will change to the one selected
  .
.
For more information about Job Categories, see and DAT-MAIL - Job Categories Setup.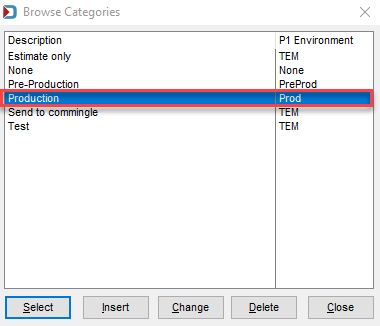
Disk Space Monitoring: When selected, the program will monitor the disk space and notify you if you have reached the set threshold.
Return to DAT-MAIL - Program Setup