Step 4 - Provision Your PWN Site in DAT-PreCheck (DPC)
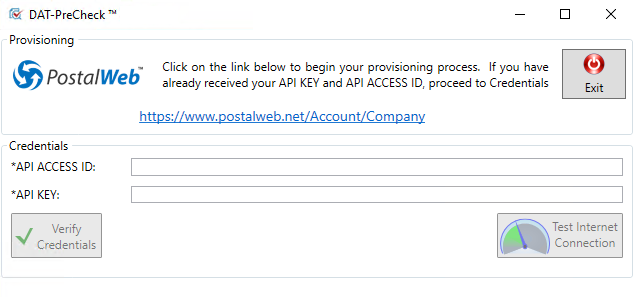
After the installation wizard for DPC completes, the utility will automatically launch after a few seconds. If provisioning is required, the PostalWeb Provisioning screen automatically displays.
If a Client is running PWC and has already provisioned their PWN site in PWC, the provisioning will automatically carry over to DPC, and no further action will be required. In this instance, the Auto Validation tab will display instead of the PostalWeb Provisioning screen shown below.
-
On the server where DPC is installed, open a web browser and navigate to your Company’s PWN site (if the site is not already logged into).
-
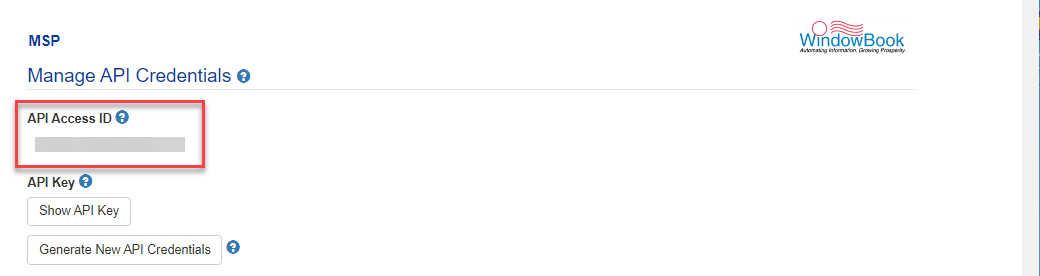
After logging in successfully, in the MSP menu, select API Credentials.

-
The Manage API Credentials page will display. Highlight and copy the API Access ID.
-
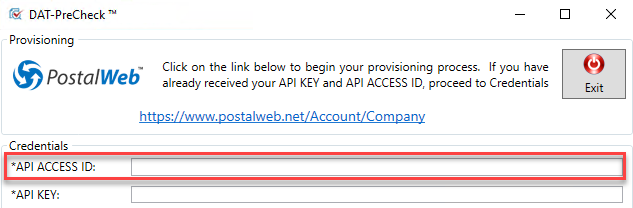
Paste the copied API Access ID into the API ACCESS ID field in the Provisioning screen.
-
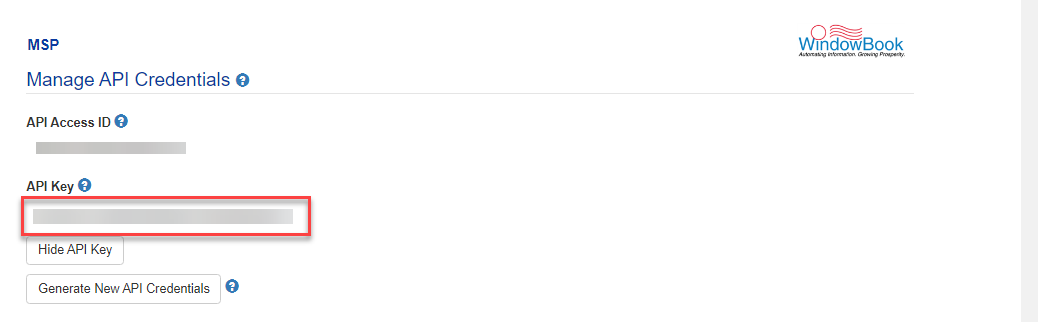
Back to your PWN site, click Show API Key, and copy the API Key.
Do not click Generate New API Credentials
-
Paste the copied API Key into the API KEY field in the DPC Provisioning screen.

-
Tab out of the field to enable Verify Credentials. Click Verify Credentials.
-
After the credentials are verified, the screen will update, displaying your Company information and fields for entering a set of valid PostalOne! Credentials (specifically User Name and Password). Fill in the required fields. When data has been entered, click Save.
-
With the PostalOne! Credentials saved, the screen will update to display a message "Location has been provisioned and activated successfully." You have now completed what needs to be set up in PWC for PWN.
Instructions for setting up or configuring the PDF and XML statement delivery functions in PWC, along with instructions for using the Statement Transfer Simulator, are located on the EDocs > Services - Subscribing to Automated Statement Delivery Services page.
Continue Site and User Management