EDocs > Services - Subscribing to Automated Statement Delivery Services
PWN offers services to send PostalOne automatically!-generated statements and documents in PDF and XML file formats via email and a secure and automated file transfer service to a folder on your location's stand-alone or server.
Services must first be subscribed to before they can be enabled for individual users of the MO’s PWN site. Please contact your Client Services or a Support representative to enable services. See Contact Us.
-
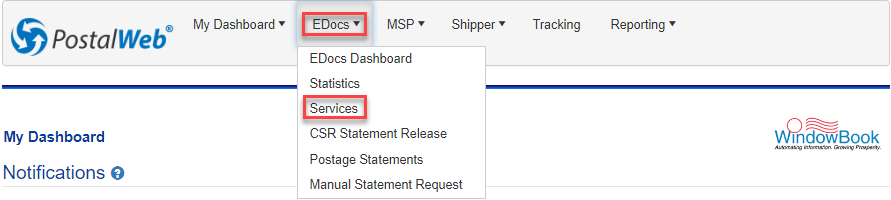
To see whether your Services have been enabled, select Services from the EDocs menu.
-
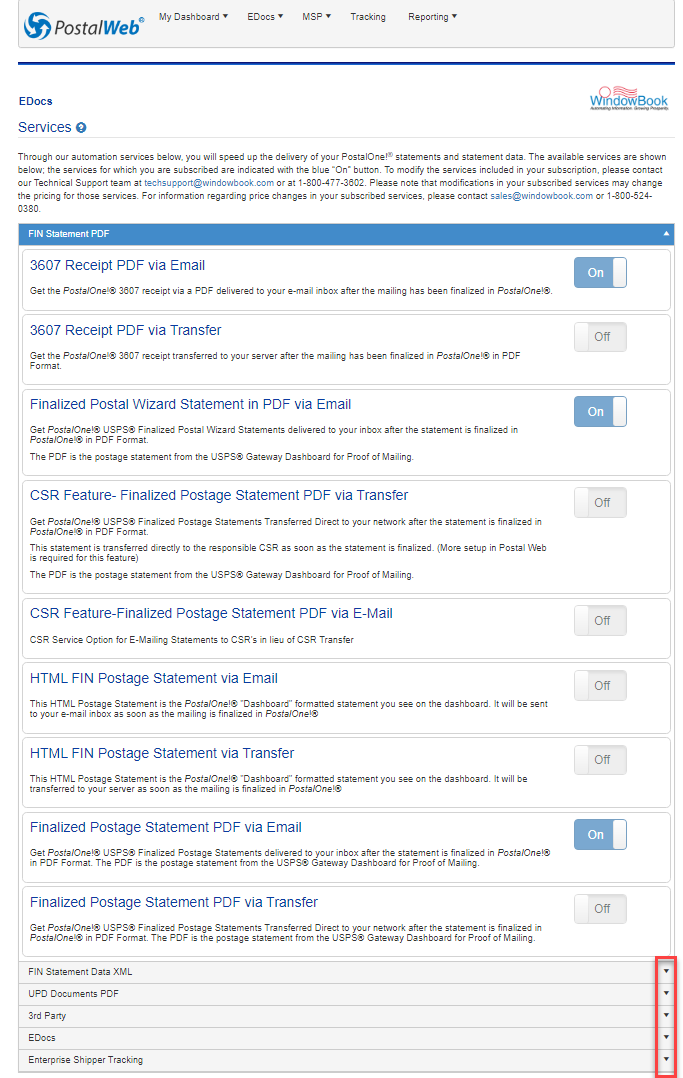
The Services screen will display. A list of available service categories will display (specifically, FIN Statement PDF, FIN Statement Data XML, UPD Documents PDF, 3rd Party, EDocs, and Enterprise Shipper Tracking, if applicable). Clicking on a category’s title bar will display the list of available, corresponding services for that category. The default category is displayed when the page is accessed FIN Statement PDF. Each service that makes up this category contains a corresponding On/Off toggle. If Off is displayed on the toggle, that service is currently not subscribed.
Folder Creation for File Transfer Services
If any PDF or XML file transfer services have been subscribed to on your Company's PWN site, configuration of where and how those files are delivered or transferred to a stand-alone or server using PWC is required.
The configuration for the transfer of PDF files is performed separately from the transfer of XML files; however, the configuration procedure is the same for each. Instructions on how to configure the transfer of PDF files is provided in this document. For companies who are subscribed to XML file transfer services, the process for PDF file transfers should be followed.
Your Company’s PWN site must be provisioned in PWC before performing the configuration to transfer PDF or XML files (refer to Step 4 - Provision Your PWN Site in PWC).
The user performing this function must be assigned an ‘Administrator’ role in their PWN site.
To configure the settings for the transfer of PDF files, perform the following:
-
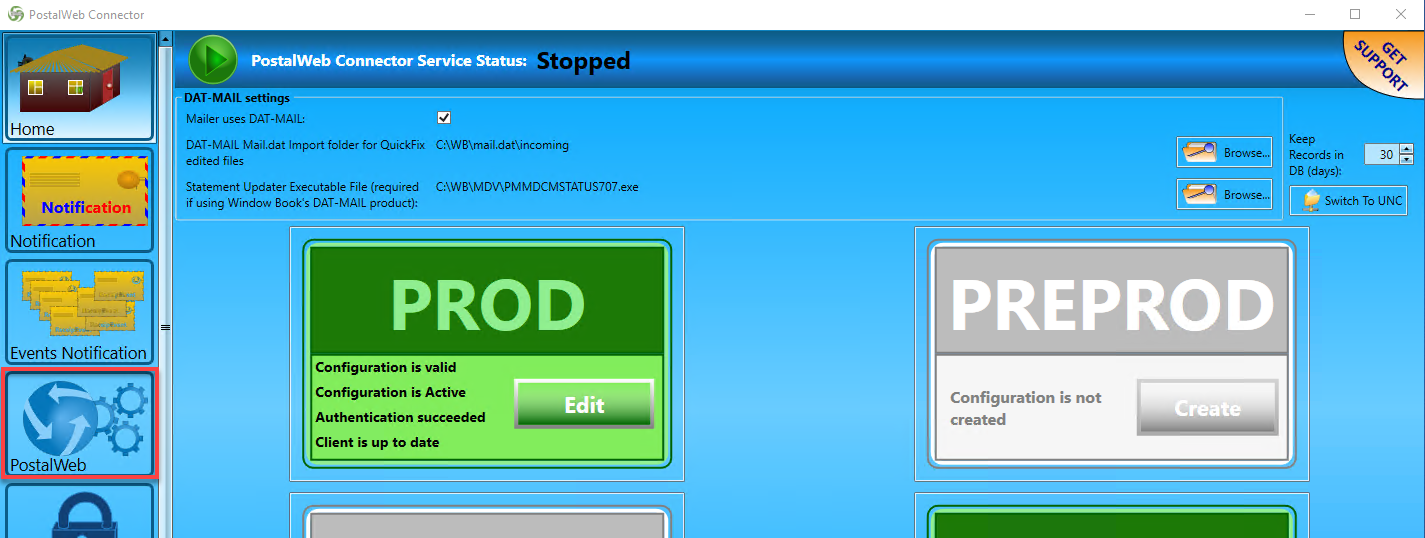
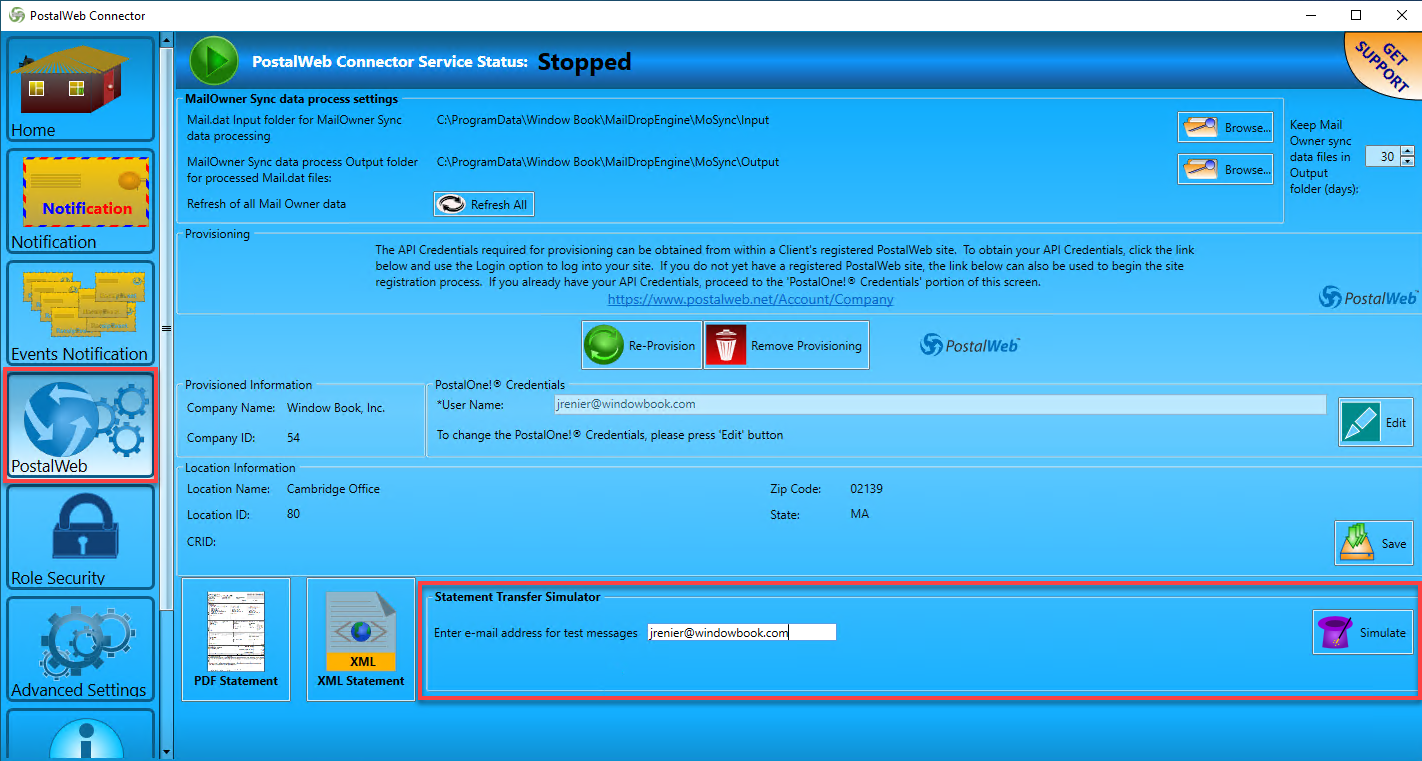
In PWC, click PostalWeb.
-
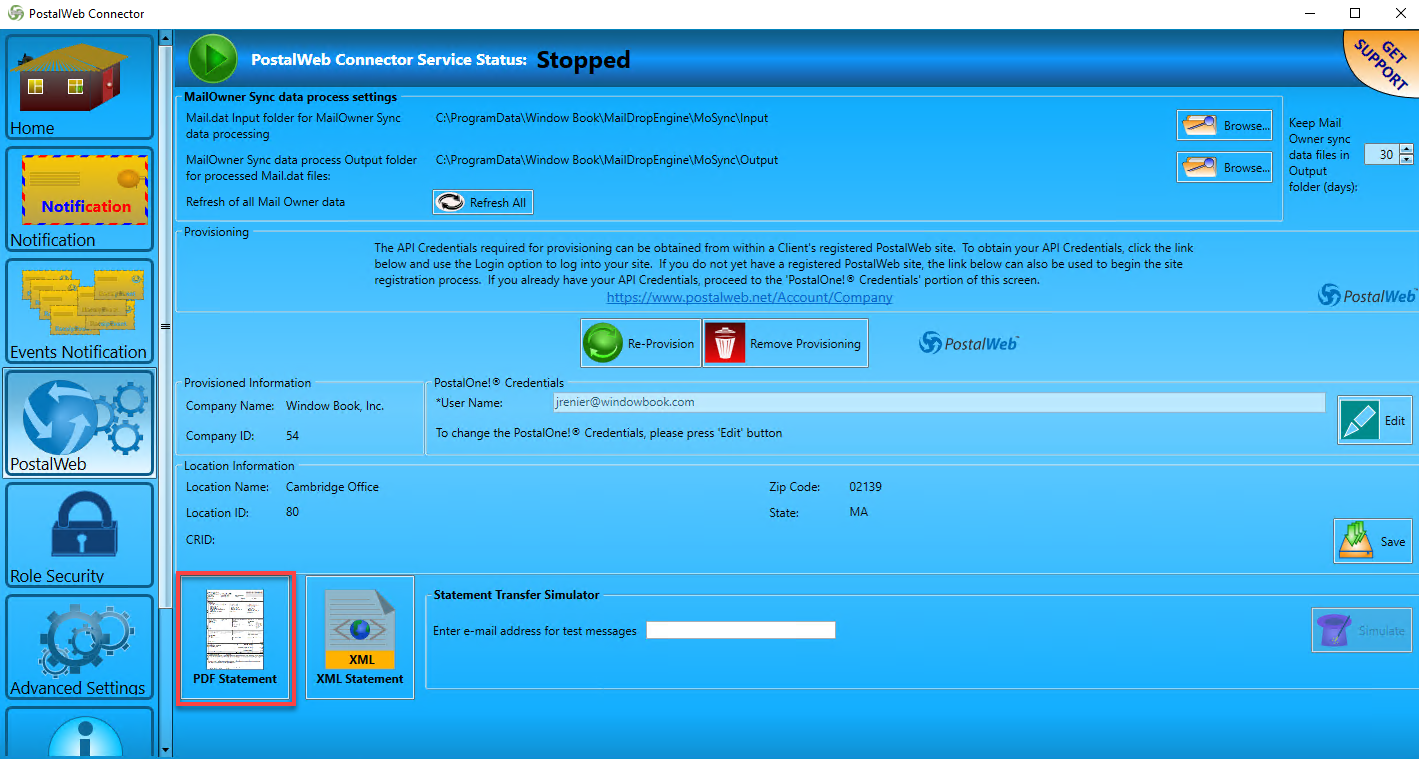
When the PostalWeb screen displays, click PDF Statement.
Or, if you intend to receive XML files, click XML Statement.
-
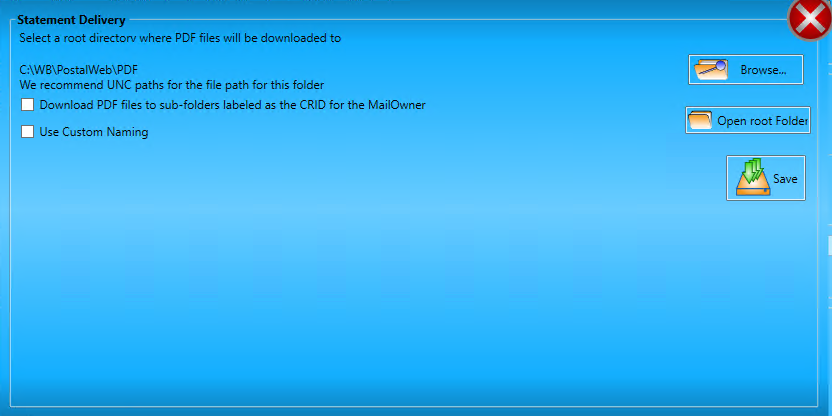
A Statement Delivery window will display. Click Browse.
-
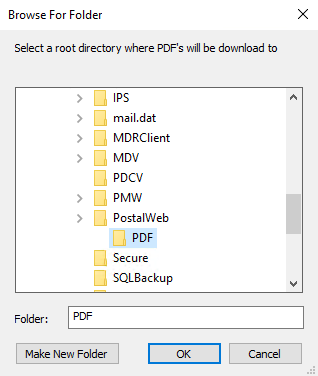
Browse For Folder screen will display. Point to or create a folder where the PDF files will be delivered. Select the folder and click OK to close the screen.
(In the example used here, a folder called 'PostalWeb' and then a subfolder 'PDF' are created in the 'WB' directory: 'C:\WB\PostalWeb\PDF').
We assume your statements will be available to multiple people, so use a UNC Path. Mapped drives cannot be used since PWC runs as a Service. In the example above, 'C:\WB\PostalWeb\PDF' would be changed to \\JRW10X64SVR1\WB\PostalWeb\PDF'. 'JRW10X64SVR1' is the server where the files are saved. See the Support Portal Knowledge Base for assistance with UNC Paths - https://windowbook.na2.teamsupport.com/knowledgeBase (login is required).
-
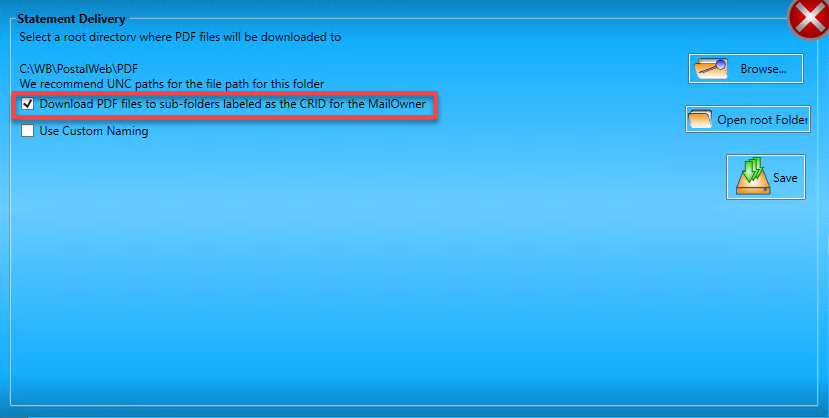
The updated Statement Delivery screen will display. If you wish to file the transferred PDF statement files into sub-folders of the main folder named/created above, select the Download PDF files to sub-folders labeled as the CRID for the MailOwner checkbox. Sub-folders will be created and named using the MO's CRID found in the transferred file.
If a Subfolder template is not created, in Steps 6 and 7, sub-folders will be created and named using the Mail Owner CRID found in the transferred PDF file. If this is okay, you can move on to testing the setup - see Using the Statement Transfer Simulator.
-
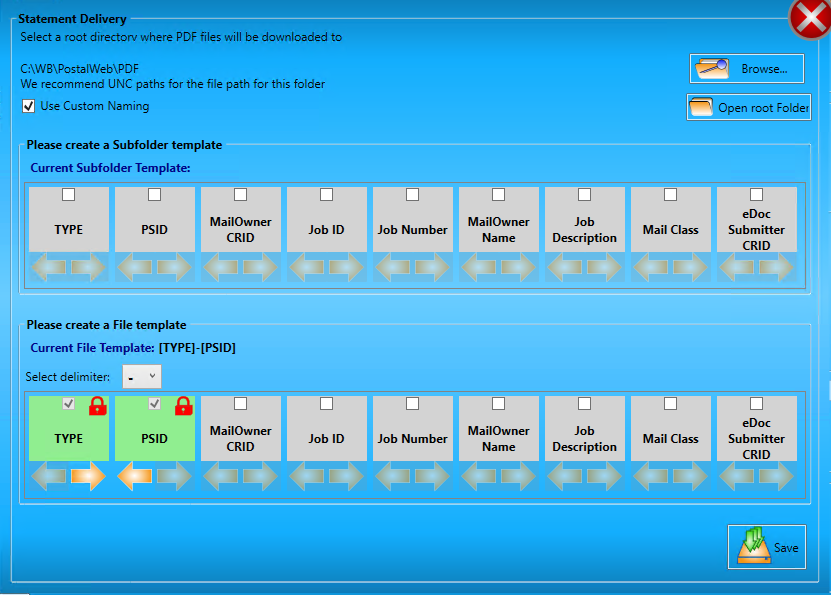
In addition, the following option, Use Custom Naming, is a great way to make PDF files even easier to find and identify. When you select the Use Custom Naming checkbox, the Statement Delivery screen expands to provide the options for creating subfolders and naming PDF files.
-
When you select an option, you will see arrows appear. The arrows allow you to change the order in which information will appear. When checked, selected fields are then moved to the beginning of the string; in the order they are chosen. This will be the hierarchy of how subfolders are created, and file names are named.
Once you have chosen and arranged the subfolder naming and file naming, click Save.
Quickly in red, it will flash that 'Changes were saved successfully,' and then you can close the Statement Delivery screen.
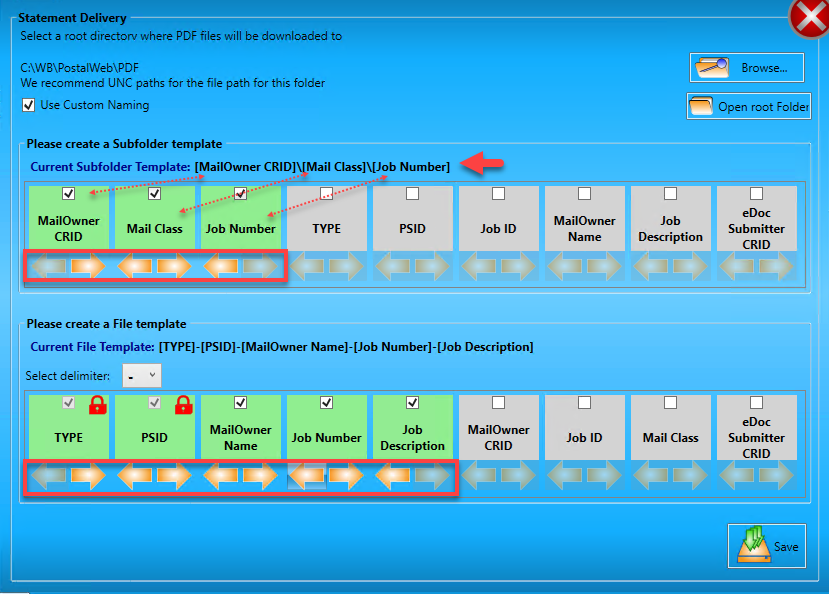
There will be a new subfolder for every MO CRID, Mail Class, and Job Number in the example above. The file name will start with the statement TYPE, the USPS PSID (postage statement number), Mail Owner Name, Job Number, and Job Description. You will see the subfolder paths and file naming convention change as you select options.
For the file name, there will always be TYPE and PSID. You cannot remove these. So we show those with
 Lock icon.
Using the Statement Transfer Simulator
Once the delivery of PDF files and XML files has been configured in PWC, this feature allows you to confirm the template configuration and make any necessary corrections before actual statements or documents are delivered.
Statement Transfer Simulator Use has the Following Requirements:
The Support team must subscribe your Company to a PDF and transfer delivery service.
Although not shown in the following screen images, there are other service subscriptions available that are also included as part of the "statement" transfer functionality found in the PWC (for example, USPS Processing Due Documents (UPD)). Additionally, any PostalWeb Service denoted as "via Transfer" applies.
-
The email address entered in the Simulator must be for a user already authorized to receive the transfer files in their PWN’s MSP > Manage Users screen (accessible by a user with Administrator privileges only).
-
The PROD MDR Client must be configured and active in the PWC.
-
Your PWN site must be provisioned within PWC.
-
The PWC service should be stopped before running the Simulator.
Steps to Simulate
The Statement Transfer Simulator is located on the PWC PostalWeb screen.
-
Enter a qualified user's (refer to the bulleted list above) email address to simulate a statement transfer. When the email address is entered, Simulate will become active (shown above). Click Simulate.
An email notification(s) will be sent to the email address provided, simulating what a message will contain information, where the transferred files will be saved, and how they will be named. In addition, a notification/simulation will be sent representing each service your Company is subscribed to in PWN, either a PDF or XML file (or both). Below is an example of two emails received for this test job, first when the UPD Statement has been generated and the Confirmation page and Register of Postage Statement. And a second test email is received indicating the statement has been finalized.
UPD email 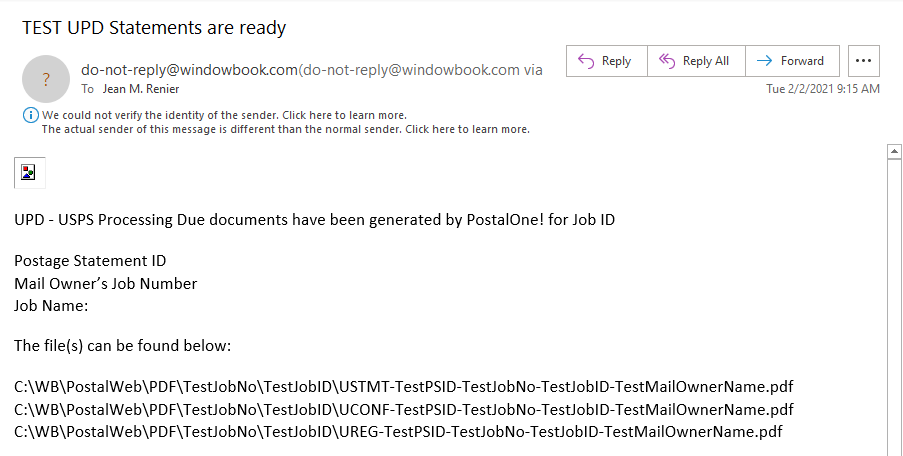
FIN email 
-
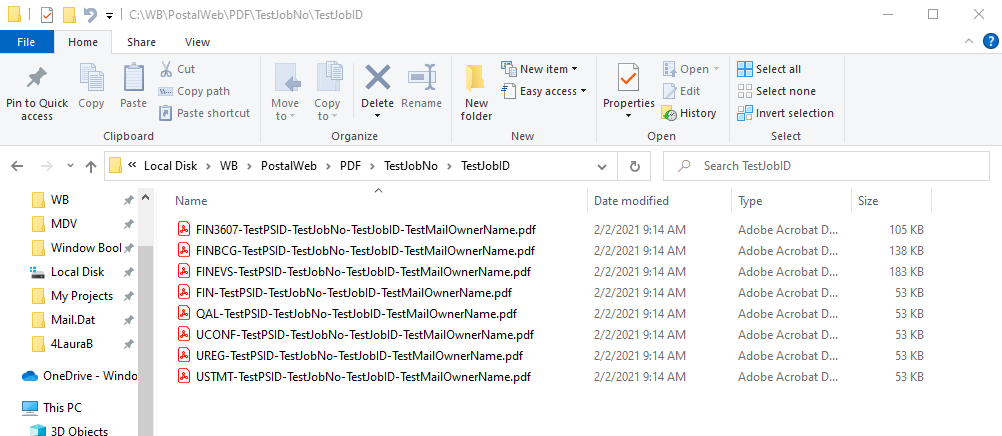
Also, you can confirm the existence of the created folders/subfolders on the server using File Explorer to navigate to the location where the folders have been created. The test or dummy folders created using the Statement Transfer Simulator contain “Test” in their name.
-
Once you are satisfied with the folder/subfolder and file name templates being used, delete the “Test” folders. New, non-“Test” folders will automatically be created when actual files are delivered in production.
Return to Site and User Management