Qualification View - Change and Query Options
This page will cover using the Change option in both panes and the Query tool.
Change Options
Top Pane
Highlighting a tray or sack in the top pane brings up the Changing Container Summary Information window. Here you can change entry points and several other container fields. For example, it is okay to make changes such as label information.
We do not recommend using this feature unless the tray or sack is not linked to a pallet. Changing an entry point on the tray or sack removes it from the pallet. Also, when you change container dates, it should be at the pallet level, which will then copy to the trays or sacks linked to the pallet. Since that is the case, all the date fields are grayed out, so you cannot change dates here unless the tray or sack is not linked to a pallet.
Bottom Pane
When you highlight a tray or sack in the top pane, it breaks out the zips (Container Quantity records (CQT) on the tray or sack in the bottom pane. You can highlight a CQT for a tray or sack and click Change.
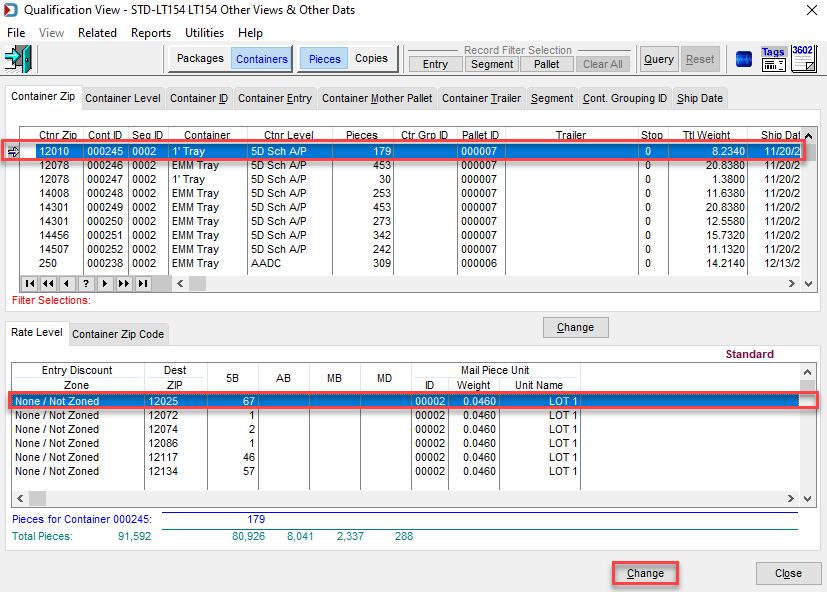
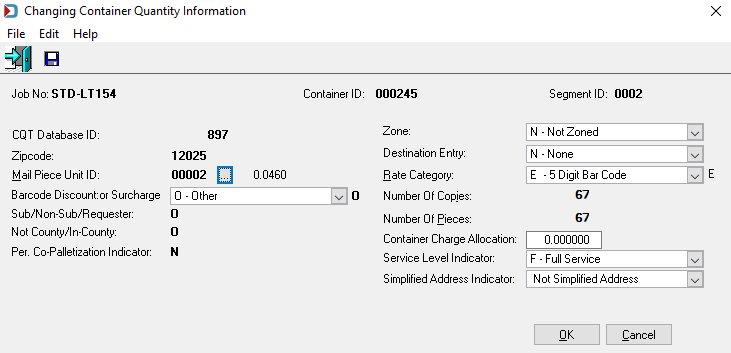
The Changing Container Quantity Information screen will open, and you can make your updates and click OK.
Query Tool
-
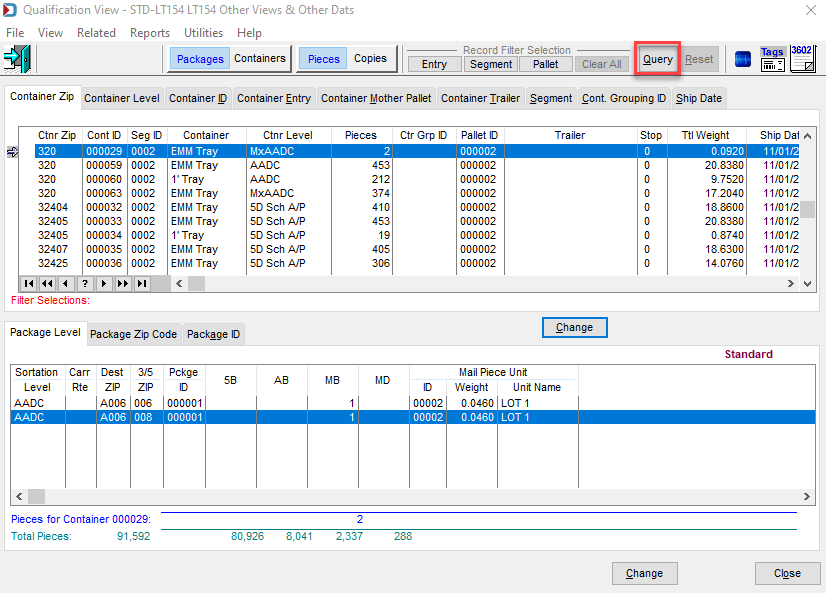
Click Query.
-
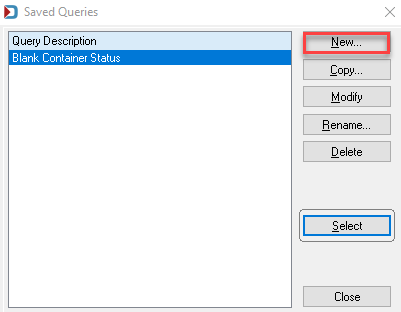
After you click Query, the Save Queries window will appear. Next, click New to create a query.
-
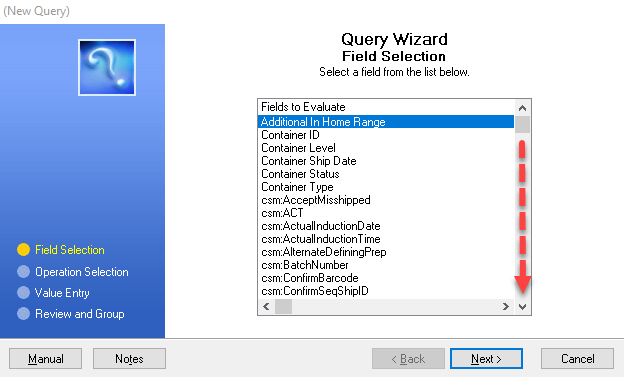
When the New Query window is open, you can select a field from the list or click Manual to add the field. Here the focus will be on selecting a field from the available list.
-
Choose the field and click Next. For this example, we will choose the csm:HasSiblings field.

-
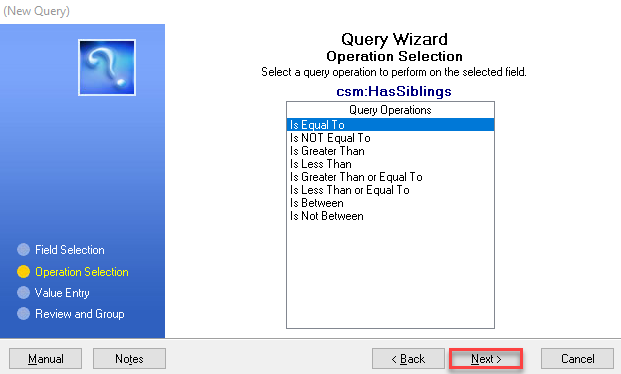
In the Operation Selection window of the wizard, select the query operation and click Next. This example will use Is Equal To.
-
Either you can enter a Constant Value and click Next or add another field or create an Expression. In this example, assume the person running the query has no idea how many sibling containers were created for each tray or pallet, so let us use the Expression option. To open a window to assist you in creating the expression, click Browse to open the Expression Builder.
mpr stands for mother pallet records.

-
 Create the expression and then click
  Validate to confirm it is okay. Next, click
  OK and then
  OK.
OK.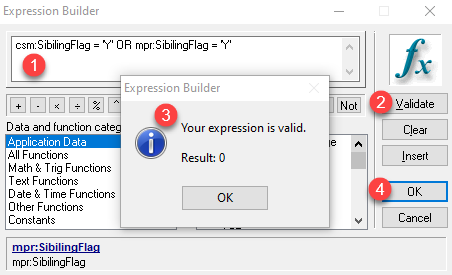
-
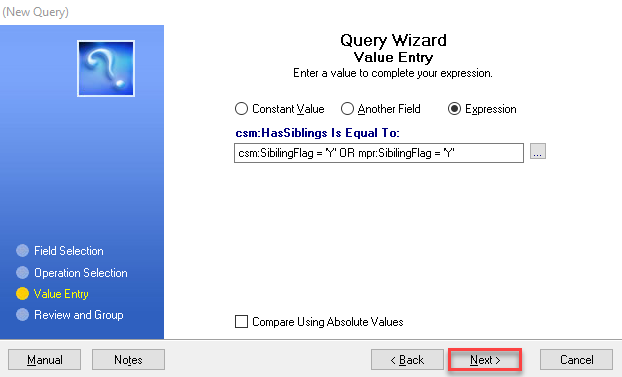
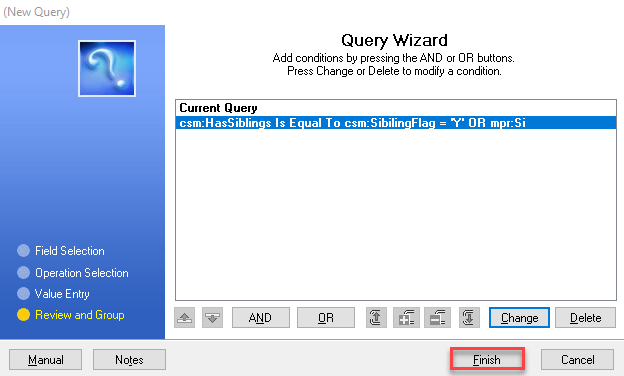
The expression will populate into the Query Wizard. Click Next.
-
On the next wizard screen, click Finish.
-
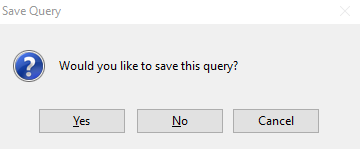
The Save Query prompt will display; click Yes to use it again.
-
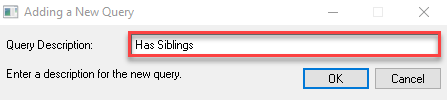
The Adding a New Query prompt will display; enter a description for the query and click OK.
-
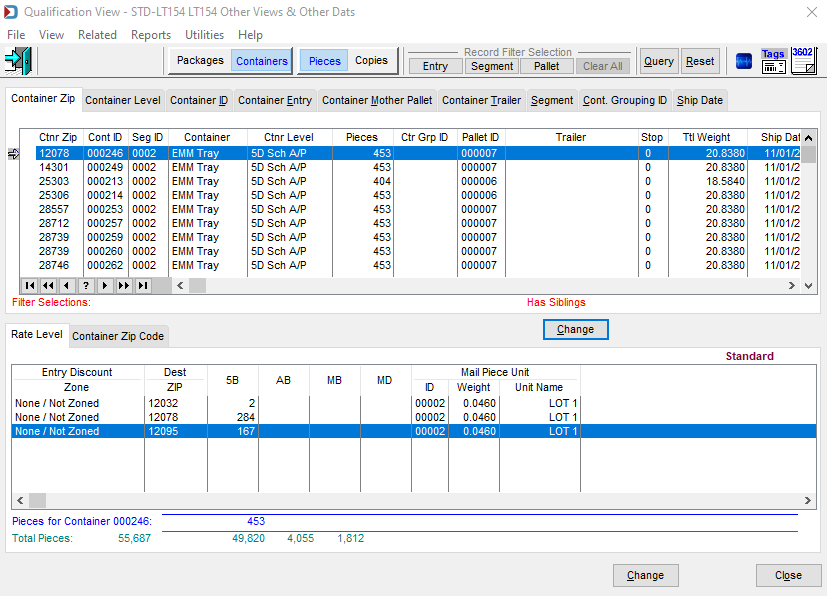
The results of your query will show in the Qualification View.
In this example, only the trays that have siblings are shown but notice that you cannot tell which pallets are sibling pallets. The happens because the expression used above does not work, so instead, a query can be created to show sibling mother pallets and another to show sibling trays. Hopefully, you have the gift of using expressions, unlike the person writing this.
Return to Advanced Navigator - Other Views