Planalyzer - Creating a Freight Table
If you are going to several destinations, the first method shown for creating a freight table will work for you. Otherwise, refer to Small Set of Destinations.
Several Destinations
You can import and export freight tables. We have some set formats that can be imported, please ask us whether your freight table can be imported. Otherwise, you can create your own.
-
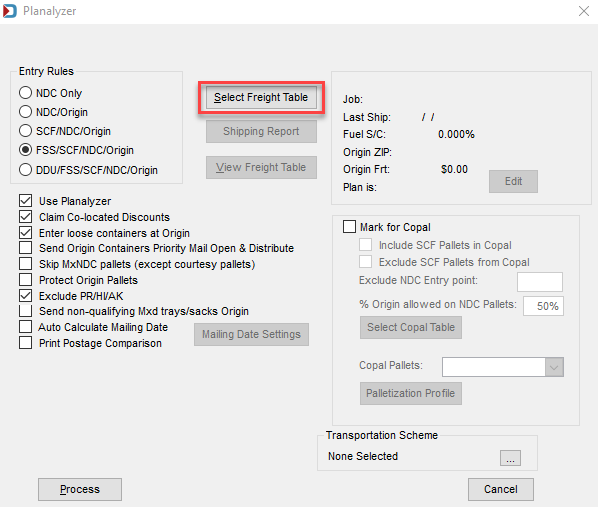
Click Select Freight Table.
-
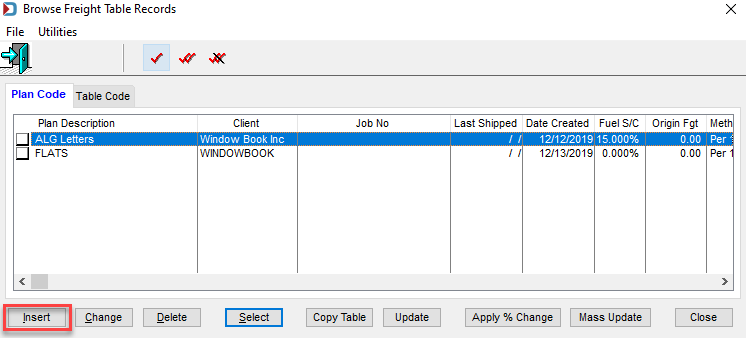
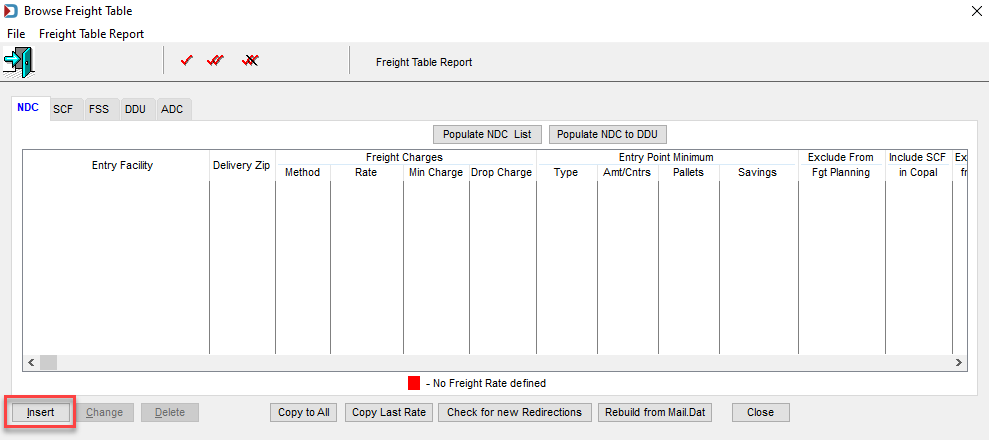
When the Browse Freight Table Records screen appears, click Insert.
-
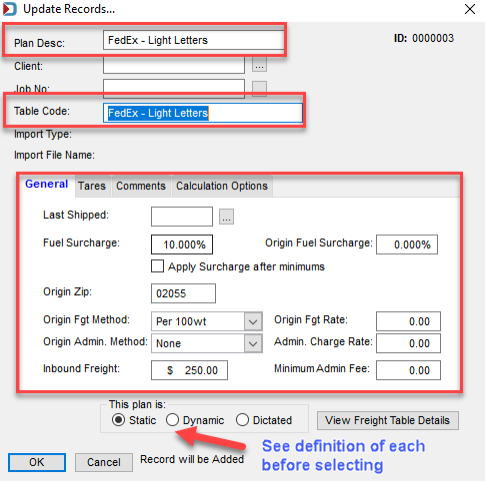
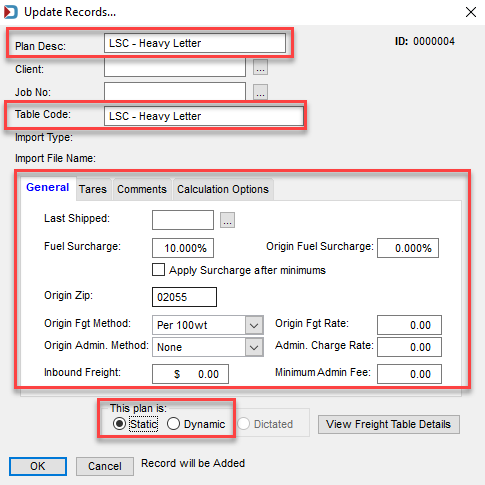
The Update Records screen will appear, fill out the information applicable to you:
The most important thing to select is the type of Plan, whether it is Static or Dynamic, when you are inserting a new freight table. This will determine how Planalyzer will determine entry points.
Static: Limited Entry Points are contained within your table. TIP: Start by populating your table with all possible Entry Points (Dynamic) and remove the unwanted items. Postage savings and minimums are used to determine final plan.
Dynamic: You have populated your table with all viable USPS Entry Points. Postage savings and minimums are used to determine final plan.
Dictated: You populate your table with a Static or Dynamic amount of Entry Point locations. The Dictated Plan uses no minimum logic. Your Mail.dat file will be processed to every Entry Point in your table regardless of savings or minimum requirements. This plan is used when your Client requests their mail be drop shipped no matter what the cost.
Once the plan option is set, there are some other decisions to make:
For example, if you have different pricing for light letters vs. heavy letters, you might want to be more specific naming the Freight table.
This is also where you can set defaults for all entry points, such as fuel surcharge, your origin zip and inbound freight charge, if you’ll be trucking it to a logistics provider’s facility. Make sure to populate Origin Zip.
Once your plan and other settings are populated, click View Freight Table Details to continue.
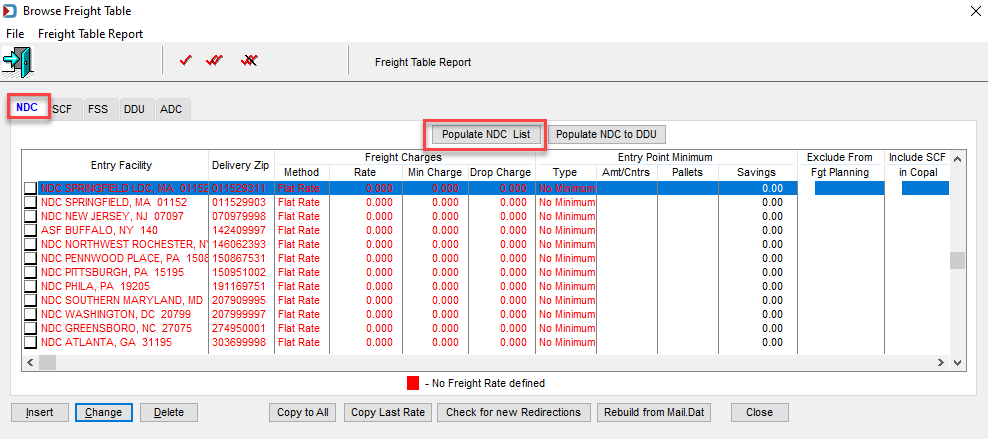
If you are going to most of the NDCs and SCFs, the quick way is to click Populate NDC List and then click on the SCF tab and click Populate SCF List, then you can exclude or delete any point where you would choose not to drop.
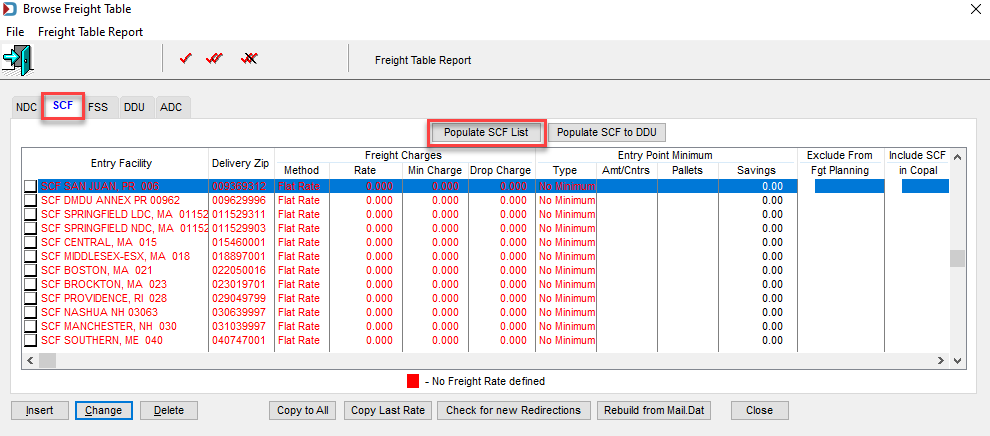
Ignore Destinations
If you selected all NDCs and SCFs and want to ignore specific facilities, you can select the checkbox to the left of these destinations and click Change.
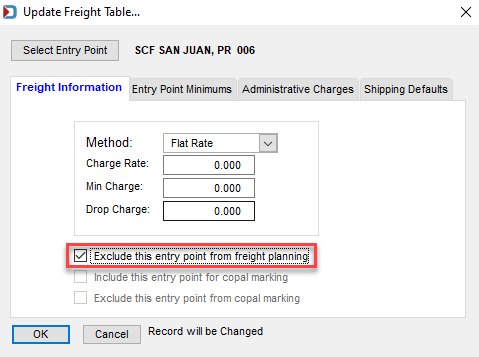
-
Select the Exclude this entry point from freight planning and click OK .
-
If you’ve selected multiple, destinations to exclude, the Propogate Changes screen will appear. Select the Exclude this entry point from freight planning checkbox and then click Process.
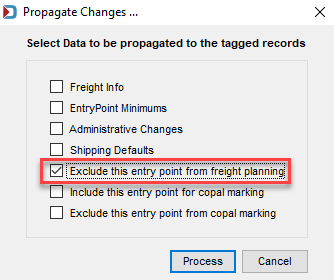
You will see a red X in the Exclude from Fgt Planning column for any point you excluded.

Entering Freight Costs
For any destination where you plan to drop ship mail, either double click on it or highlight the entry point and click Change to enter in your costs. If multiple destinations have the same cost, they can be added at one time by selecting each entry points checkbox and then click Change.
Once you’ve completed updating your entry points, click Close to exit the Browse Freight Table window.
Small Set of Destinations
If you only need to go to a few destinations, it may make sense to add them one at a time:
-
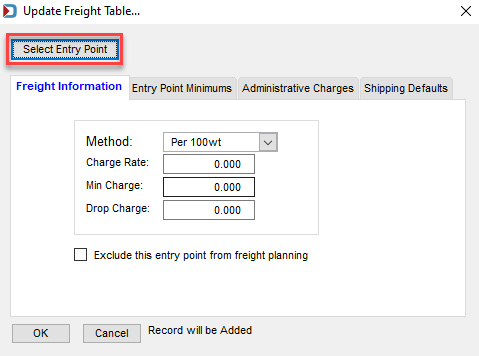
Click Insert, this will allow you to select a specific entry point and minimums for each destination.
-
Click Select Entry Point.
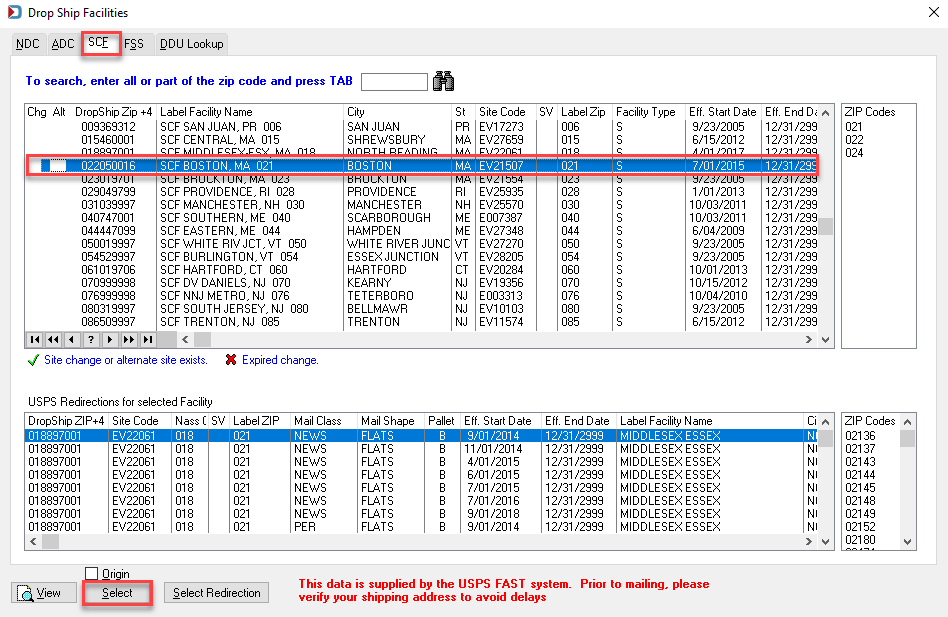
A list of Drop Ship Facilities will appear.
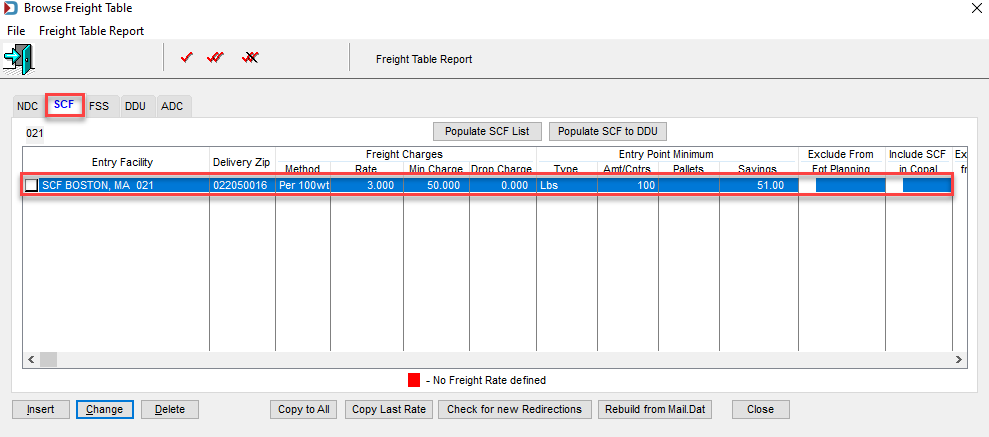
let's, for example, find SCF Boston, MA. First click on the SCF tab, highlight Boston and click Select.
-
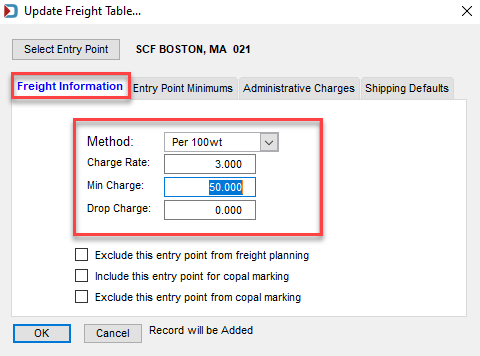
Now you will see SCF Boston, MA 021 next to Select Entry Point in the Update Freight Table screen, now insert your charge method of one of the following:
-
Per 100wt; Per Pallet; Flat Rate; Per 1000 pc; or Per Pound
-
Enter the Charge Rate; in this example, it’s $3 per 100 pounds
-
Enter any Min Charge; in this example, it’s a $50 minimum to go to SCF Boston.
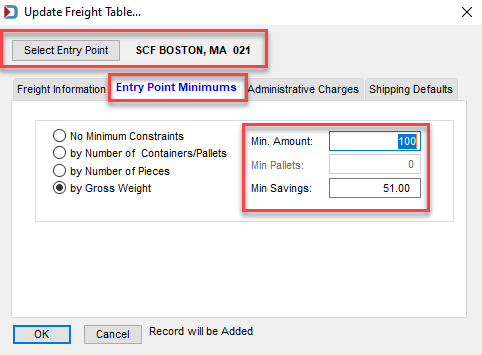
You can set Entry Point Minimums, so for example, you know if you have less than 100 pounds, and you are going PMOD, then you could set a Min. Amount and if you do not want to drop ship there unless there is more savings than the minimum charge, you could enter a Min Savings. Again, this is just an example.
Skipping past the Administrative Charges and the Shipping Defaults tab (see Planalyzer - Auto-Calculate Mailing Date, if interested in Planalyzer setting mailing, in-home dates or using in-home dates to set mailing date).
-
After clicking OK, click on the tab for the facility type of the destination (in this example SCF Boston) you just added and you will see your entry point and you can continue adding entry points by repeating the steps above.
-
After you click Close and return to the Update Records screen, enter a Plan Desc and Table Code. Also, set any other setting. Again, most importantly select the plan type of either Static or Dynamic.
-
Static: Limited Entry Points are contained within your table. TIP: Start by populating your table with all possible Entry Points (Dynamic) and remove the unwanted items. Postage savings and minimums are used to determine final plan.
-
Dynamic: You have populated your table with all viable USPS Entry Points. Postage savings and minimums are used to determine final plan.
-
Dictated: You populate your table with a Static or Dynamic amount of Entry Point locations. The Dictated Plan uses no minimum logic. Your Mail.dat file will be processed to every Entry Point in your table regardless of savings or minimum requirements. This plan is used when your Client requests their mail be drop shipped no matter what the cost.
-
-
You are ready to optimize your jobs.
Return to Planalyzer - Additional Resources