File > New Mail.dat Import
This provides instructions on how to import a Mail.dat into DAT-MAIL manually. The automation of importing Mail.dat files is through the use of the Import Daemon or AWAM.
-
Selecting
 Import a new Mail.dat file or File > New Mail.dat Import launches the manual process for importing a Mail.dat file set into DAT-MAIL.
 -
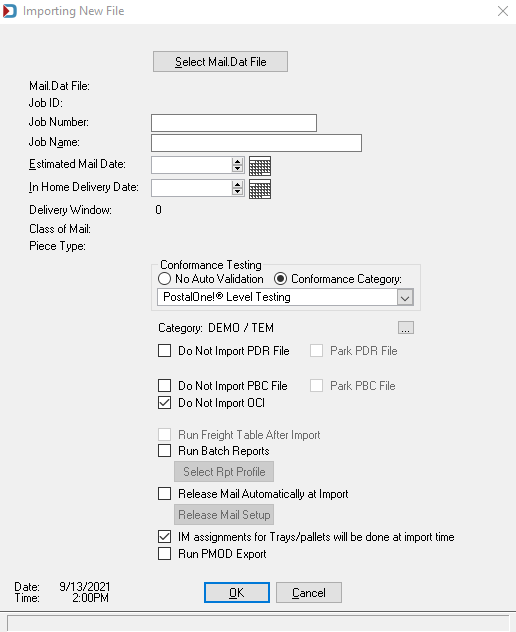
When the Importing New File screen appears, click Select Mail.dat File.
-
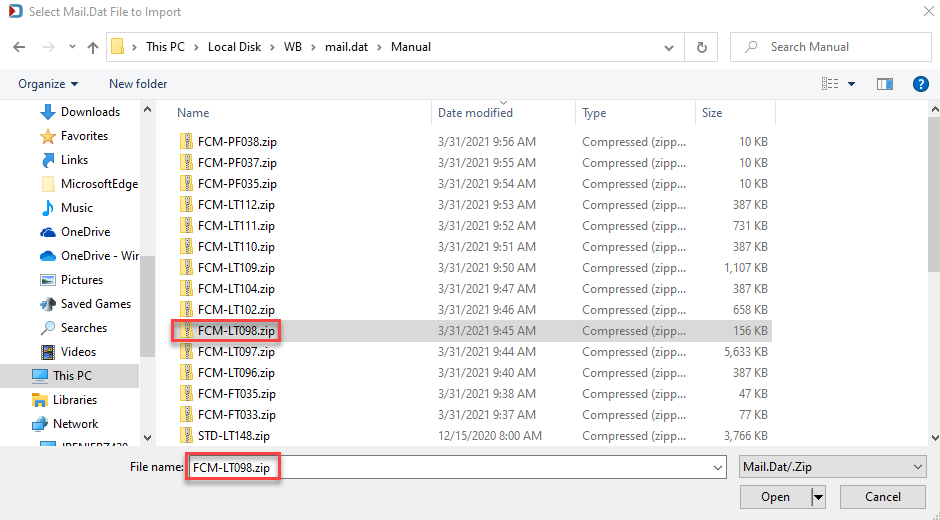
The Select Mail.dat File to Import window displays, you can either select a file from the folder location set as your default or you can navigate to another folder where the Mail.dat is located. When you find the Mail.dat, highlight it and click Open.
-
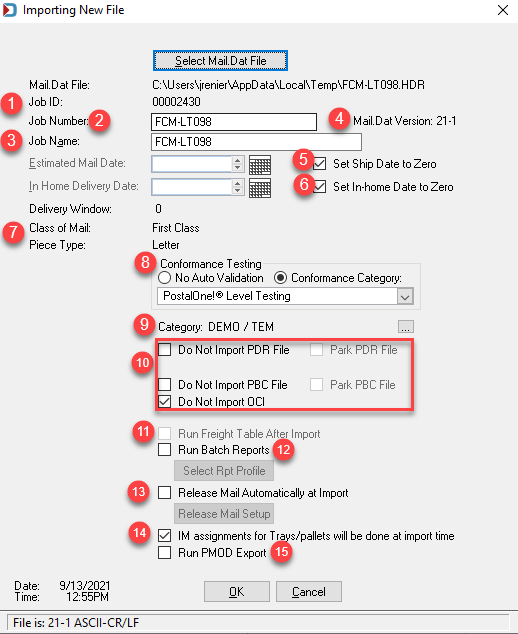
It brings you back to the Importing New File screen, and now information about your job is populated. You can change several things before starting the import, plus perform other actions after the import is complete. If you are using the defaults set for your Company and no explanation of the screen is needed, click OK and skip to DAT-MAIL Import Process continued.
-
Below the print screen is an explanation:
-
 Job ID: A system-generated unique Job ID is assigned for every job imported into DAT-MAIL.
 -
 Job Number: This is a number assigned by the presort and can be changed.
 -
 Job Name: This description is also assigned by the presort and can be changed.
 -
 Mail.dat Version: The DTAC Mail.dat version continues to change as the mailing industry adds or removes fields and adds values to existing fields, such as rate categories. The version is vital since PostalOne may not accept an older version. The best way to confirm what versions are currently accepted by PostalOne! is to check the USPS Mail.dat Technical Specification located at https://postalpro.usps.com/mailing/techspecs.
 -
 Set Ship Date to Zero: If you want to make sure someone sets the ship date, then selecting the Set Ship Date to Zero checkbox will eliminate the date specified in the job.
 -
 In Home Delivery Date: If you want to make sure someone sets the in-home date, then selecting the Set In-home Date to Zero checkbox will eliminate the date specified in the job.
 -
 Class of Mail: and Piece Type fields: You can confirm you are importing the correct Mail.dat. If you were expecting to be importing a First Class mail job, it should show First Class. Also, it will show you the mail shape (piece type), such as Letters and Flats.
 -
 Conformance Testing: While you could select not to perform auto validation, we recommend using this feature. Also, we recommend using PostalOne!® Level Testing, our most extensive validation level. Please see DAT-MAIL Setup - Import Defaults (continued) for more information.
 -
 Category: If job categories have not been set up or are not being used the default is None. For information on job categories, see File > Category Maintenance.
 -
 Do Not Import PDR File (Park PDR File), Do Not Import PBC File (Park PBC File), and Do Not Import OCI: Unless you are not submitting files to PostalOne! from DAT-MAIL, you should not select either Do Not Import PDR File or PBC File. Or if you are submitting to PostalOne! but do not need to register the piece barcodes. Instead, you can select Park PDR File or PBC File to reduce import time and submit to PostalOne! they will be reconnected to the Mail.dat. While you can park these files, we usually recommend that you register your piece barcodes to track undocumented, perform QA, and account for spoilage (if applicable). The OCI file is used in copal, and through Program Setup, you can let DAT-MAIL determine how to handle the OCI. For more information. see Setup - PostalOne!.
 -
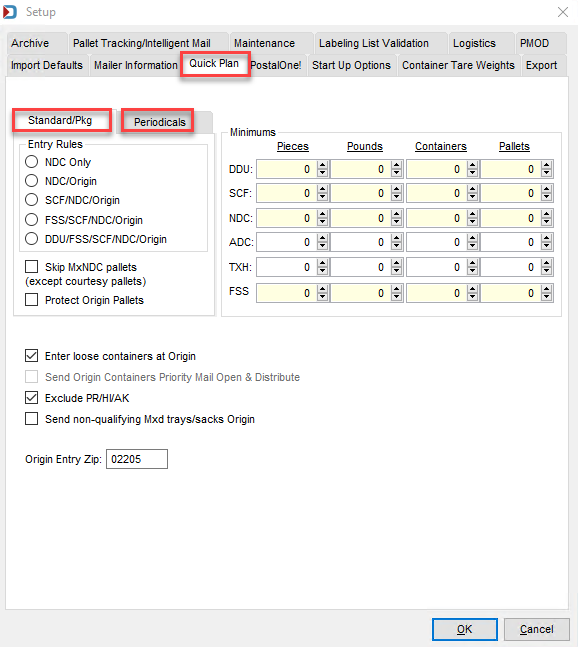
 Run Freight Table After Import: Toolbox Clients have the option to automatically run a freight plan using a predetermined freight table upon import. Editor Clients have the option to run a Quick Plan upon import with predetermined defaults. Before a freight table can be used, the Planalyzer tab needs to be set up - from the DAT-MAIL main menu, go to File > Program Settings > Program Setup > either Planalyzer or Quick Plan tab. It has not been set up if this checkbox does not appear automatically in the Importing New File screen.
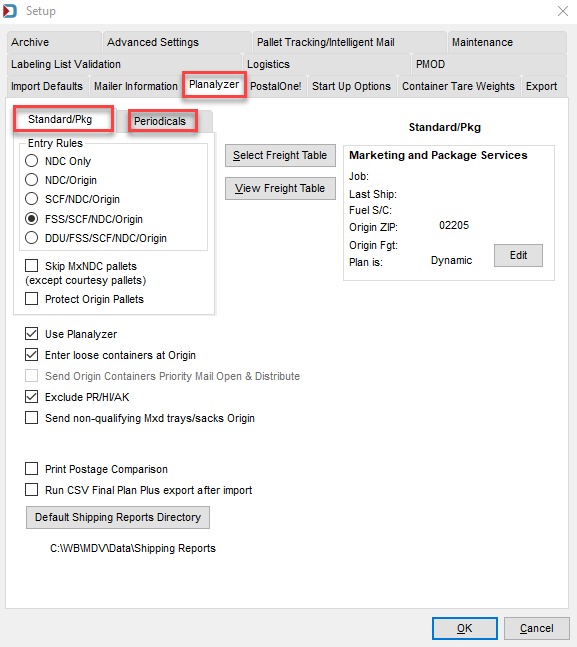
-
 Run Batch Reports: If batch reports are set up, one can be selected to run after import.
 -
 Release Mail Automatically at Import: You can choose to immediately export a PostalOne! Original Ready to Pay File (Qualification Reports and Statements) automatically. When this checkbox is selected, a pop-up window will appear where you can change the Actual Container Ship Date (CSM-1113) and Postage Statement Mailing Date (CSM-1184) for all containers. To the date you set.
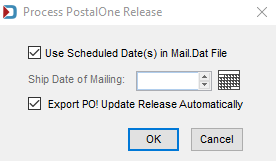
This feature does not change the following dates if populated - Scheduled Ship Date (CSM-1172); Scheduled Induction Start Date CSM-1117), Scheduled Induction End Date (CSM-2001), Scheduled Ship Date (CSM-1172), or Scheduled PickUp Date (CSM-1177).
-
 IM assignments for Trays/pallets will be done at import time: This should already have been set in Program Setup, and if you are importing a test file, you can deselect this checkbox to not assign barcodes.
  Run PMOD Export: This is another option that will automatically be selected, if it was set in Program Setup. If it is not automatically selected, then it needs to be setup in Program Setup.
DAT-MAIL Import Process continued
-
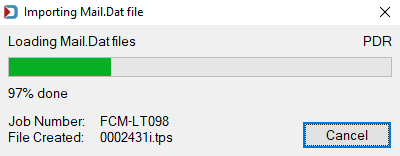
After clicking OK, it will display an Importing Mail.dat file progress window.
-
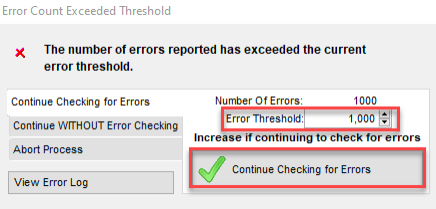
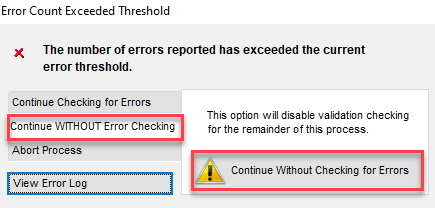
Errors may occur and if you see the Error Count Exceed Threshold window, you have the option to View Error Log and then decide whether to continue with the import. If you know what the reason for the errors and you can fix the issue, you can Continue WITHOUT Error Checking or increase the Error Threshold and Continue Checking for Errors.
If there are no errors, you will immediately see the job open in Advanced Navigator Navigator or another view you have selected in Program Program Setup, Start Up Options tab, to open.
-
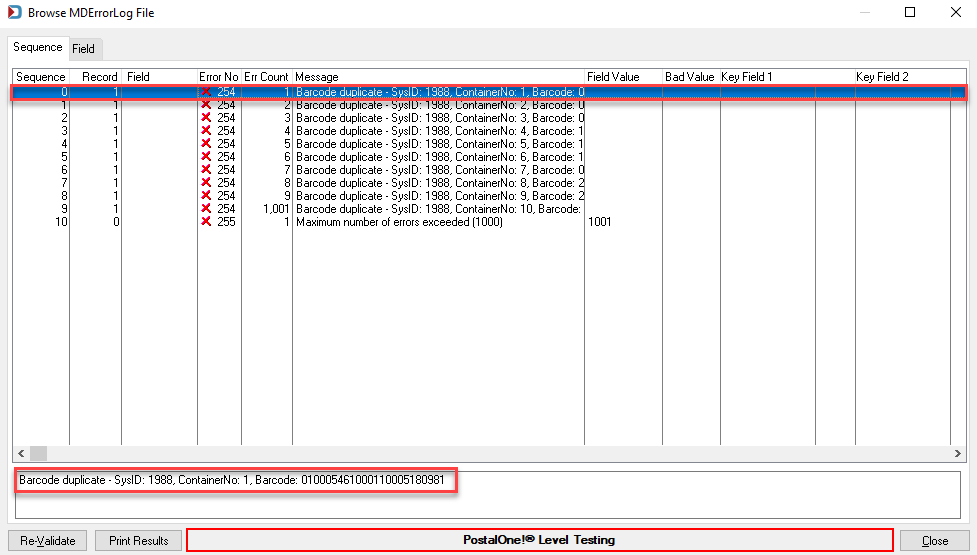
Once importing is complete, in this example where there are errors, the following message dialog will appear - Import Errors Found, click OK to continue.

Next, the Browse MDErrorLog File will appear.
To view an error, highlight the line, and at the bottom of the screen, you will see the error message.
-
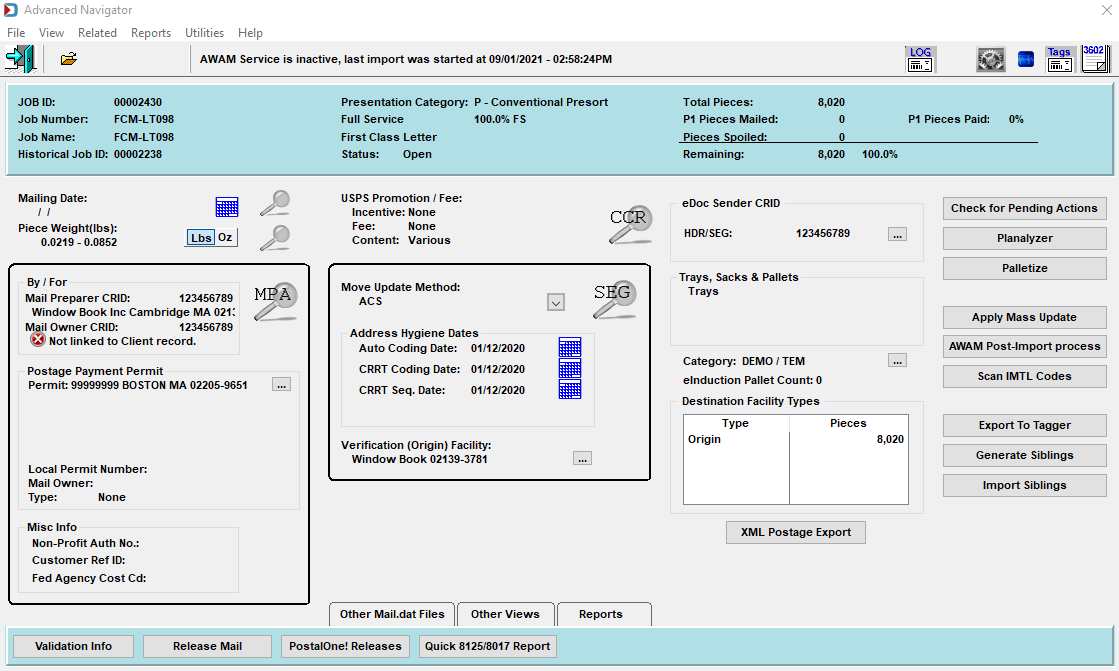
Next, the Advanced Navigator screen will display for the imported job.
If you are not using the Advanced Navigator it will open to what you have set as the default Start Up View Options, see DAT-MAIL Setup - Start Up Options for more information.
-
Import is complete.
Return to File Menu