AWAM - DAT-MAIL's Merge Mail.dat Files Utility
The AWAM Merge Mail.dat Files utility uses Merge profiles that stipulate what type of merge will occur and what will happen during the merge process and specify any actions performed on the new Mail.dat created.
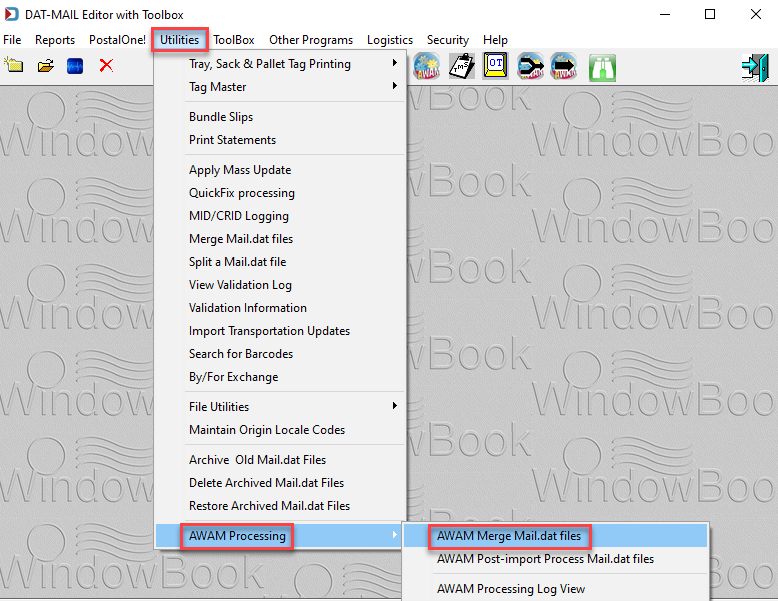
The AWAM Merge Mail.dat files utility is accessed within DAT-MAIL by clicking the  AWAM Merge icon or selecting Utilities > AWAM Processing > AWAM Merge Mail.dat files located on DAT-MAIL’s home screen.

Or
![]() The utility displays all of the existing Mail.dat files.
The utility displays all of the existing Mail.dat files.
Below the print screen is an explanation:
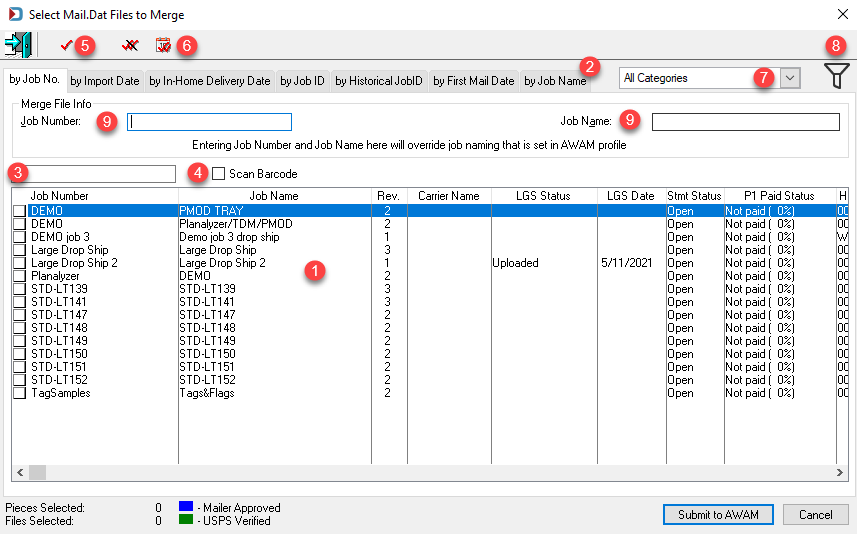
Files can be sorted, filtered, and viewed by many different fields.
![]() Clicking a specific tab will update the job list to display that tab’s corresponding field.
Clicking a specific tab will update the job list to display that tab’s corresponding field.
![]() Once the available Mail.dat files are displayed in the desired sort order, you can search for specific jobs easily by entering a value specific to the field sort selected.
Once the available Mail.dat files are displayed in the desired sort order, you can search for specific jobs easily by entering a value specific to the field sort selected.
-
For example, in the numbered screen image above, the sort order chosen is by Job No. ( job number); therefore, you can enter text or numbers about the Job Numbers to narrow further the search for specific jobs. The search begins at the beginning of the field and will not identify jobs with the same search criteria if it occurs mid-field. When search criteria are entered, you must tab out of the area to launch the search.
![]() If you select the Scan Barcode checkbox, you can scan or enter a barcode of a job to be merged.
If you select the Scan Barcode checkbox, you can scan or enter a barcode of a job to be merged.
-
When the barcode is scanned in, it will display in the search field. If the right job is identified, it will show in the job display window and be automatically tagged.
When the desired job is found, it can be tagged for merging by either clicking in the empty box to the left of the job’s line item or by clicking anywhere on the job’s line item to highlight it and then clicking the ![]()
 single red check mark located at the top of the screen. A job is tagged when a checkmark displays in the box located to the left of the job’s line item.
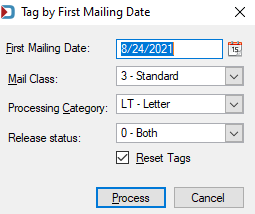
![]() A block of jobs can be tagged simultaneously, such as for mailers doing OCI tray-based copal, using the
A block of jobs can be tagged simultaneously, such as for mailers doing OCI tray-based copal, using the  Tag by First Mailing Date utility. This utility allows users to search for a block of jobs using the First Mailing Date, Mail Class, Processing Category, and Release Status fields as filters. When all of the filters are set and Process is clicked, the Tag by First Mailing Date utility identifies all of the jobs that meet the specified criteria and tags (marks) them automatically for you.
Individual jobs can be un-tagged (unmarked) by clicking anywhere on a single job’s line item to highlight it and clicking the single red check mark located at the top of the screen. You can also click on the checkmark located to the specific job’s line item's left.
If there are multiple jobs tagged and you wish to un-tag all of them, you can do so all at once by clicking the  double-red checkmark.
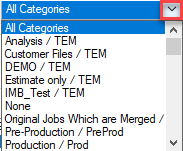
![]() If you are using Job Categories, you can filter by selecting a Category from the drop-down list.
If you are using Job Categories, you can filter by selecting a Category from the drop-down list.
![]() You can also use the
You can also use the  filter function and create an applicable filter setting or settings. When the Browse Filter List window appears, click Insert to add a new profile or Select if you already have existing profiles.

In this example, going to filter jobs that are 100% Full Service.
-
 Enter a Filter name.
 -
 Select a filter to use from the Filter pane.
 -
 In the List filter pane, select the applicable value.
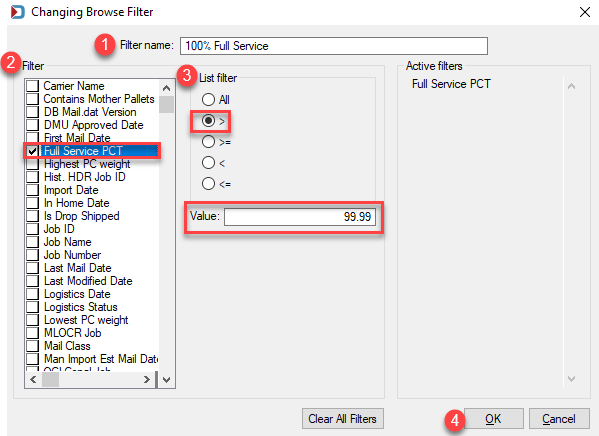
-
 When you click OK, the Browse Filter List window displays, click Select.
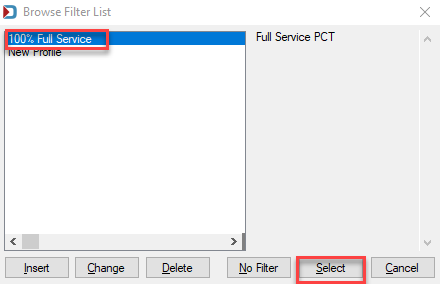
-
When a filter is selected, the
 filter icon changes to black to indicate a filter is on. If you want to remove the filter, click on the filter icon and click No Filter in the Browse Filter List.
![]() A specific Job Number and Job Name can be applied to the new Mail.dat that the merge will create by entering the values in the utility screen. Keep in mind that if values for either field are entered here, they will overwrite whatever is stipulated in the AWAM merge profile being used.
A specific Job Number and Job Name can be applied to the new Mail.dat that the merge will create by entering the values in the utility screen. Keep in mind that if values for either field are entered here, they will overwrite whatever is stipulated in the AWAM merge profile being used.