AWAM - Using an Import Profile Specific to QuickFix Files
QuickFixed Mail. dats can be automatically imported back into DAT-MAIL by creating and using a QuickFix-specific AWAM import profile. To do this, perform the following:
-
On the server, open DAT-MAIL and launch AWAM. In the Control Center, click the Edit profiles.
-
The Browse Profiles screen will display. Click the Insert and select New Import Profile.
-
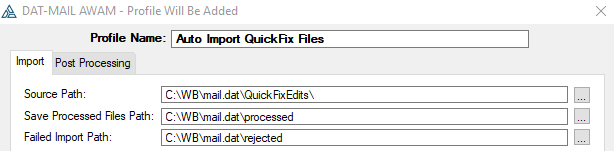
A Profile Will Be Added screen will display. First, name the new QuickFix import profile (“Auto Import QuickFix Files”). Then, click Browse for the Source Path field and navigate to the folder where the Mail.dat files corrected by QuickFix (‘C:\wb\mail. dat\QuickFixEdits’) are located. Click OK when finished.
In a server-with-workstations environment, make sure a UNC path name is used for the QuickFix folder.
-
The Browse Profiles screen will display. Select the newly created QuickFix import profile and click Activate (refer to AWAM - Activating & Deactivating Profiles for more information). Click Close when finished.
-
On the server, open PostalWeb Connector (PWC). On the PWC Home screen, use Browse to select the same import folder used with AWAM’s default import profile as the DAT-MAIL Mail.dat Import folder for QuickFix edited files. Then, stop and restart the service.
In a server-with-workstations environment, make sure a UNC path name is used for the QuickFix folder.

-
Within DAT-MAIL, navigate to File > Program Settings > Program Setup.
-
The Setup screen will display. In the Import Defaults tab, click the QuickFix File Path. Navigate to, and select the same folder selected in PWC for the QuickFix File Path to be used by DAT-MAIL ('C:\WB\mail. dat\QuickFixEdits’). Click OK to close the Setup screen, saving the update.
In a server-with-workstations environment, use a UNC path name for the QuickFix folder.

-
Setup is complete.
Return to AWAM - Example Profiles