Assign Pallets to Manifests - Select Manifest
The Select Manifest button is used to select a manifest, which is the equivalent of requesting a truck. The Browse Pallet Database screen is where this selection occurs. While you are in the Manage Manifest window, you can also create and change manifests, dispatch trucks, cancel manifests, view the pallets list on a manifest, print the bill of ladings, and export data. We will wait till we cover View/Dispatch Manifests - Use to go into these in more detail. We will focus on selecting a manifest here.
-
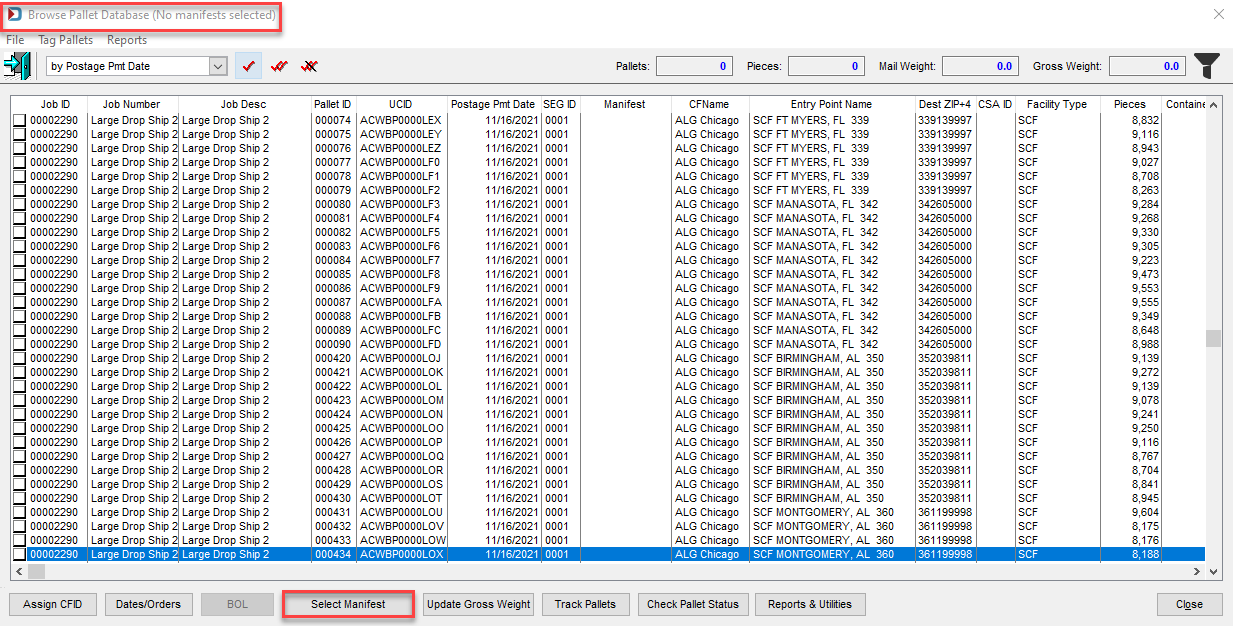
Click Select Manifest on the Browse Pallet Database screen.
-
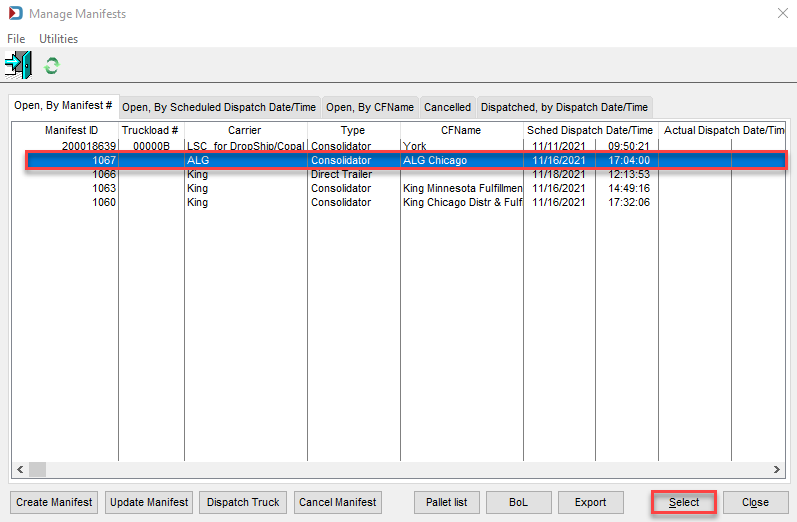
The Manage Manifests screen will display, listing any existing manifests. You can create a manifest, update an existing manifest, select an existing manifest, or cancel a manifest. In this example, we will select a manifest. First, highlight the manifest and then click Select.
-
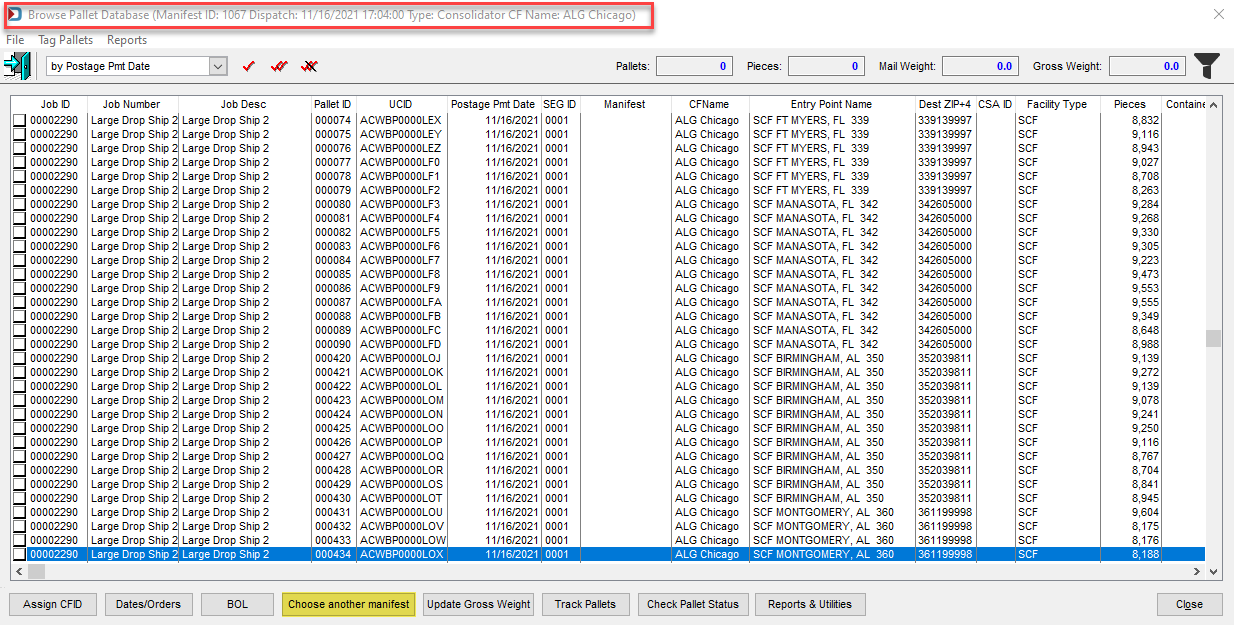
When a manifest is selected, the Manage Manifest screen closes and the Browse Pallet Database screen for the selected manifest displays. All of the pallets available will be listed. Notice that when a manifest for carrier ALG and the consolidation facility ALG Chicago is selected, only pallets assigned to that carrier/consolidation facility will be displayed. The list can be further condensed (if preferred) by using the screen’s filter function.
In addition, after a manifest has been selected, the Select Manifest button changes to read Choose another manifest. In case you need to select a different one.
-
Now you are ready to add pallets to the manifest.
Continue Assign Pallets to Manifests - BOL