New User Sign-Up
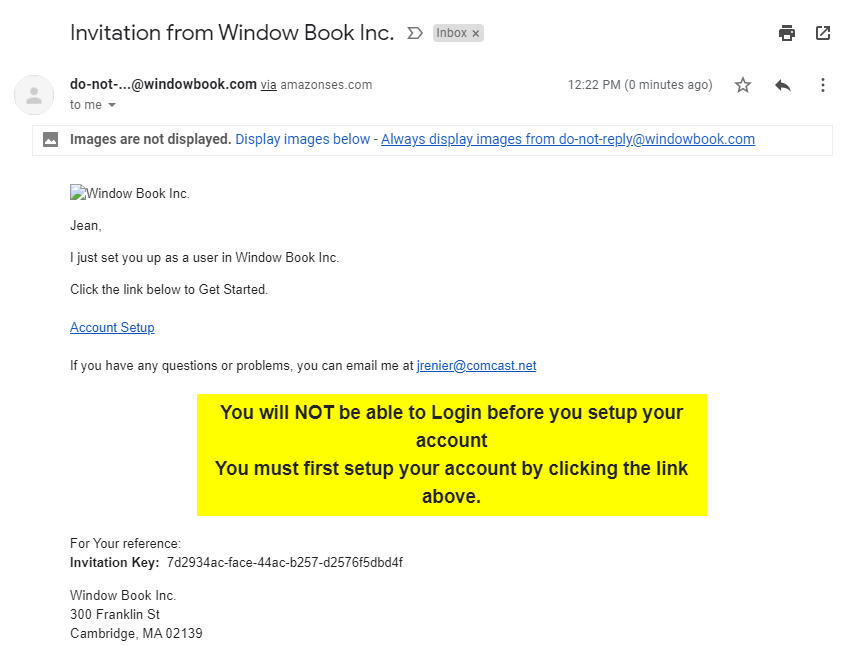
Invitations to become a user of your Company's PWN site are issued by the Company Administrator or a Location Manager from your Company's PWN site. They are sent via email to the potential new user. Within the invitation email is an Account Setup link that the invited user must click to accept the invitation and begin the process of becoming a user of their Company's site.
If the email invitation gets delivered to a spam or junk folder, the Account Setup link may not work. Move the email invitation to the Inbox before using the Account Setup link.

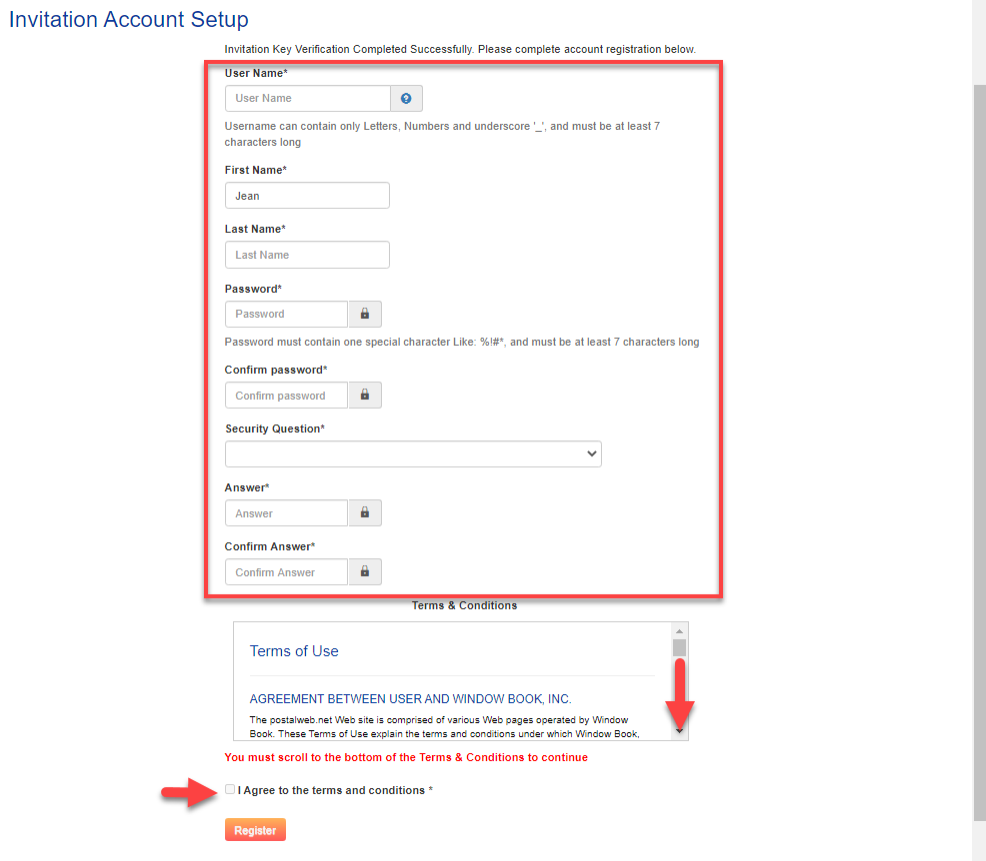
When the Account Setup link is clicked, a web browser is launched on your computer, and an Invitation Account Setup page is displayed. Next, you must fill in all fields, creating a user name and password for logging on to your Company's PWN site. After entering all fields, please scroll to the bottom of the Terms of Use window to select the I Agree to the terms and conditions checkbox. After selecting the checkbox, click Register to complete the process.
Account Setup

When Register is clicked, an email is sent from PWN to you thanking you for accepting the invitation. The email also provides your Company's URL to your PWN site.
In addition, you are directed to the Login Information screen for your Company's site. Enter your User name and Password, then click Log In.

Seven consecutive failed logins due to an incorrect password (but using a correct user name) will cause the account associated with the user name to become locked for 30 minutes. After at least 30 minutes have passed, attempt the log in again.
For information on using the Forgot your Password? and Forgot your User Name links, refer to Forgot Your Password? or Forgot Your User Name?.
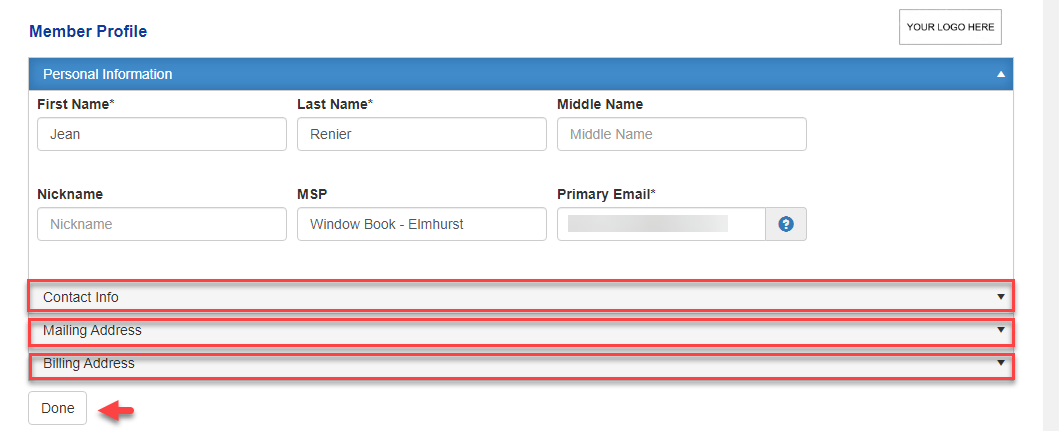
A Member Profile screen will display. You must complete the Member Profile before the rest of the site will be available to you.
Below the print screen is an explanation:

The Member Profile consists of four sections: Personal Information; Contact Info; Mailing Address; and Billing Address. The required information for each section must be entered to complete the Member Profile. To select a section and expand it to view its contents, click on the category's title bar. Next, populate any missing required fields in each area. After all four sections have been completed, click Done. When Done is clicked, a Success dialog will display.

Getting Started with PWN
After the Success dialog displays, you will be directed to the Getting Started with PostalWeb page. The role assigned to you determines what appears when on the Getting Started with PostalWeb page. In this example, the new user was given the role of Administrator, so all tiles available will show (refer to Step 3 - Log in to PWN (First Time) for more information on what each tile has to offer).

Return to Additional Resources