Step 3 - Log in to PWN (First Time)
The user name and password created during the registration process (refer to Step 1 - Site Registration - User Information) is required to complete this step.
The first person to log in to your Company’s PWN site is automatically given Administrator (full access) rights and, therefore, should be somebody that is highly trusted.
Window Book recommends using the same computer or server where PWC is installed (if applicable) to log into the newly registered PWN site for the first time.
-
After completing the registration process and installing PWC, click on the URL (link) provided for the newly registered PWN site in the email received (refer to After Confirmation is Complete).
It can take approximately two hours for the new domain name to be propagated on the Internet by the DNS servers, which means the registrant’s Company-specific PostalWeb site may not be accessible for up to two hours after its initial creation/registration.
Until the new domain name (your Company-specific PostalWeb URL) is propagated on the Internet by the DNS servers, a “Server not found” (or similar) message may display when the registrant clicks the link to access their PWN site for the first time.
Clear the Internet browser cache before trying again if this DNS failure occurs. It may take up to two hours for the mailer’s PostalWeb site to be accessible the first time (only).
Seven consecutive failed logins due to an incorrect password (but using a correct User name) will cause the account associated with the user name to become locked for 30 minutes. After 30 minutes have passed, the user can log in again.
-
A web browser can also be opened, and the URL typed into the address bar to launch the site (do not use ‘www’ – enter the URL as displayed in the email (for example, ‘https://windowbook.postalweb.net/Company’).
-
The Login Information screen will display. First, enter the User name and Password (both were entered in Step 1 - Site Registration - User Information).
The password IS case-sensitive. If the user name or password are entered incorrectly, an error message will display. Reenter the user name or password and attempt to log in again. If the error persists, use the Forgot your Password? or Forgot your User Name? links located at the bottom of the screen. See Forgot Your Password? or Forgot Your User Name? for further assistance.
-
Select the Remember Me? checkbox to save the User name automatically populate the next time the browser launches. The Login Information screen is displayed (optional, and this option should not be selected if multiple users use the computer). Click Log In.
-
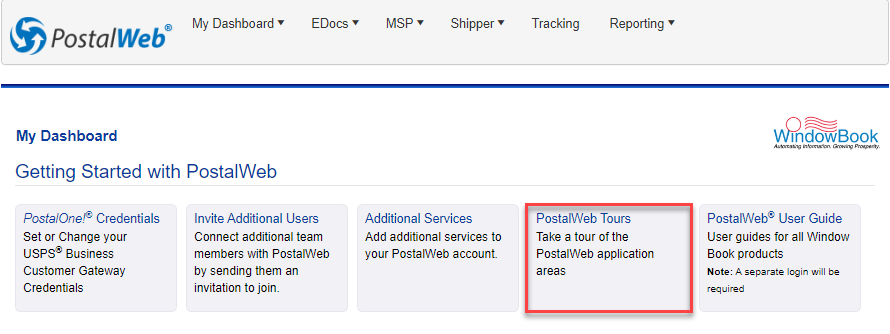
After successfully logging into your Company PWN site for the first time, the EDocs - Getting Started with PostalWeb page will display. If you do not, see the screen below, click on the blue question mark
 at the top right of the web page. Next, you will need to complete the setup of PostalOne! Credentials and Invite Additional Users.
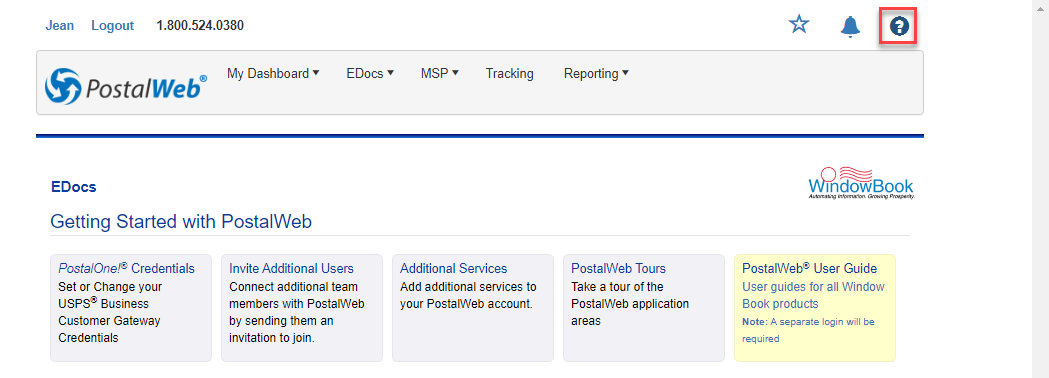
-
PostalOne!® Credentials: Clicking this tile requires the user to enter their PostalOne! credentials to allow PWN to immediately retrieve finalized statements for the past 88 days and retrieve all future finalized statements.
Again, we recommend that you create PostalOne! credentials to be used only in Window Book, Inc. products.

Performing this function provides a better first-time user experience for your users since your PWN site will be populated with existing data for use almost immediately. In addition, you are entering the PostalOne! credentials to allow your PWN site to retrieve any new or future finalized statements when PWC is not utilized (for example, creating a statement using Postal Wizard). Retrieval of future statements is limited to finalized statements. The PWN retrieval process runs approximately once every four hours.
Retrieving PostalOne!-related documents other than finalized statements requires PWC use, specifically, having your PWN site provisioned. Also, provisioning allows for the almost immediate or real-time retrieval of all available statements and documents versus waiting to receive them every four hours. Also, deliver those statements and documents to your computer or server automatically in PDF and XML format via a file transfer service (refer to Step 4 - Provision Your PWN Site in PWC for more information).
-
Once the credentials are entered, click Done. A Success dialog will appear above, and the credentials you entered will disappear from the screen.
-
Next, click on the browser's back button to return to the Getting Started with PostalWeb page.
-
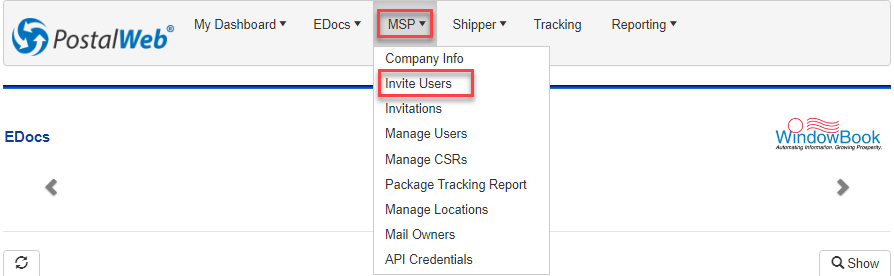
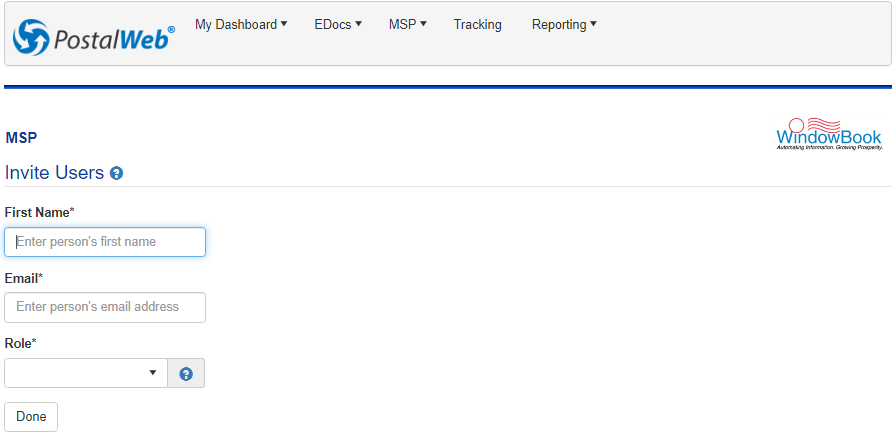
Invite Additional Users: Clicking this tile displays the Invite Users page where you invite and enable others to use the PWN site.The registrant must invite individuals within the Company – now the Administrator – to become users. Sending these invites is done from the Invite Users page.
The Invite Users page can be accessed during everyday use by highlighting MSP from the main menu, then selecting Invite Users.
-
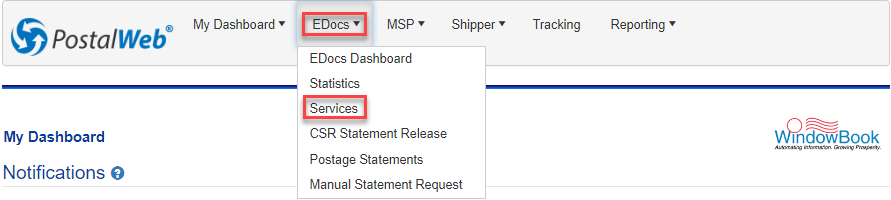
Additional Services: Clicking this tile displays the Services page, shows what services your Company is subscribed to, and shows all the Services available. See Additional Services for more information.
Before installing PWC, you contacted one of our Team Support Representatives (see Contact Us) to add your subscribed services.
The Services page can be accessed by going to the EDocs from the main menu, then selecting Services.

-
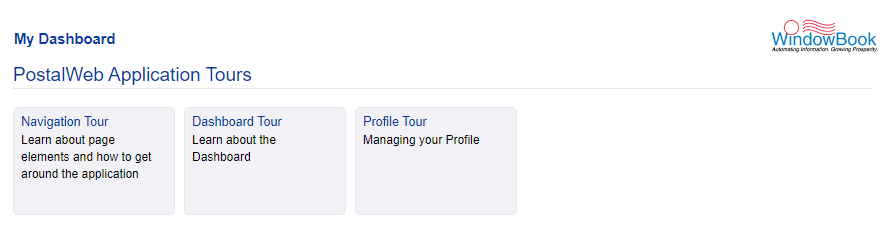
PostalWeb Tours: Clicking this tile displays the PostalWeb Application Tours page, which introduces you to the web pages.
-
Navigation Tour: Introduces the page elements of PWN.
-
Dashboard Tour: Introduces the user to the Dashboard feature in PWN.
-
Profile Tour: Introduces the user to the components of the Member Profile pages.
-
Continue Step 4 - Provision Your PWN Site in PWC.
See also