Add Return Address
 Once you complete the Required Settings in the Settings screen, continue to the Addresses screen to add at least one Return Address by clicking Addresses in the vertical menu on the left..
-
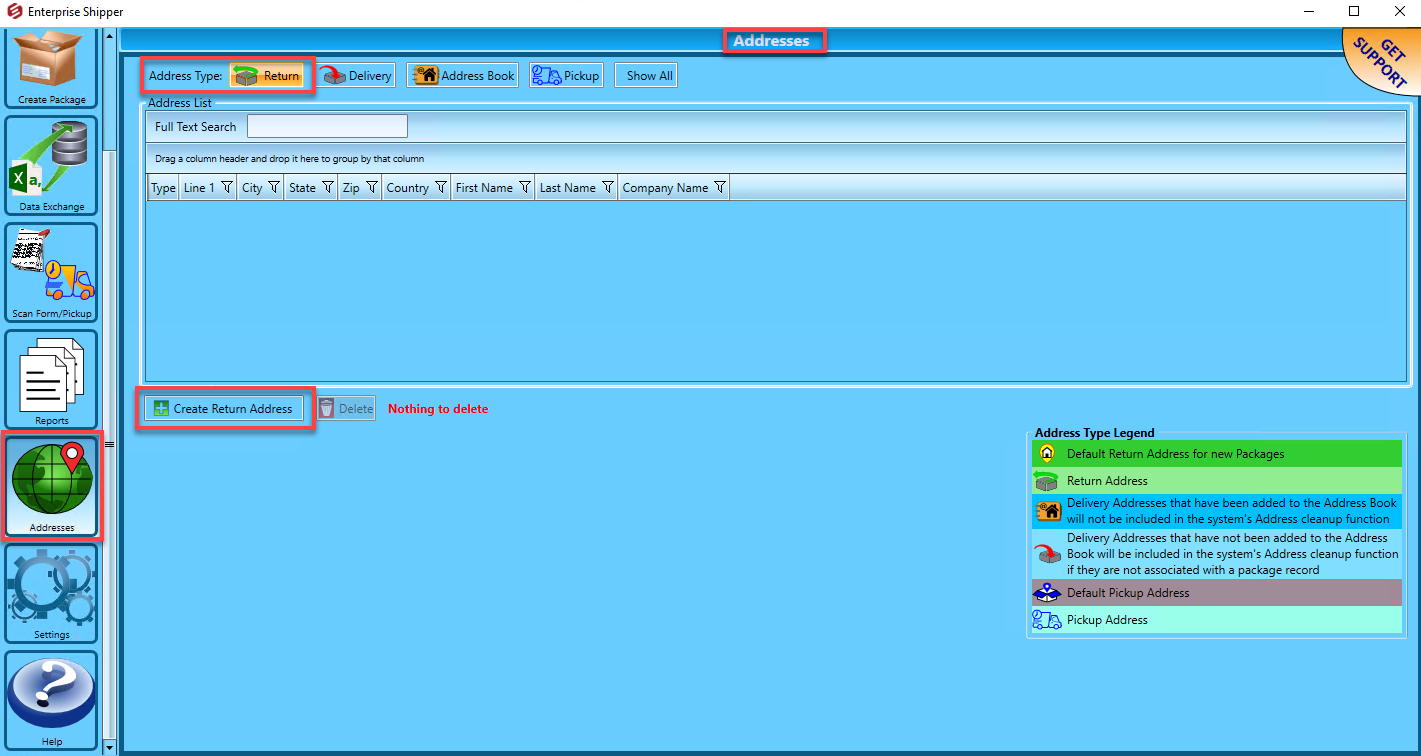
In the Addresses screen, for the Address Type click Return. And then click Create Return Address.
-
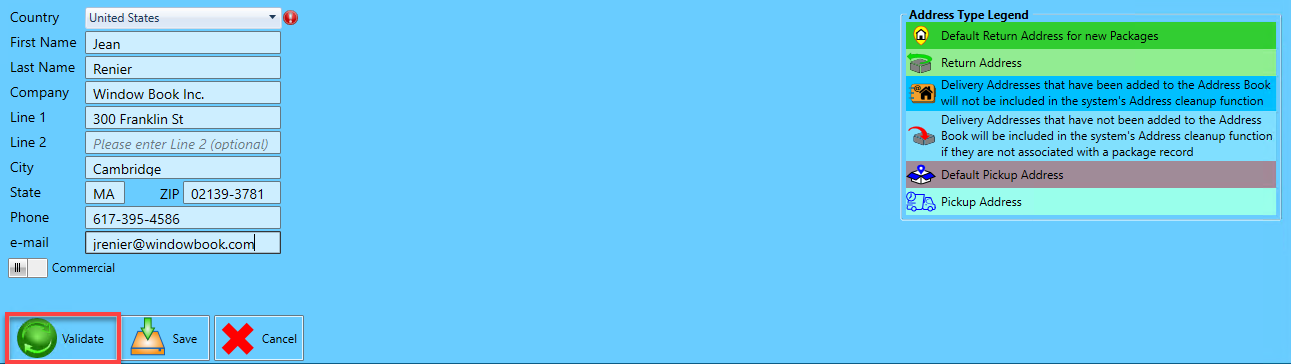
Enter all the address fields highlighted in red. We recommend populating Phone and e-mail too, so if there is an issue with a package the carrier, such as DHL, FedEx or UPS will have contact information. When ready, click Validate to confirm the address is valid. Then click Save to complete adding the return address.
The validation occurs by the provider set as your default. If you did not set a default Provider Account, it is the first provider set up in Provider Accounts.
-
Once the address shows as populated, select the Use this Address as DEFAULT checkbox. You will notice that it now shows in the Address List section with a
 Home icon.
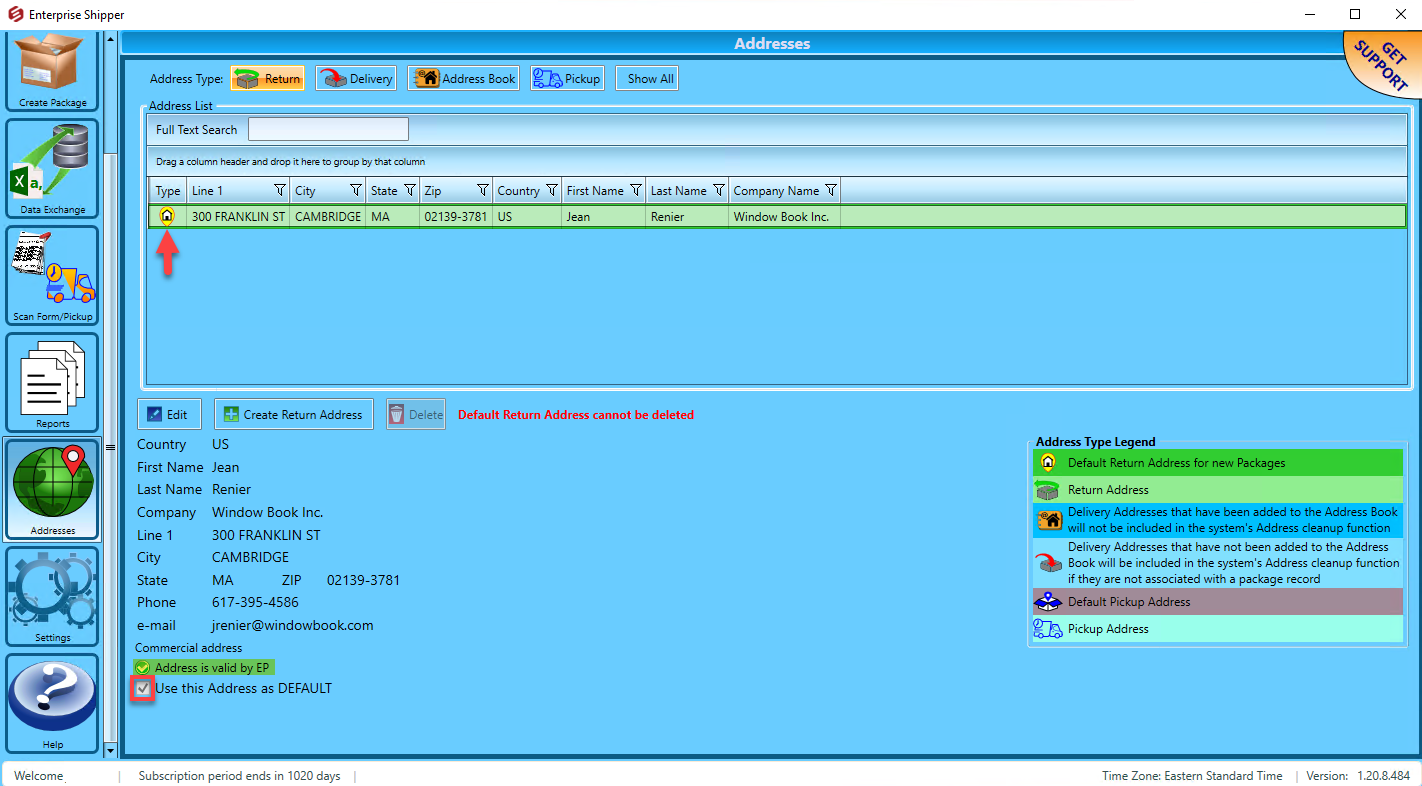
The ES setup is complete! You can now begin using the software. The next time Enterprise Shipper (ES)launches, the default home screen is the Packages screen.
Continue Settings > Optional Settings