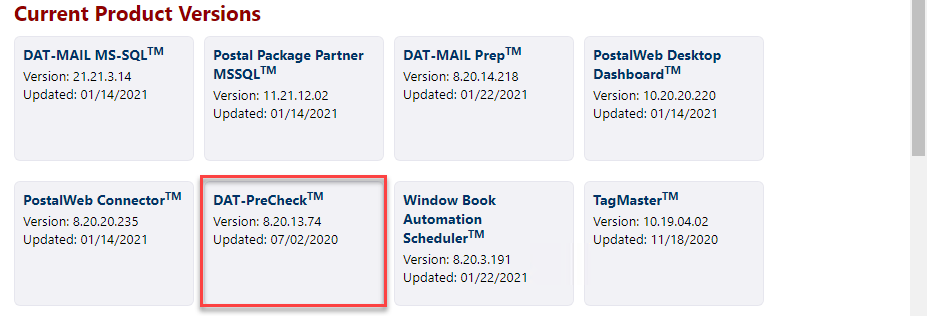
Installation Steps - Option to Use Existing SQL Server
The version information for DPC depicted in these screens images is subject to change as new product releases occur. Therefore, Window Book's website may not reflect the version number displayed here.
-
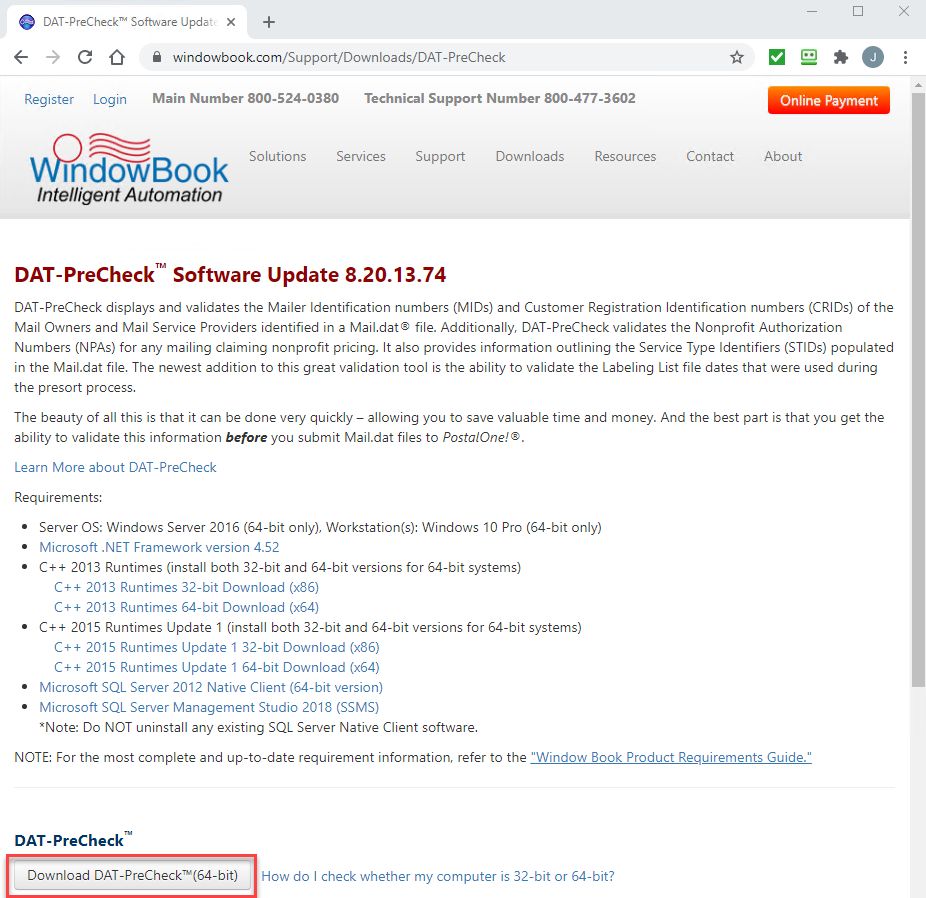
To download the installer, go to https://www.windowbook.com/Support/Downloads, click the DAT-PreCheck™ tile.
-
The DAT-PreCheck™ Software Update 8.20.13.74 or newer screen will appear, click Download DAT-PreCheck™(64-bit).
-
Close any open Window Book software application.
-
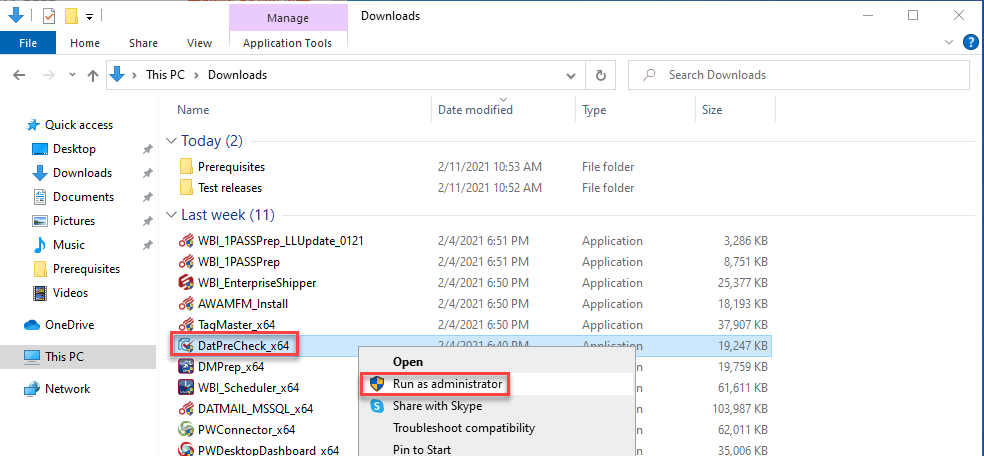
After the download is complete, navigate to the downloaded file on the computer or server using File Explorer, right-click on the file and select Run as administrator.
-
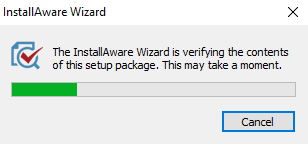
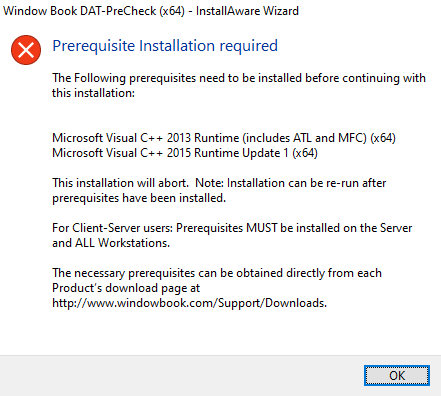
The Window Book InstallAware Wizard will run automatic system checks and confirm all software prerequisites are installed.
If prerequisites have not been installed, a message will appear indicating they have not been installed. Click OK to close out the installer and go to the DPC download page to download and install prerequisite software - https://www.windowbook.com/Support/Downloads/DAT-PreCheck.
-
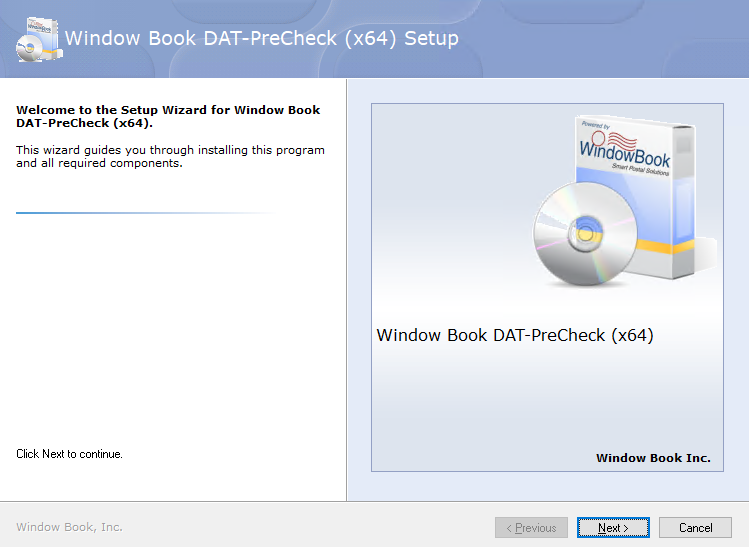
The Welcome to Setup Wizard for Window Book DAT-PreCheck (x64) will appear. Click Next to continue.
-
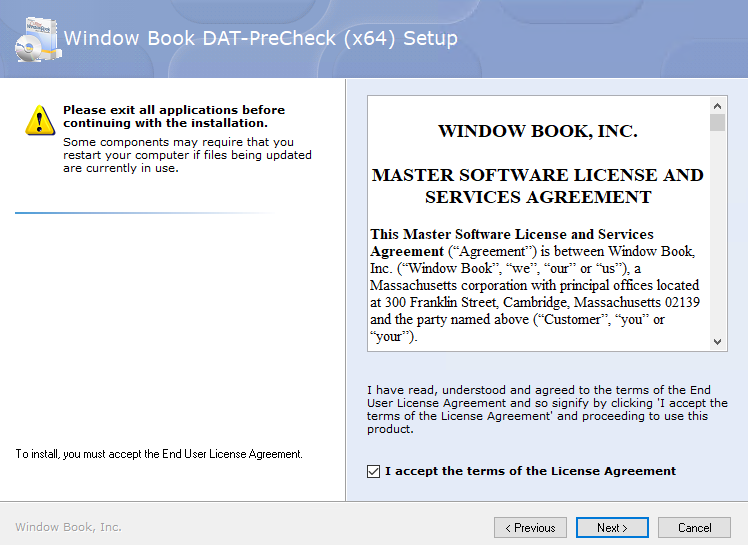
When the Please exit all applicationsscreen appears, select the I accept the terms of the License Agreement checkbox. Click Next to continue.
-
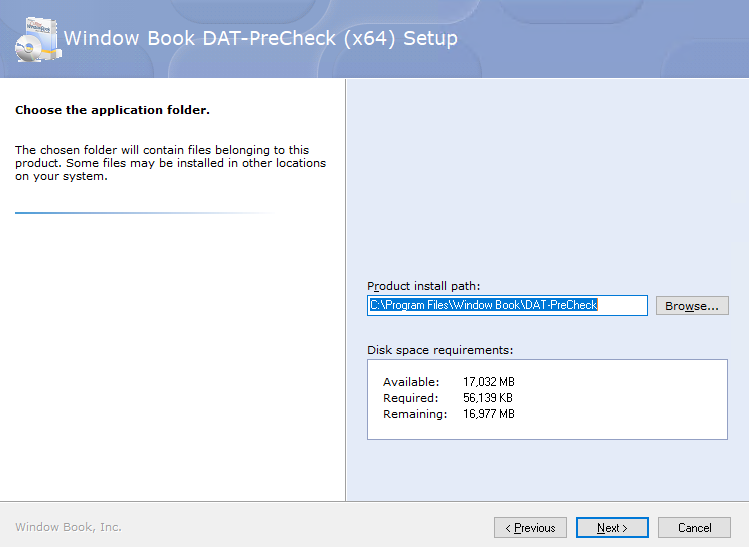
The Choose the application folder screen will display. Click Next.
Window Book strongly recommends using the default provided. However, if installed on a server where program files are on a different drive changing the drive letter to match is okay, but please leave the path structure.
-
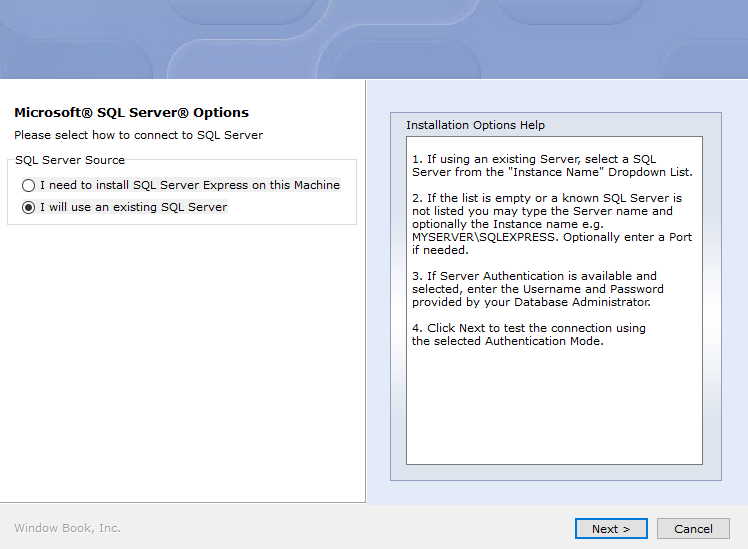
The Microsoft® SQL Server® Options screen it already defaulted to the option you need - I will use an existing SQL Server. Click Next to continue.
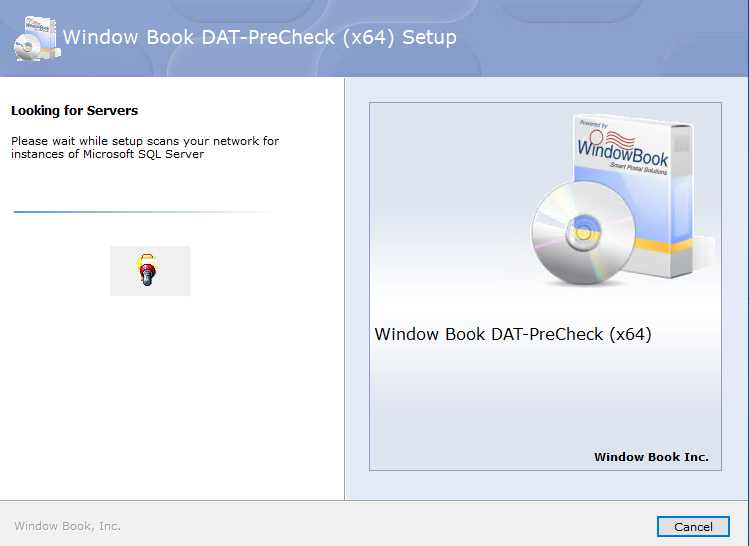
A Looking for Servers screen will display, as it looks for instances of SQL Server on your network.
-
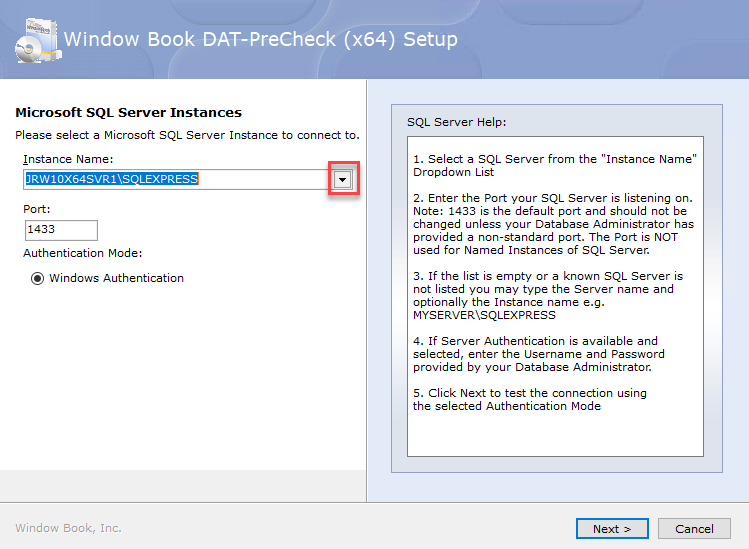
Once it finds a SQL Server, the Microsoft SQL Server Instances screen will appear, click the Instance Name drop-down, select the appropriate SQL Server Instance, and click Next.
-
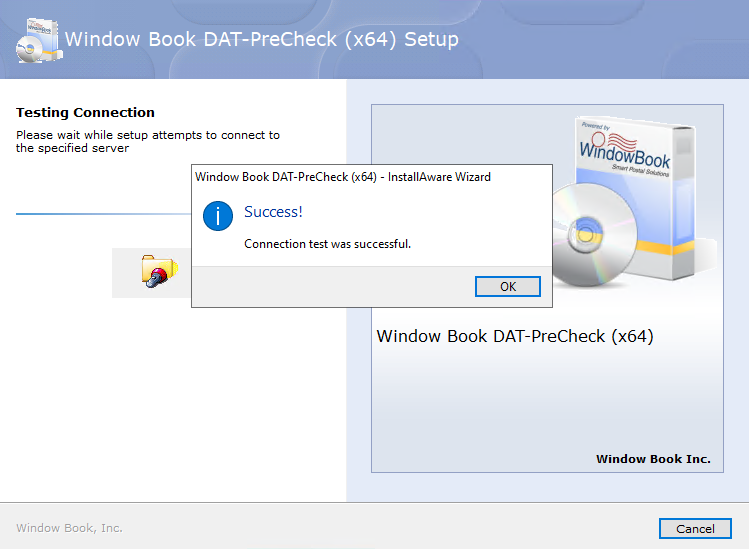
A Testing Connection screen will appear and then a Success dialog will appear. If the connection was successful, click OK to continue.
If the SQL Server Instance does not display in the list, you can type the instance in the field and attempt a connection to it.
-
The Choose the application folder screen will appear; click Next to continue.
Window Book strongly recommends using the default provided. However, if installed on a server where program files are on a different drive changing the drive letter to match is okay, but please leave the path structure.
-
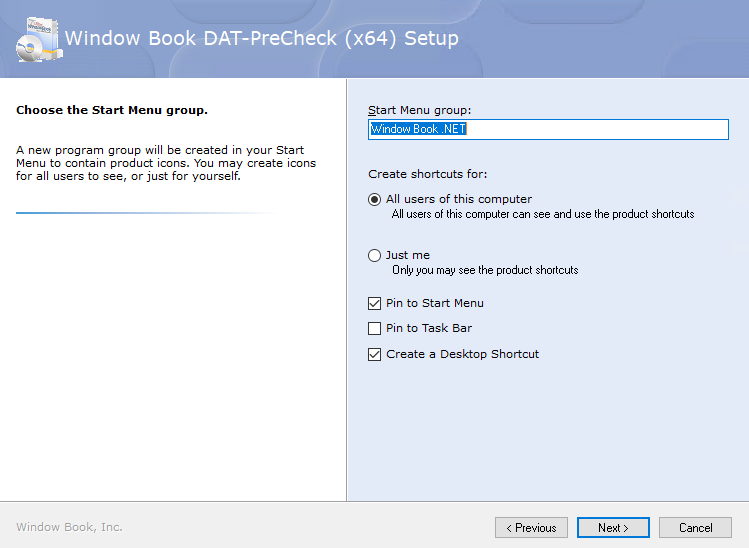
The Choose Start Menu group screen will appear. It has the Start Menu group specified and provides other options to enable (for example, Create a Desktop Shortcut). Leave the Start Menu Group as the default and enable the other options as needed. When ready, click Next to continue.
-
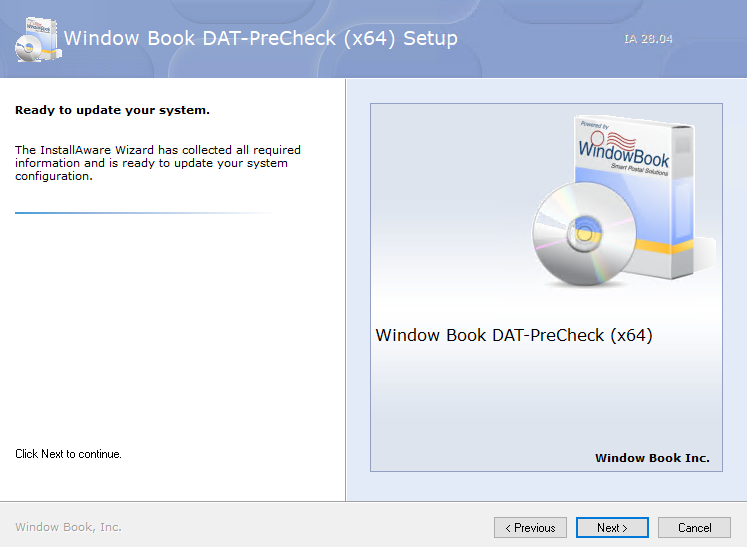
The Ready to update your system screen will appear. Click Next to continue.
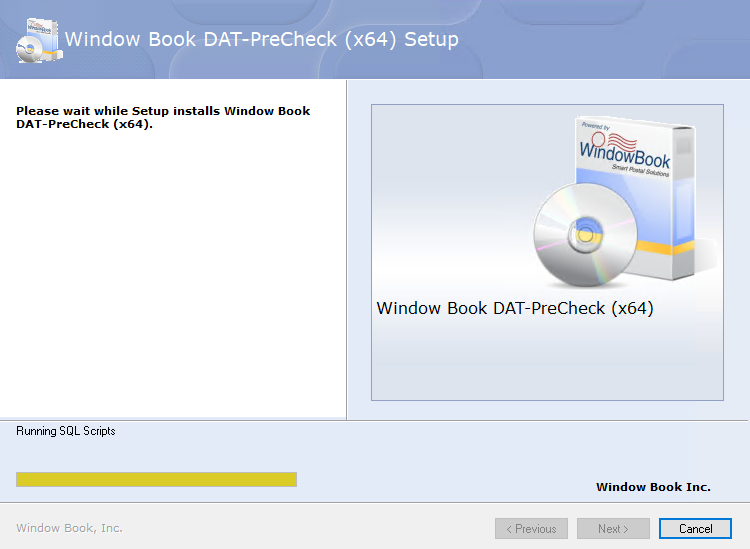
Please wait screen will display, and it will take a few moments to complete the setup.
-
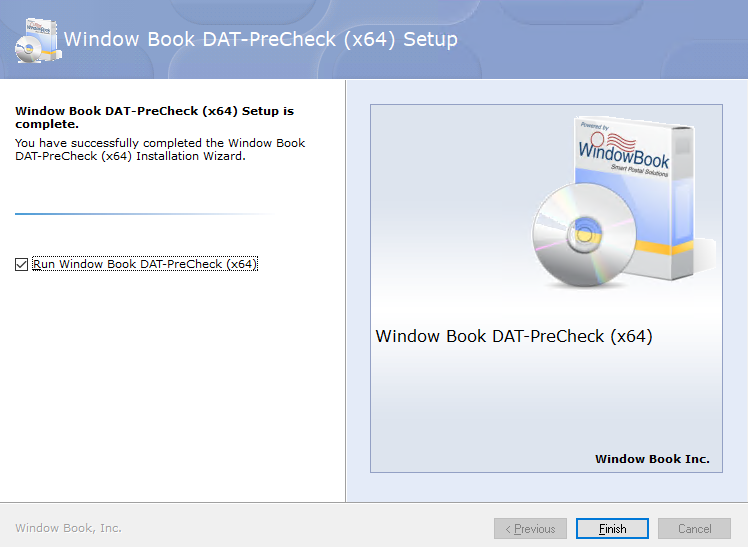
After a few moments, the Window Book DAT-PreCheck (x64) Setup is Complete screen will appear, click Finish.
-
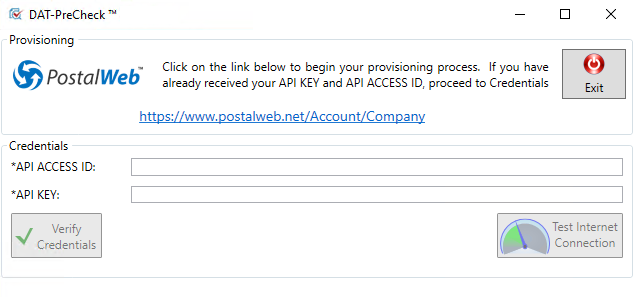
When DPC launches, it will show the Provisioning screen for PostalWeb (PWN). You will need to access your PWN site to retrieve the API Access ID and API Key. You can locate instructions on finding the ID and Key in the PWN for MSP: Step 4 - Provision Your PWN Site in DPC.
Continue Enable the Service