DAT-MAIL Setup to Transfer Data
Setting up DAT-MAIL to transfer data to the Tagger occurs within DAT-MAIL’s Tagger Settings screen. To access the Tagger Settings screen, close all other program functions in DAT-MAIL and then from main menu, select Other Programs > IM Scanning > Tagger Interface Setup.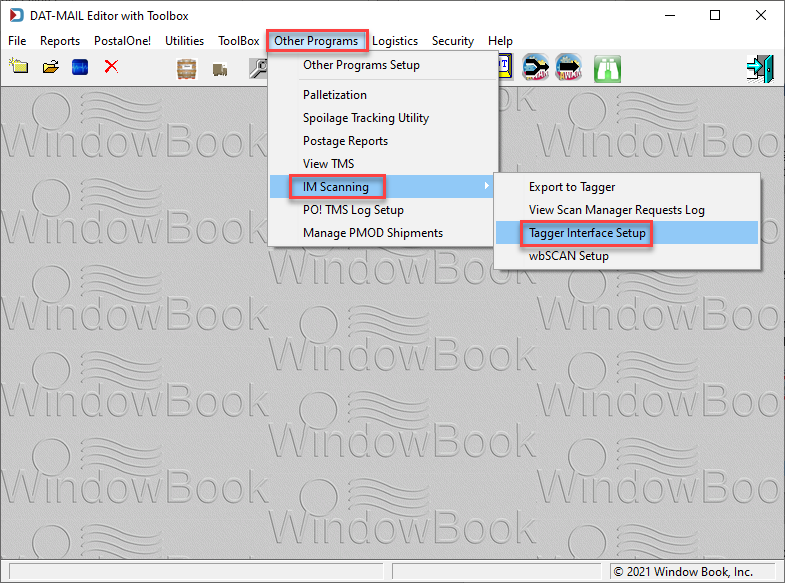
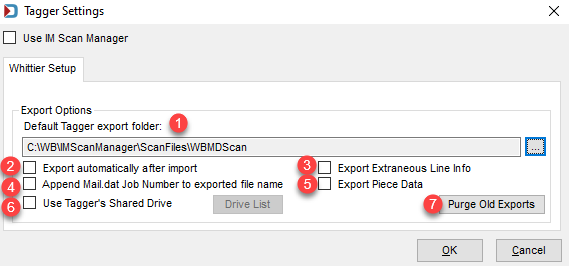
The Tagger Settings screen will display.
Export Options
![]() Default Tagger Export Folder
Default Tagger Export Folder
You can set the default export folder to the UNC folder name used by the network share that the Tagger will be connected to by clicking the field’s corresponding browse. If you are transferring the data to the Tagger using a USB flash drive, insert it then select it as the export folder. You will need to reinsert a USB flash drive before you export files.
![]() Export Automatically After Import
Export Automatically After Import
This feature sends data to the Tagger share automatically after a Mail.dat is imported. To use this feature you must be exporting data to the Tagger via a share.
There are certain situations where you should not check this option:
-
If you change your entry points on drop shipped mailings and print the entry point designation on the Printer Line of your tray tags.
-
If you have multiple Taggers and wish to send data to a specific Tagger. When you export the files manually, you can pick which Tagger to send the data to.
-
If you export your data to USB flash drive.
In the three cases above it is better to export data to the Tagger from either the DAT-MAIL Advanced Navigator screen or by selecting the Export to Tagger menu found via Other Programs > IM Scanning.
![]() Export Extraneous Line Information
Export Extraneous Line Information
DAT-MAIL has the ability to format the Extraneous Line (we refer to as Printer Line) of the tray tag to include data you may want to use in production. This data will appear on tray tags that DAT-MAIL prints. If you enable this feature, it will alter the extraneous data sent to the Tagger so it will print the same information. There are two limitations though: 1) The Printer Line can be no more than 40 characters (a Mail.dat limitation) and you cannot change the font used to print the Printer Line; and 2) The Tagger does not print the “User 2” field in Mail.dat so those settings will not have any affect. Though this information is provided to the Tagger it is not updated back to the original Mail.dat.
If you are already using this feature to configure the Printer Line printed by DAT-MAIL, you may need to confirm that you are not going over 40 characters. If you are not using this feature for tags printed by DAT-MAIL but would like to use it for tags printed by the Tagger, follow these instructions:
-
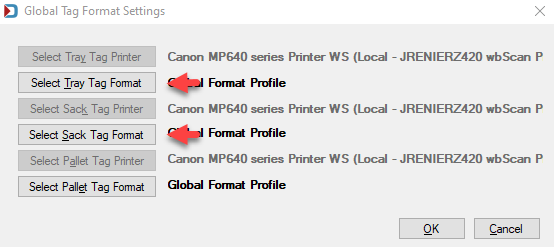
Go to the DAT-MAIL's main menu Utilities > Tray, Sack and Pallet Tag Printing > Tag Setup > under Tag Format Default Settings will be applied to the selected level section of the screen click Browse for the tile shown in blue (which your Administrator would have set when installing DAT-MAIL, if you are printing tags from both the tagger and DAT-MAIL, ask your Administrator to select either the Machine Level or User Level for the default):

-
Click on the tag format you wish to setup - either Select Tray Tag Format or Select Sack Tag Format.
-
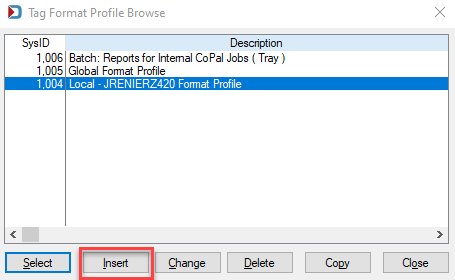
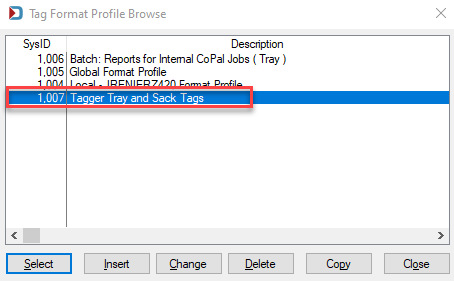
When the Tag Format Profile Browse screen appears, either you can confirm that an existing profile has an Extraneous Line that is less than or equal to 40 characters and Select it for use or create a new one by clicking Insert. For example purposes here, we will assume you are creating a new Tag Format Profile(Insert).
-
When the Record Will Be Added screen appears:
Below the print screen is an explanation:

-
 Give the profile a name.
 -
 Select the media 1up Landscape (Whittier). FYI, your Tag Format profile can be created for both Tray and Sack Tags in the same file if the information need is the same.
 -
 Click on the Tray/Sack tab.
-
-
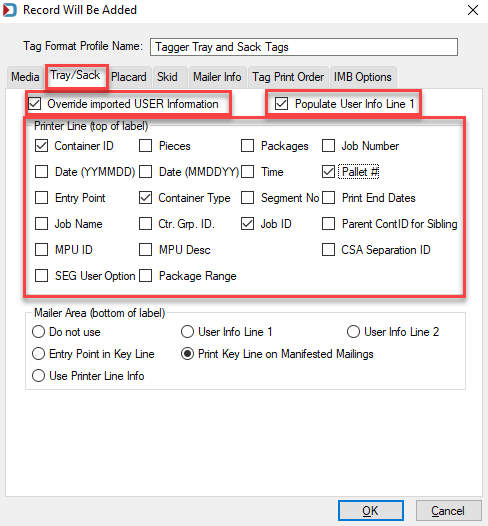
In the Tray/Sack tab, select both the Override imported USER Information and Populate User Info Line 1 checkboxes and the fields to put on the tags:
-
When ready, click OK.
-
It will return you to the Tag Format Profile Browse screen, make sure the new profile is highlighted and click Select.
-
The new Tag Format Profile will appear next to the tag format you selected, if you are using both types of tags and using the same format, click the other tag format and select this same profile. Or repeat the steps above to create (insert) another tag format profile. When ready click OK and OK again, when back at the Tag Setup screen.

Now back to the other Tagger options, not covered above, - ![]() through
through ![]() :
:
![]() Append Mail.dat Job Number to the Exported File Name
Append Mail.dat Job Number to the Exported File Name
When you export a file for use by the Tagger, the file name is going to be the same name used in the Mail.dat that was imported by DAT-MAIL. Window Book strongly recommends that this file name include the Job Number associated with this file. It will make retrieval from the share much easier using the search feature. If you cannot rely on this file name to include the job number, you should enable this feature which will add the job number to the end of the file name all the time. This way you can always find this file by job number.
![]() Export Piece Data
Export Piece Data
If you have a 2D USB scanner, you can reprint missing or damaged tray tags in Full Service jobs by just scanning a mail piece from the tray. To locate a tray based on an IMb scan, the Tagger must have single piece data. Checking this option will provide that data but you must be creating either PBC or PDR single piece files in your Mail.dats.
DAT-MAIL must also not be “parking” these files. To check, click the ‘File’ menu option on DAT-MAIL’s main screen, select ‘Program Settings’ and then ‘Program Setup’. Make sure the “Do Not import Piece Detail File” and “Do Not Import Piece Barcode File” options are UNCHECKED.
![]() Use Tagger’s Shared Drive
Use Tagger’s Shared Drive
When sharing data with the BT-850 over a network, you have a choice of storing this data on a shared drive on your network or the BT-850’s internal file share.
If you prefer to store the data on the BT-850’s internal file share, it does not matter if you have a single Tagger or multiple Taggers. When you select this option you would then press the adjacent Drive List where you can indicate what the mapped drive or UNC path name is for each of the Taggers. This is used for importing data. When DAT-MAIL imports data from the BT-850 it will look in all paths listed for the ‘Logs’ folders that hold the data being sent to DAT-MAIL.
This feature is only necessary if you use the shares located on each Tagger to exchange data with DAT-MAIL. If a network share is used to exchange data, this option does not require setup.
To enable this feature, perform the following:
-
From the Tagger Settings screen, select the option to ‘Use Tagger’s Shared Drive’;
-
Click Drive List.
-
The Browse Tagger’s Shared Drive screen will display. Click Insert to add a new Tagger.
-
The Record will be Added screen will display. Type a description for the Tagger share and then type in or browse for the Share UNC path by clicking Browse.
-
Locate the network share and select it. Click OK.
-
The added share and its UNC path will be displayed. Click OK.
-
The Browse Tagger’s Share Drive screen will display and will contain the newly added share.
Perform this procedure for as many Taggers as necessary. This particular example only uses one Tagger share.
![]() Purge Old Exports
Purge Old Exports
Used to remove old Tagger files, see File Maintenance for more information.
Importing
Window Book does not support the manual importing of scan files. Importing scan files is now accomplished through an automated process using the Automation Scheduler’s IM Scan Manager plug-in.
The IM Scan Manager plug-in will update all Tagger log data into an MS-SQL database that will be updated to Mail.dats when users generate statements for those jobs. The statement generation in DAT-MAIL is what creates “Ready-to-Pay” releases for PostalOne! and these submissions represent the “end state” of those trays that are part of the statement. PostalOne! allows no further changes once it receives the ready-to-pay update.
In addition, Mailers can configure the plug-in to send email or text message notifications every time the plug-in either successfully or unsuccessfully performs an import of BT-850 data.
The Automation Scheduler does not tie up a workstation license which means you can do automated processing of Tagger logs even on a single user version of DAT-MAIL.
The setup of a default import folder for Tagger; as well as the archive folder for imported logs is done in the plug-in’s Scan File Import screen.
In order to use the IM Scan Manager for importing, select the Use IM Scan Manager checkbox on the Tagger Settings screen in DAT-MAIL.
Setup instructions for the Automation Scheduler’s IM Scan Manager plug-in are provided on the following page - Scheduler Setup to Transfer Data.
Split Trays
DAT-MAIL automatically splits trays into two so that DSMS and Tray Based copalletization programs can include those trays.
Continue Scheduler Setup to Transfer Data