TDM Website - Go to Quotes
The instructions provided on this page assume you already have an account registered with TDM.
Clients with existing Truck Direct Mail accounts should use their current accounts when logging into the wb.truckdirectmail URL from DAT-MAIL. A secondary Window Book/TDM account should not be created.
-
When Go to Quote is clicked, a web browser will launch. If a user is not already logged into TDM, the TDM Sign-in page will display. Sign in by entering the appropriate Username and Password, and click Sign In.
DAT-MAIL users must sign in using the Window Book/TDM URL ( https://wb.truckdirectmail.com).

-
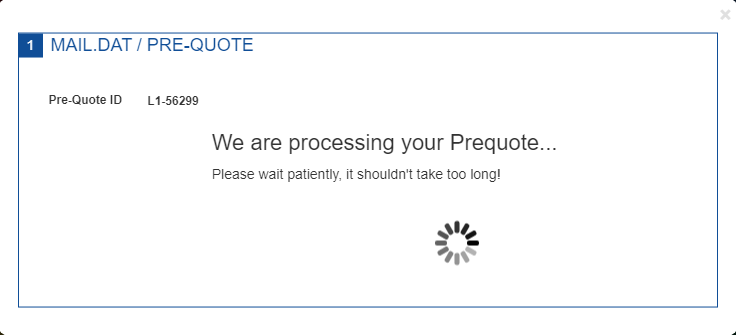
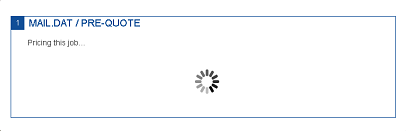
When successfully logged in, a Mail.dat/PRE-QUOTE page will display while the pre-quote is processed.
If you are already signed into TDM, the Mail.dat/PRE-QUOTE page will automatically display when you click GO TO QUOTE in DAT-MAIL.
The first in a series of Mail.dat/PRE-QUOTE screens specific to the selected pre-quote will display when the processing completes. Information on these screens comes from the Mail.dat or the default settings entered in your TDM account profile. You can edit fields before the quote becomes an actual shipment. You are required to confirm or edit the details on each screen before continuing.
-
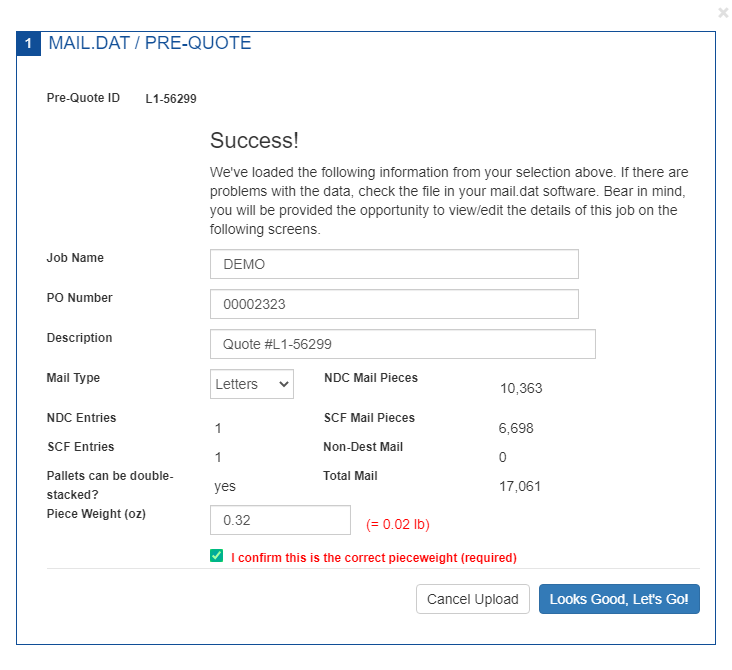
The first screen to display is the Success! screen. You can change the Job Name or PO Number for the job. Next, confirm the remainder of the information shown is correct. Finally, select the I confirm this is the correct piece weight (required) checkbox. When finished, click Looks Good, Let’s Go! to continue.
Looks Good, Let’s Go! will not be enabled until the Piece Weight is confirmed.
If Cancel Upload is clicked, no indication is provided on the screen that the cancellation is occurring. Instead, you will be redirected to the TDM home page when the cancellation is complete.
-
The Mail.dat/PRE-QUOTE – Pickup Details and Delivery Planning screen will display. When finished updating, click Looks Good, Let’s Price It! to price the job for the selected pre-quote.
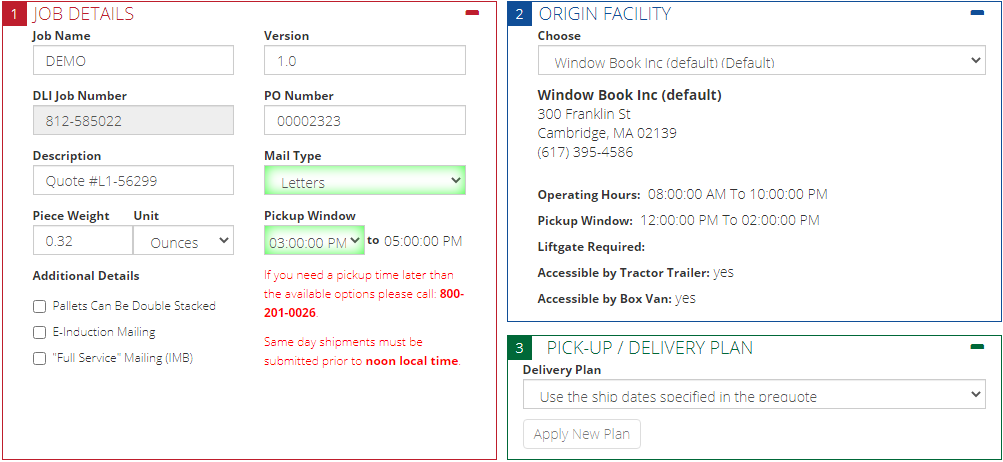
Confirm that the correct Origin Facility is selected. TDM will default to the origin default facility specified in your TDM account profile. You can use the drop-down to choose a different facility. If the desired origin facility is not listed, you will need to add it to your TDM account profile.
The options for Vehicle Access are also in your TDM account profile and be edited in your account profile for your origin facilities.
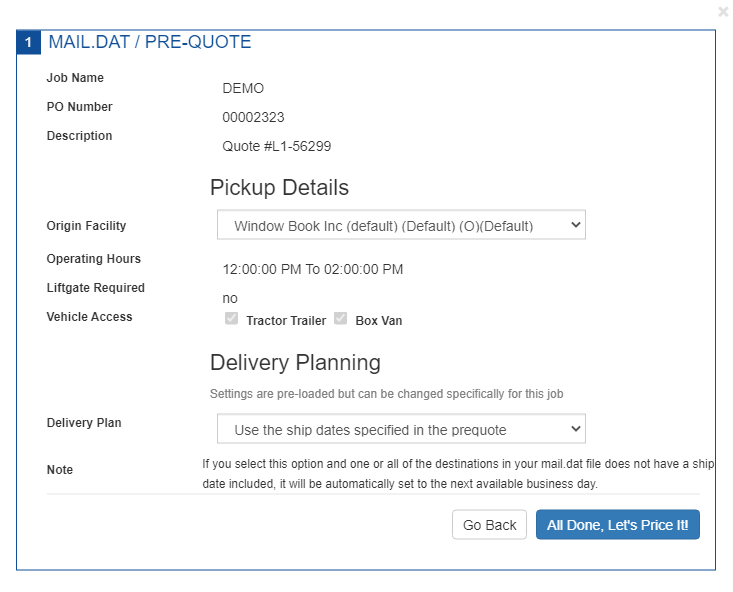
The Delivery Planning option is determined by what is in your TDM account profile. You can change this by clicking the drop-down list and selecting another option. For more information on Delivery Planning, see Delivery Plan Options.
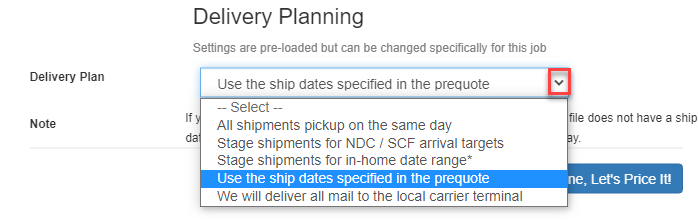
Depending on what option is selected, additional date fields may display that will require input.
A processing screen will display while it prices the job.
-
When pricing finishes, an Edit Existing Job page will display.
The Edit Existing Job screen consists of six sections:
1 JOB DETAILS
2 ORIGIN FACILITY
3 PICK-UP/DELIVERY PLAN
4 ENTER THE DESTINATION POINTS
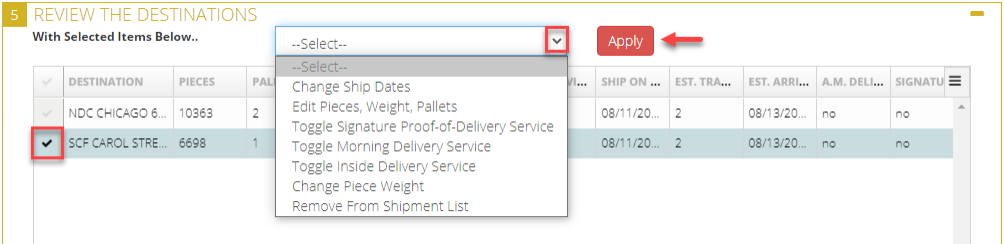
5 REVIEW THE DESTINATIONS
6 CONFIRM THE JOB FOR SHIPMENT
Except for the DLI Job Number field, you can change information in these sections.
The destinations are in section 5. You can edit specific details about any or all of the entry points or remove a facility from the shipment list. Click on a point’s line item to highlight it and select an option from the drop-down list. After you make a change, click Apply.
If a user wishes to add a destination point, they can do so in section 4 by satisfying the required fields, selecting the I confirm this is the correct piece weight (required) checkbox, and clicking ADD DROP.
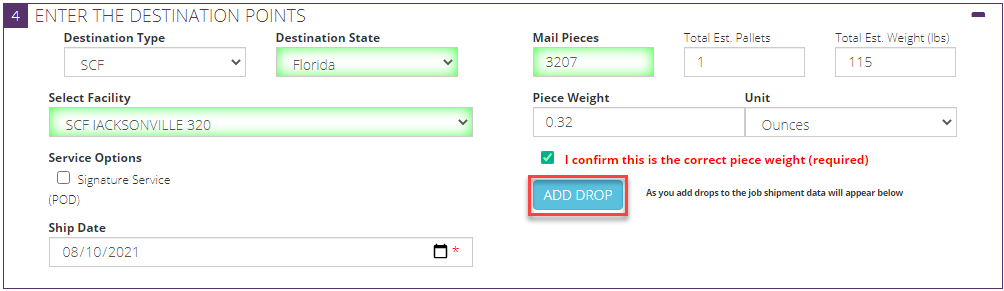
The screen will update, and the newly entered destination point or drop will display in the destination list (in section 5), and a confirmation message will display.

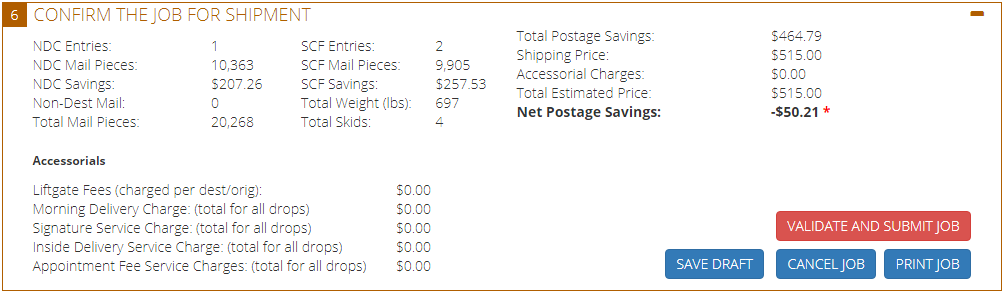
Section 6 displays the details of the job as far as number and type of entry points, total mail pieces, weight, skids, entry type savings, postage savings, shipping price, any accessorial charges, and the total estimated price along with the net postage savings.
-
At this point, the user has four options:
-
The job can be saved but not submitted by clicking SAFE DRAFT; you will be redirected to the TDM home screen.
-
The job can be canceled (not deleted) by clicking CANCEL JOB; you will be redirected to the TDM home screen
-
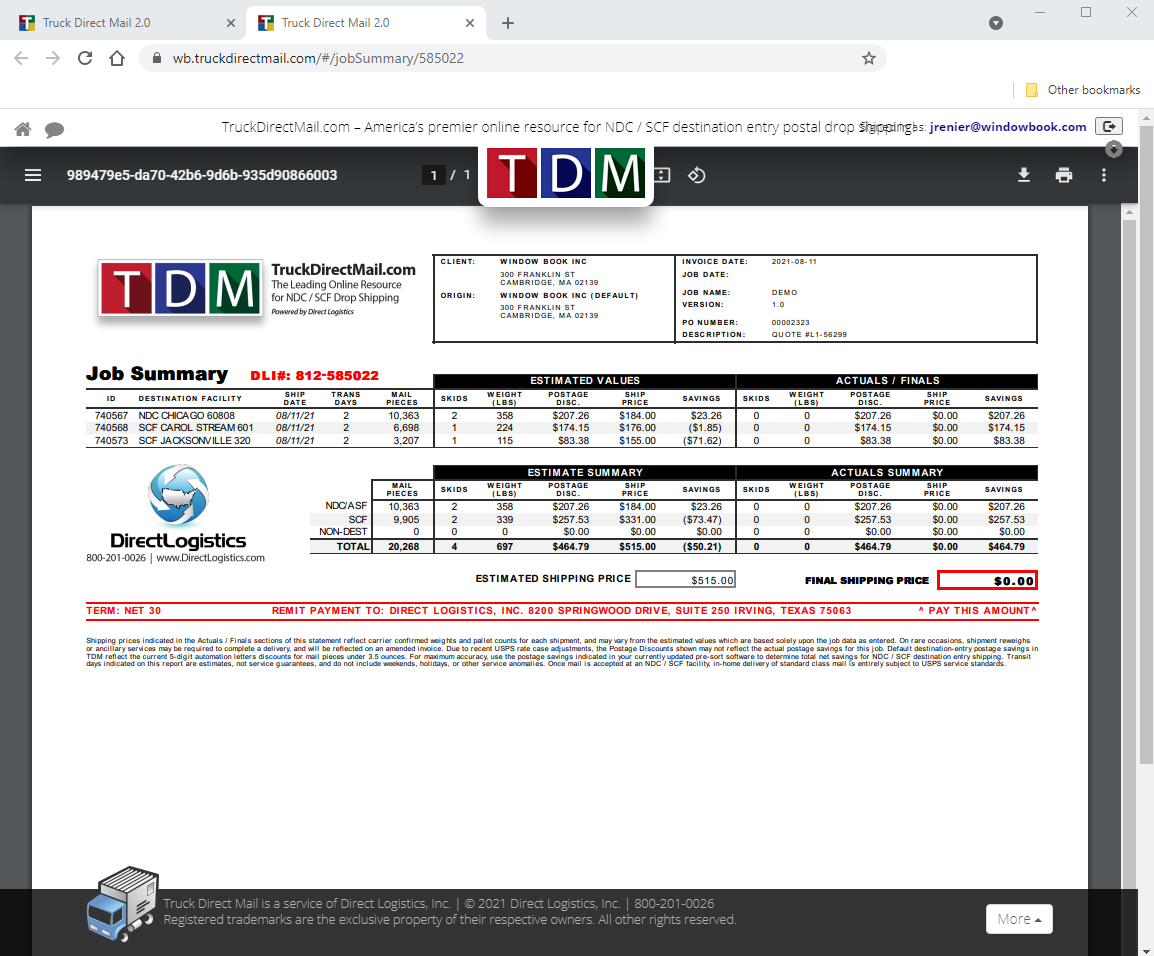
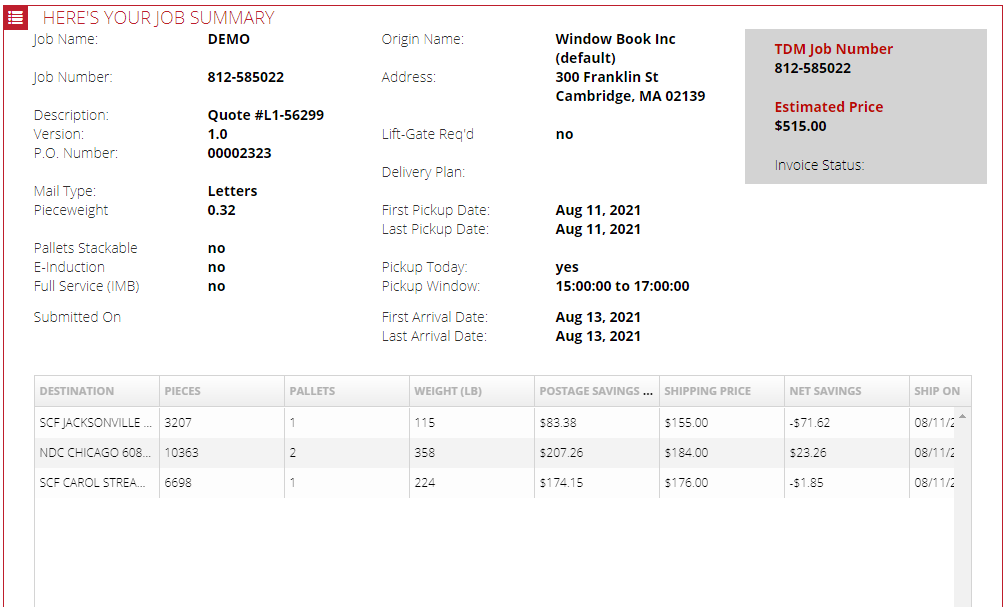
The job can be printed by clicking PRINT JOB. In addition, a Job Summary document will display in the browser that can be printed.
-
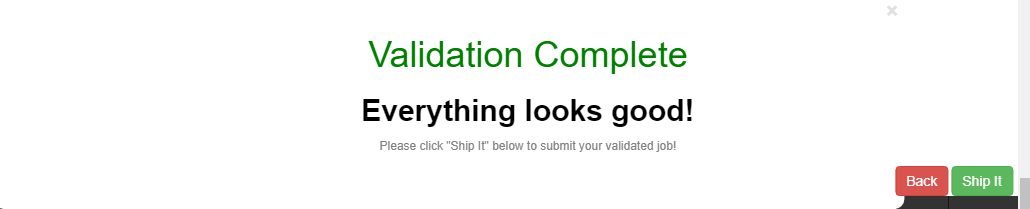
The user can submit the job by clicking VALIDATE AND SUBMIT JOB. Then, TDM runs a quick validation to confirm that there are no problems with the job setup.
TDM will also notify the user if any issues could affect the shipment, such as the re-direction to different facilities. At that point, you can cancel the shipment or click Accept and continue with the load.
-
-
When the validation completes successfully, a confirmation will display. Click SHIP IT to schedule the shipment.
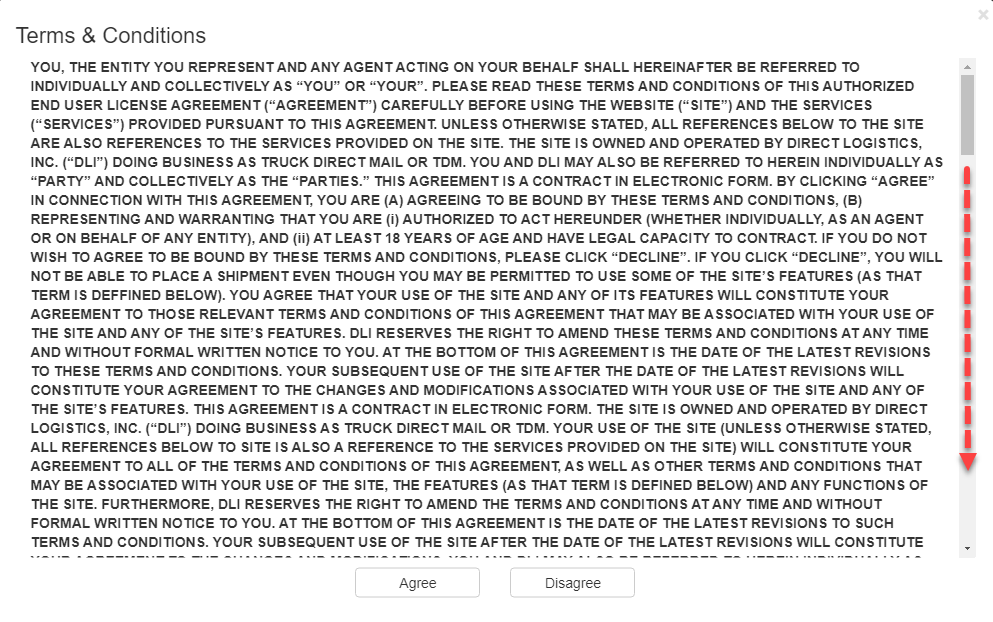
TDM requires you to agree to the Terms & Conditions before the shipment is complete. To agree, click Agree.
-
The screen will update, and the final Job Summary page will display. The job is scheduled for shipment.
To learn more about the services and functionality TDM offers, including information on bills of lading and other shipping-related documentation, refer to the “Online Resouces” option found under ACCESS INFORMATION on TDM’s website (https://wb.truckdirectmail.com/#/resources). Login is required.
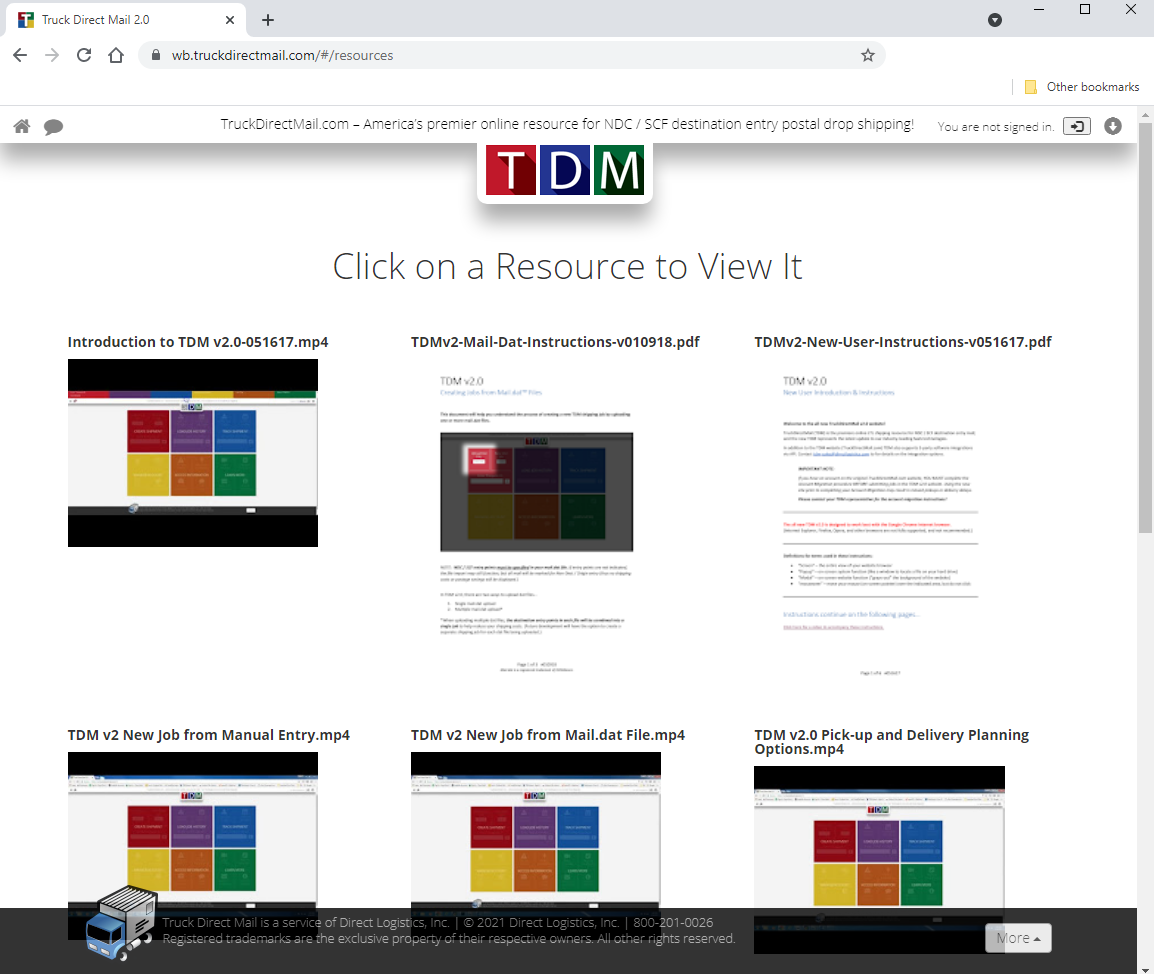
It can also be accessed from the home page, under ACCESS INFORMATION.

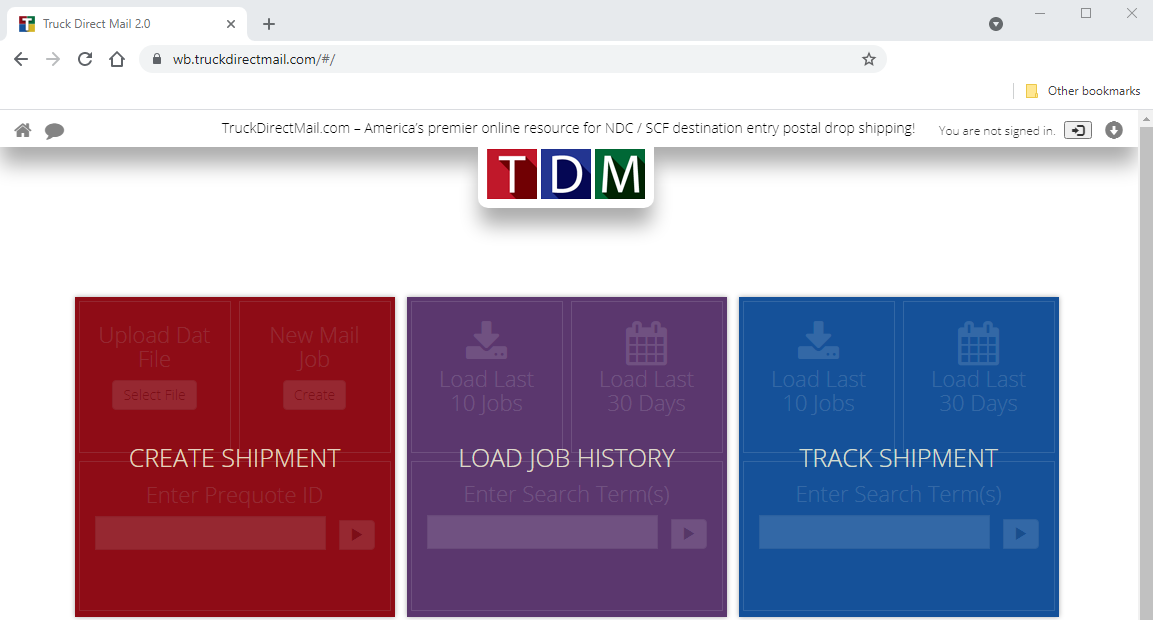
For information on managing your job history in TDM, see LOAD JOB HISTORY or TRACK SHIPMENTS from the home page.
Continue TDM - Manage Quotes