Other Programs > Manage PMOD Shipments - Create Shipments Manually
-
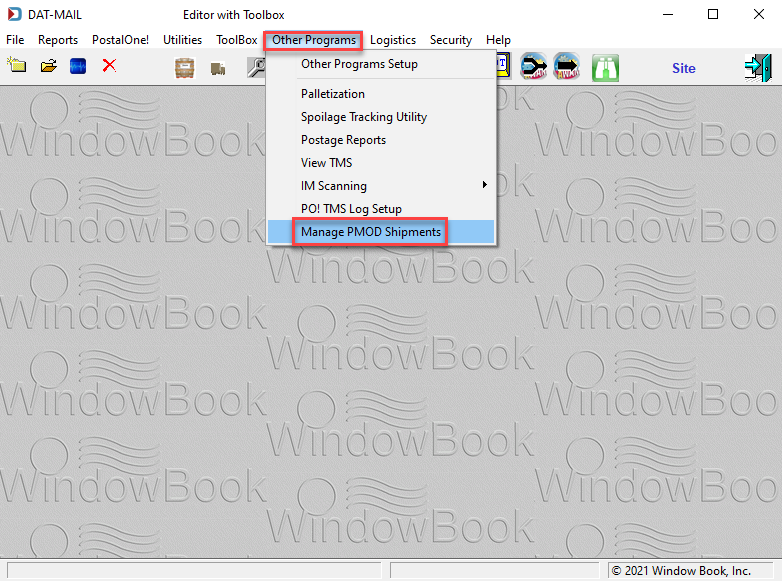
To create shipments manually (not from a Mail.dat), select Other Programs > Manage PMOD Shipments from DAT-MAIL’s main menu.
-
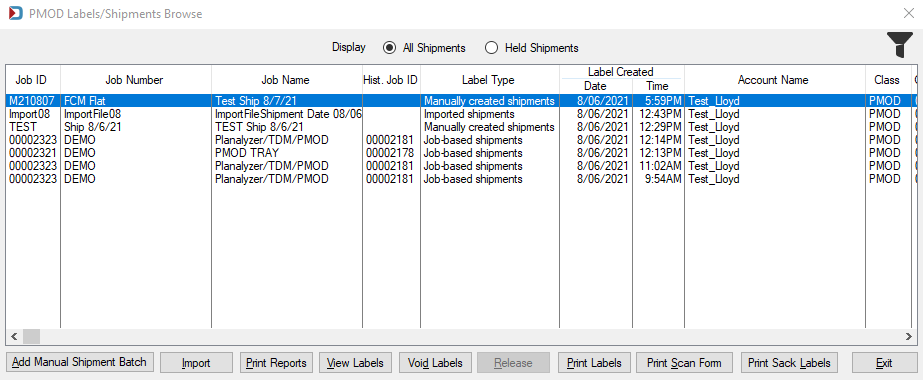
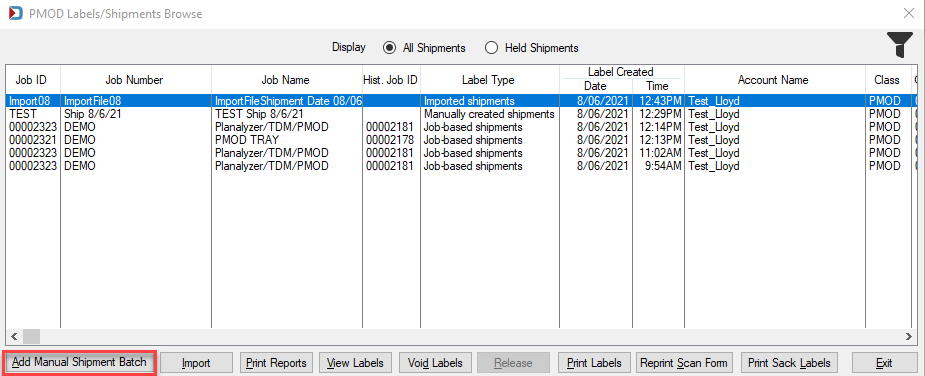
The PMOD Labels/Shipments Browse screen will display. Click Add Manual Shipment Batch.
-
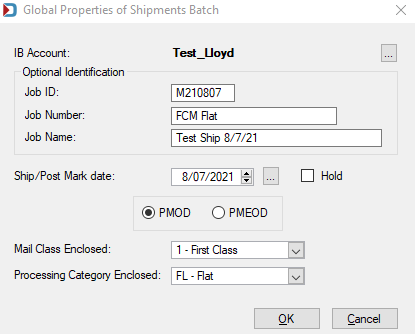
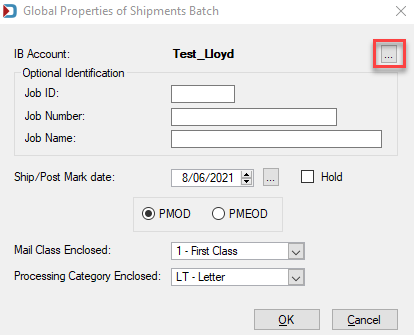
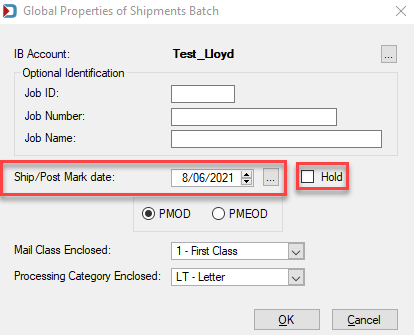
The Global Properties of Shipments Batch screen will display. Select the IB Account to use for this shipment.
-
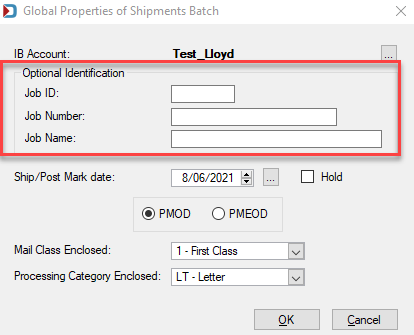
Populate Optional Identification, if helpful.
-
Specify a Ship/Post Mark date if different than today’s date. Or you can put the label on hold for 14 days. The PMOD label will not have a postmark date to allow you to ship at a later date.
When you set a different postmark date or put a label on hold (using ePostage), you are still purchasing the label when you create the label.
-
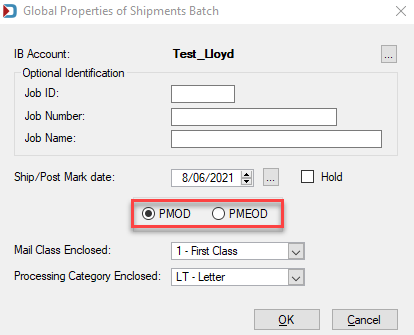
Select whether the batch shipment is supposed to be PMOD or PMEOD.
-
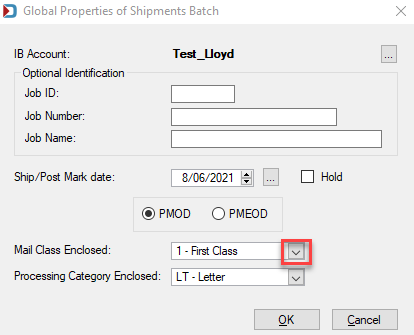
Select a mail class for the batch shipment from the drop-down list.
-
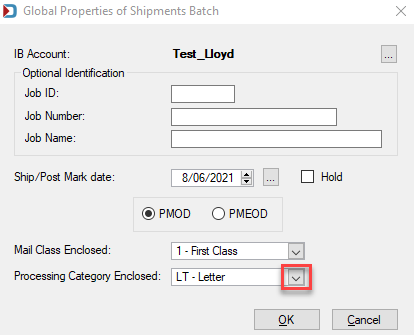
Select a processing category for the batch shipment from the drop-down list.
-
Click OK when finished.
-
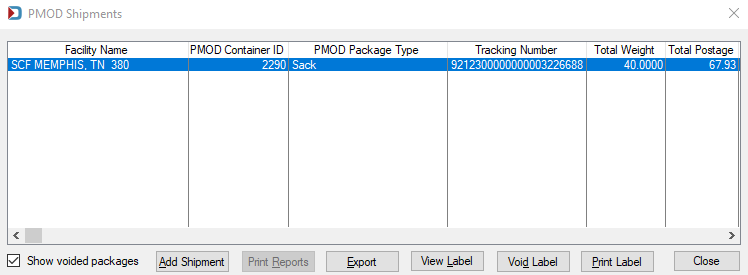
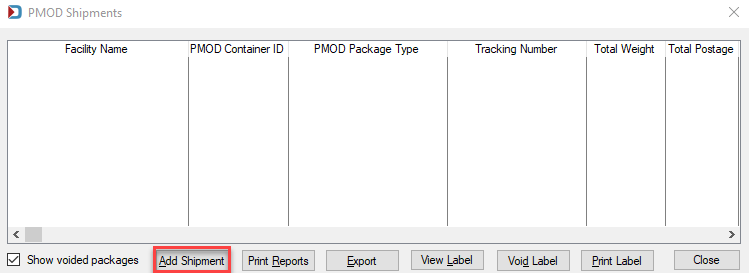
The PMOD Shipment screen will display. This screen will list individual shipments in the batch. Click the Add Shipment button.
-
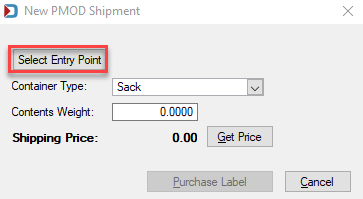
The New PMOD Shipment screen will display. Click the Select Entry Point button.
-
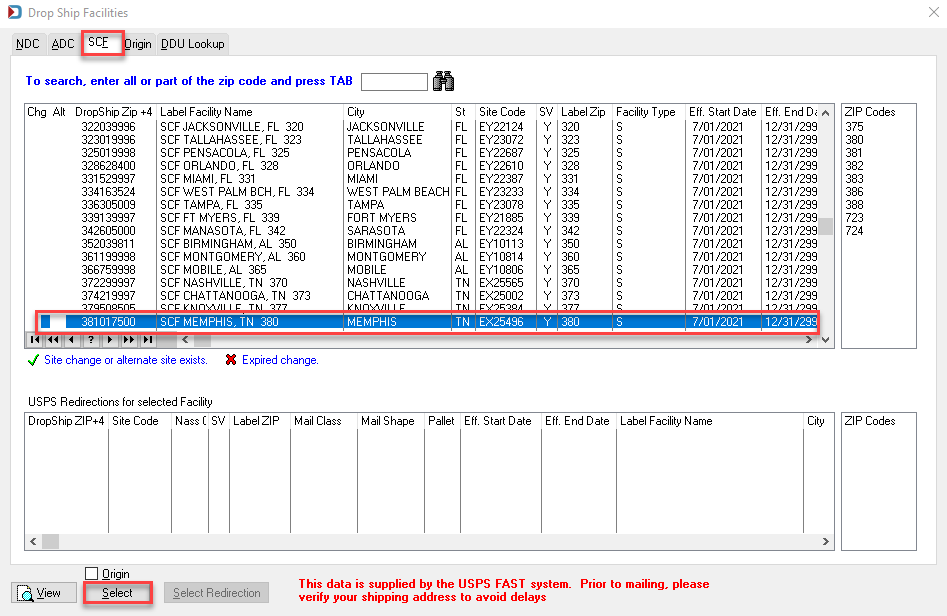
The Drop Ship Facilities screen will display. First, select the appropriate drop ship facility type using the tabs along the top of the screen. Then, from the corresponding list, highlight the facility name and click Select.
-
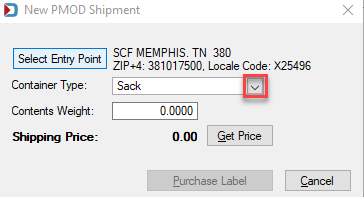
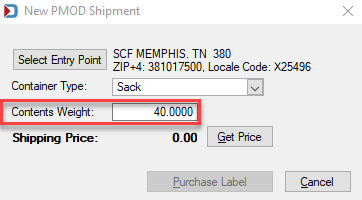
In the New PMOD Shipment screen, select a Container Type from the drop-down list.
-
Enter the Contents Weight of the shipment.
-
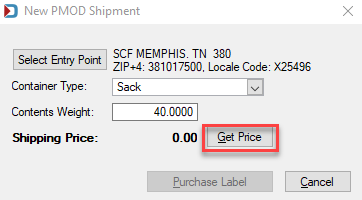
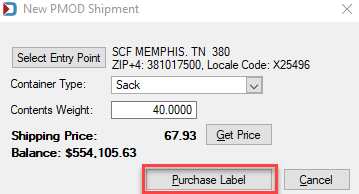
Click Get Price. In a few seconds, the screen will update to display a Shipping Price. Also, the balance of the Window Book/International Bridge Account displays.
-
When ready, click Purchase and Print Label.
-
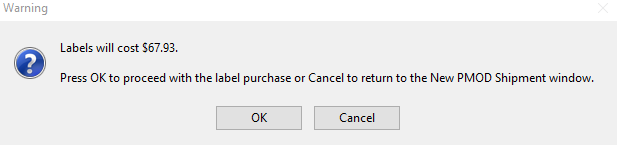
A Warning dialog will display confirming the purchase and the purchase amount. Click OK button to close the dialog.
-
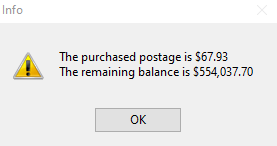
An Info dialog will display confirming the purchased postage and the remaining balance in the account you used.
-
The PMOD Shipments window will appear, where you can add more shipments. Click Close when finished.
-
The PMOD Labels/Shipments Browse will display, and your new shipment will show on the top of the list.
-
For manually created shipments, you can add trays, sacks, or tubs to your PMOD sack. See Other Programs > Manage PMOD Shipments - Managing All Types of PMOD Shipments - Add Trays, Sacks, or Tubs for more information.
Information About Contents Weight: The weight of the PMOD sacks includes the weight of the trays’ or sacks’ pieces, plus the tare weight of the trays, sacks, or tubs used. You are not charged for the weight of the PMOD sack.
Sacks cannot exceed 70lbs.
Continue Managing All PMOD Shipments
See also