Other Programs > Manage PMOD Shipments - Create Shipments From Imported File
Shipments can be created by importing a file containing shipment data. The file must be a fixed format file, and the fields must be in the correct positions (refer to PMOD - Import File Layout for the file layout definition/design).
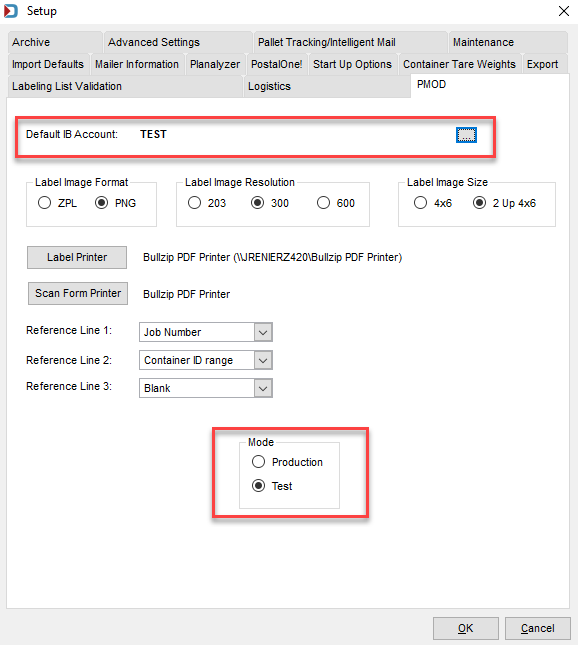
In addition, be aware that labels are automatically purchased when a file is imported using this feature. If you have set a default IB Account, labels will be charged to this, so if using a different payment account, you must set it before the import occurs (refer to Setup - PMOD Tab - Provider Registration (Required) for instructions).
Also, if it is your first time shipping a live job, set the Mode to Production in the PMOD tab.
You can use the Test Mode to create shipments with an import file.

To create shipments using the Import function and purchase labels, perform the following:
-
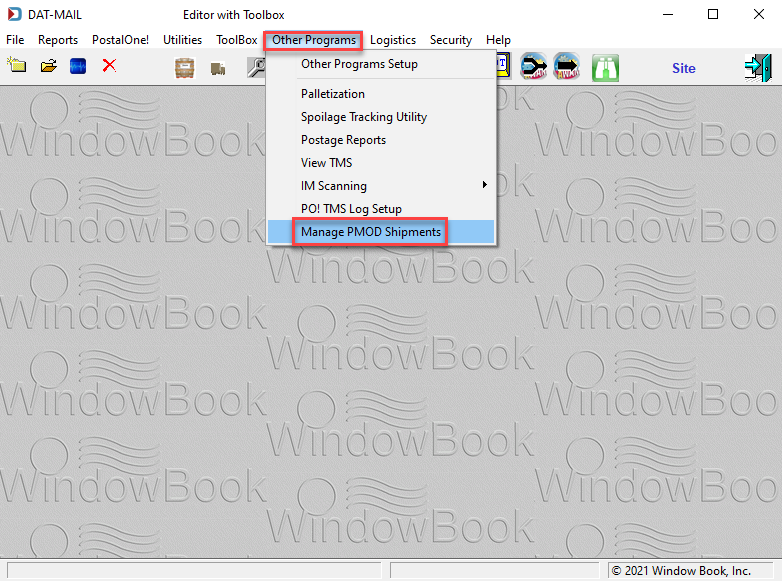
From the DAT-MAIL main menu, select Other Programs > Manage PMOD Shipments menu options.

-
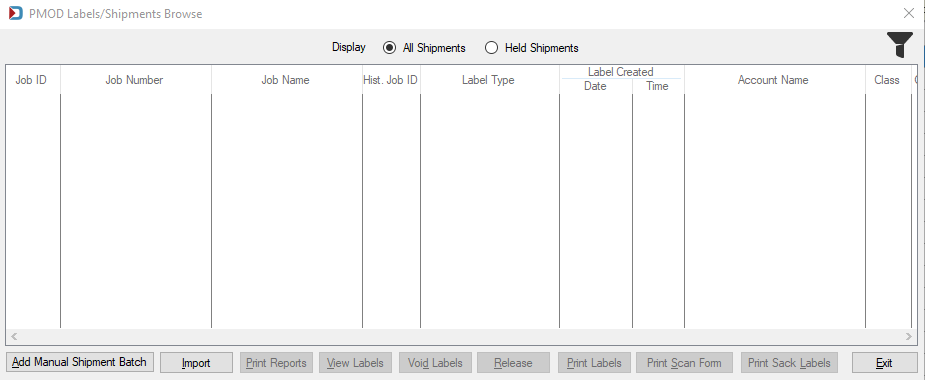
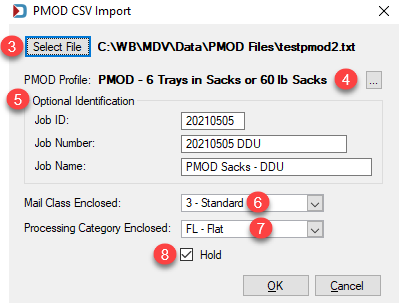
The PMOD Labels/Shipments Browse screen will display. Next, click Import to display the PMOD CSV Import window and continue with the steps below.

Below the print screen is an explanation:

-
 Click Select File and select the fixed format text file to import.
 -
 Using the corresponding Browse, select the PMOD Profile to be applied to the shipment data in the file during the import.
 -
 In the Optional Identification section of the window, populate fields (if preferred).
 -
 Using the drop-down list, select the Mail Class Enclosed.
 -
 Using the drop-down list, select the Processing Category Enclosed.
 -
 If you want to put the shipment on hold and release later, select the Hold checkbox. When ready, click OK.
The postmark date is set in the Import File.
-
If the hold was not select or using ePostage for payment on a hold, the purchase is complete, now labels can be viewed, printed or voided. Sack labels and reports can be printed.
Continue Other Programs > Manage PMOD Shipments - Managing All Types of PMOD Shipments