Using the Import Wizard - Screen 1
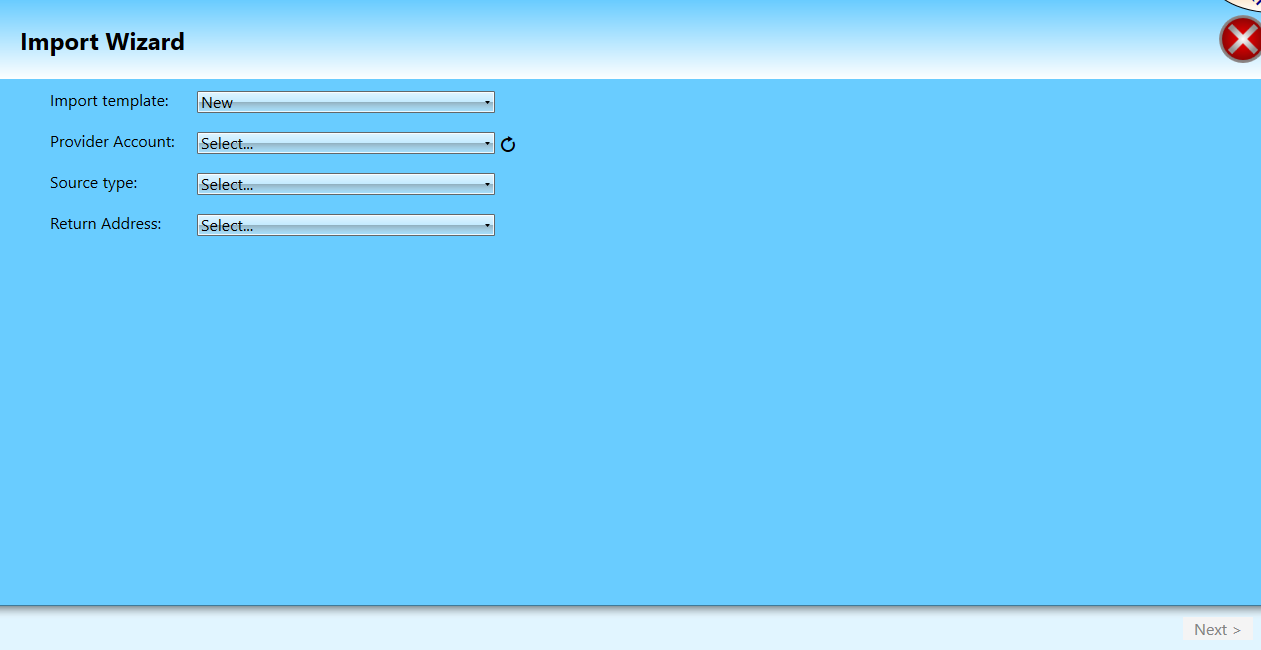
The first screen of the Import Wizard contains four fields with drop-down menus Import Template, Carrier Account, Source Type, and Return Address. The screen will refresh and display additional fields requiring attention, depending on the selections made.

-
Import Template: This is available to select an existing import template from the drop-down list. If creating a new template, leave New. Note that starting from scratch does not automatically save the settings that are about to be defined as a template. Saving the defined settings as a template for future use is an option on Screen 3.
-
Provider Account: Select a Provider Account from the drop-down list of available accounts.
Provider Accounts are added to the system in Settings > Required Settings > Provider Accounts). If you add a new Provider Account to the system while creating an Import Wizard, it may not display in the drop-down list. Click
 Refresh to update the contents of the displayed list.
 -
Source Type: Select the source type of the data to be imported. The options are Delimited, Excel, ODBC Data Source, and Fixed file.
-
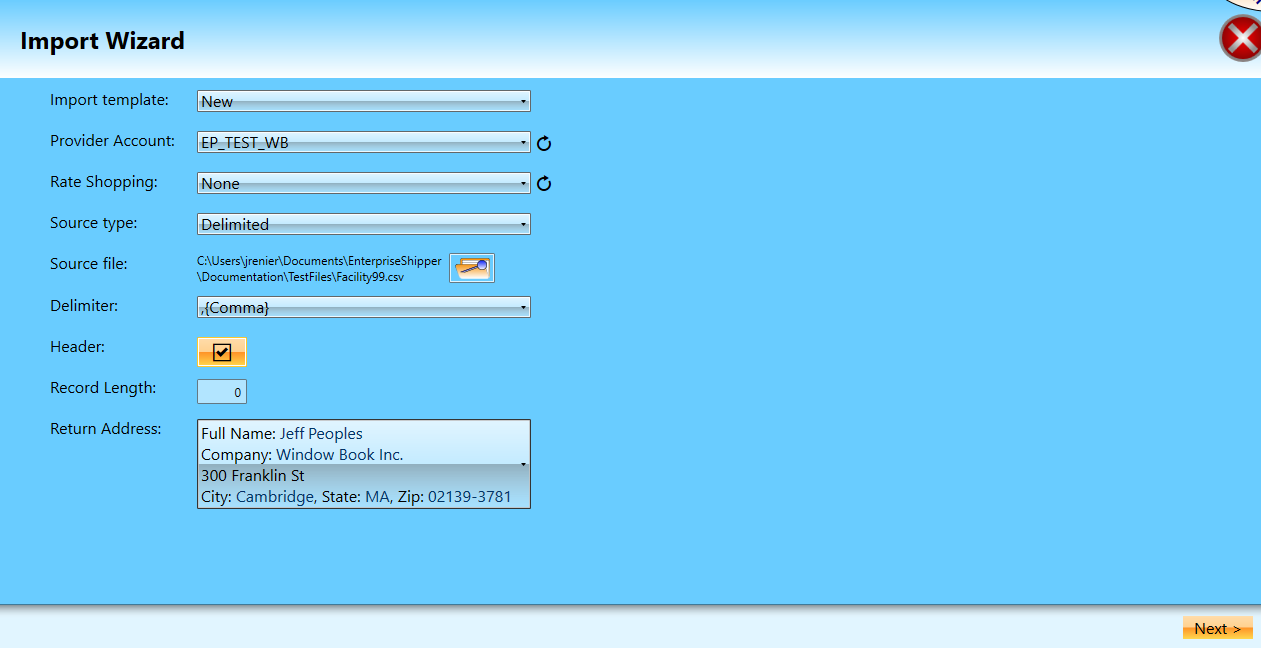
Delimited: If selecting this option as the Source Type, the screen will update, and three more fields display: Source file, Delimiter, and Header.
-
Source file: Click the folder search button to navigate and select the source file containing the data.
-
Delimiter: Using the drop-down, select the delimiter to be applied to the file. The options are Comma, Tab, Pipe, and Semi-Colon.
-
Header: Select the Header checkbox if the selected source or data file contains a header row.
-
Return Address: Using the drop-down provided, select a return address to be applied to the package labels created from the data. The address can be changed on a per package/label basis after the fact, if necessary.
-
-
-
Excel: If selecting this option as the Source Type, the screen will update, and three more fields display Source file, Header, and Return Address. The steps are the same as a Delimited source type.
Completed Screen - Next is Enabled to Proceed 
For demonstration purposes, instructions for importing data from an external file data source are here. Creating a template and establishing a connection to an ODBC data source is in Using an ODBC Data Source.
-
ODBC Data Source: If selecting this option as the Source Type, the screen will update, and three more fields will display Data Source, Credentials, Wizard Query, Data Table, and Return Address.
-
Data Source: Using the drop-down provided, select one option dBase file, Excel file, or MS Access Database. If the source is not listed, set it up in the ODBC Data Source (64-bit) application.
-
Credentials: When the selected Data Source is not on the same machine as ES, you may need to enter user credentials to access the source. When the Credential checkbox is selected, a Prompt dialog will display. Enter the User Name and Password for accessing the source.
-
Wizard Query: Allows you to query all or a specific set of data from a table.
-
Data Table: The table that you will query for data. Using the drop-down provided, select the table containing the desired data.
-
Return Address: Using the drop-down provided, select a return address to be applied to the package labels created from the data. The address can be changed on a per package/label basis after the fact, if necessary.
-
-
Fixed File: A Source Type of fixed refers to an ASCII file that uses a columnar format because the data is in columns that use a standard form; field delimiters are unnecessary. If selecting this option as the Source Type, the screen will update, and four more fields display Source file, Delimiter, Header, and Record Length.
-
Source file: Click the folder search button to navigate to and select the source file containing the data.
-
Delimiter: Since the supported ASCII file format is columnar, this field will be disabled.
-
Header: Select the Header checkbox if the selected source or data file contains a header row.
-
Record Length: Since the supported ASCII file format is columnar, the value enter for Record Length should correspond with the number of characters in a row/record.
-
Return Address: Using the drop-down provided, select a return address to be applied to the package labels created from the data. The address can be changed on a per package/label basis after the fact, if necessary.
-
-
If not using a flat-file, when ready, click Next to proceed to - Using the Import Wizard - Screen 2.
When ready, if it is a flat-file, click Next to proceed to a file layout screen.
Continue Using the Import Wizard - Screen 1 - Define Fixed File Field Layout.