Using an ODBC Data Source
Enterprise Shipper (ES) Import Wizard can point to or use multiple ODBC data tables, which supports accessing package data from external sources.
Using an ODBC data source supplants the need to import data into the system (although users can import it if they prefer). Once a connection to a data source via ODBC is established, users can then use up to three search options in the Create Package screen for identifying the desired data to create a shipment or package: Reference No, Invoice No, and Order No.
The typical ODBC connection uses a 32-bit platform. However, in ES, we recommend creating a new 64-bit DSN connection. For assistance, please get in touch with WBI Support.
Once you create an Import Template or Templates to connect to an ODBC data source or sources, additional setup options must occur before searching the data for creating packages. Refer to Settings > Optional Settings > ODBC Connect Settings for more information.
Import Wizard - Screen 1
-
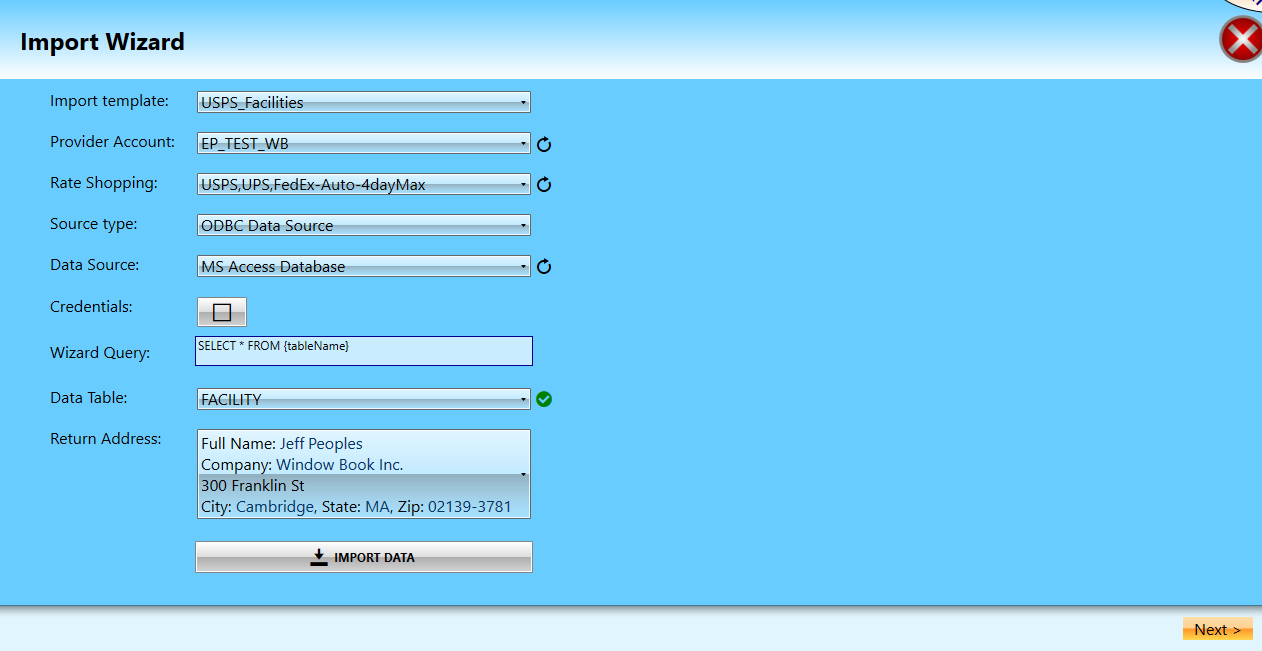
In the Import Wizard, select ODBC Data Source as the Source Type.
The screen will update, and three more fields will display Data Source, Credentials, Wizard Query, Data Table, and Return Address.
-
Data Source: Using the drop-down provided, select one option dBase file, Excel file, or MS Access Database.
If the source is not listed, set it up in the ODBC Data Source (64-bit) application.
-
Credentials (optional): When the selected Data Source is not on the same machine as ES, you may need to enter user credentials to access the source. When the Credential checkbox is selected, a Prompt dialog will display. Enter the User Name and Password for accessing the source.
-
Wizard Query (optional): Allows you to query all or a specific set of data from a table.
-
Data Table: The table that you will query for data. Using the drop-down provided, select the table containing the desired data.
If you see an
 X next to the Data Table field, an ODBC connection is not set up.
 -
Return Address: Using the drop-down provided, select a return address to be applied to the package labels created from the data.
The address can be changed on a per-package/label basis after the fact, if necessary.
-
When ready, click Next to continue.
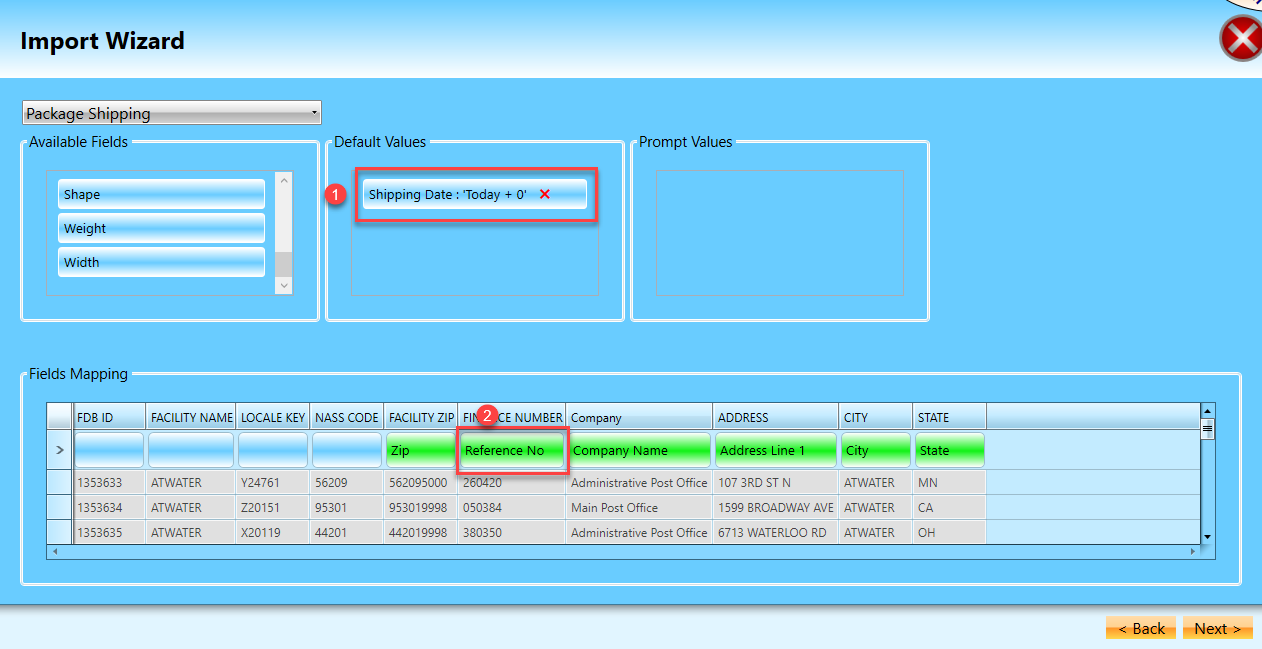
Import Wizard - Screen 2
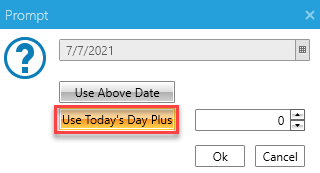
The second Import Wizard screen maps the Available Fields to the corresponding fields in the data source. Follow the instructions for mapping fields documented under Using the Import Wizard - Screen 2, with one exception. Add Shipping Date as a Default Value, selecting the ![]() Use Today’s Date Plus (0) option to use the current system date when creating packages.
Use Today’s Date Plus (0) option to use the current system date when creating packages.
Typically, Prompt Values are not used when connecting to an ODBC data source.
![]() Make sure to map one or more of these fields Reference No, Invoice No, or Order No to the corresponding fields in the data source to allow users to search this source when creating packages.
Make sure to map one or more of these fields Reference No, Invoice No, or Order No to the corresponding fields in the data source to allow users to search this source when creating packages.
Then, when ready, click Next to proceed to the next Import Wizard screen.
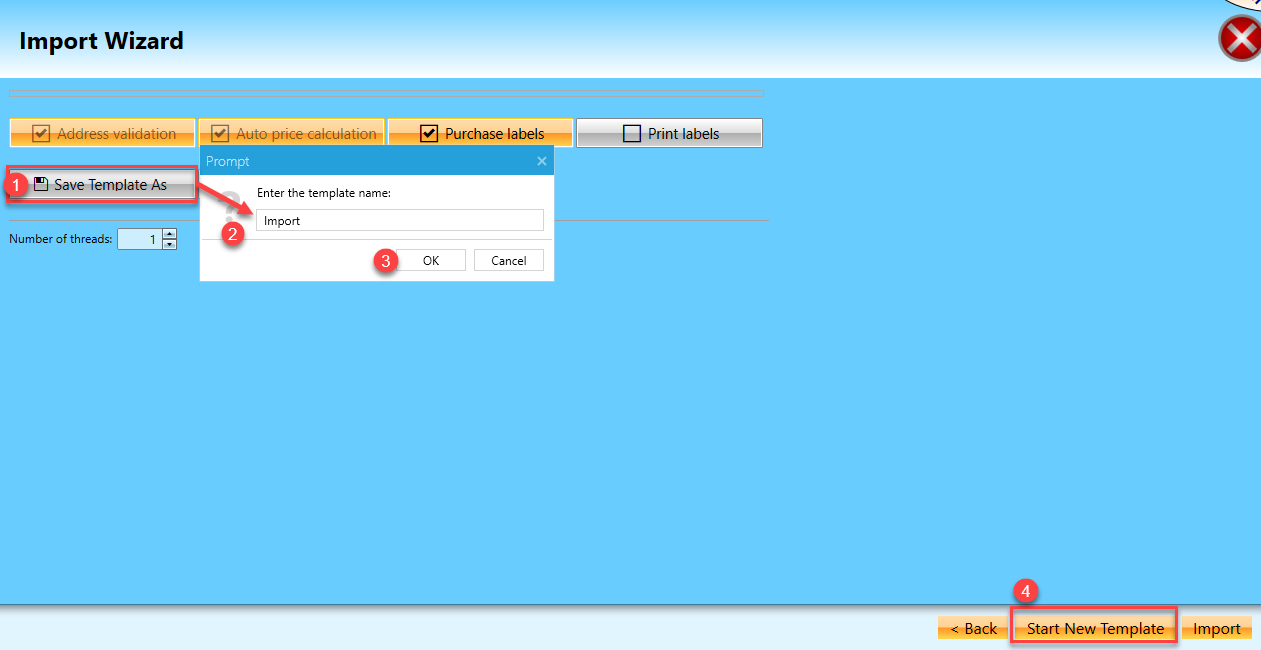
Import Wizard - Screen 3
On the 3rd screen, make sure to click ![]() Save Template As.
Save Template As. ![]() Next, enter a name for the new template and click
Next, enter a name for the new template and click ![]() OK.
OK.
At this time, the template is saved and a connection established for searching the external ODBC source for order or package data. Clicking ![]() Start New Template finishes the process and returns you to Screen 1; if done, click the
Start New Template finishes the process and returns you to Screen 1; if done, click the  X to return to the Data Exchange screen.
Many order management and ERP systems store address and order/package information in separate tables. Using the Import Wizard, users can create connections to two different ODBC data sources. They make two ODBC templates: one for the order or package data; and the other for the address data. Name the two templates accordingly for easy identification.
If only searching the ODBC data sources for order or package data, instead of importing the data into ES, the user should proceed to Settings > Optional Settings > ODBC Connect Settings to select the newly created template or templates. Also, enable one or more of the appropriate search options Order Number, Invoice Number, or Reference Number. For more information, refer to Settings > Optional Settings > ODBC Connect Settings.
Refer to Create Packages from ODBC Data Source for information on creating packages using a ODBC data source.
Continue Using the Export Wizard