Using the Import Wizard - Screen 3
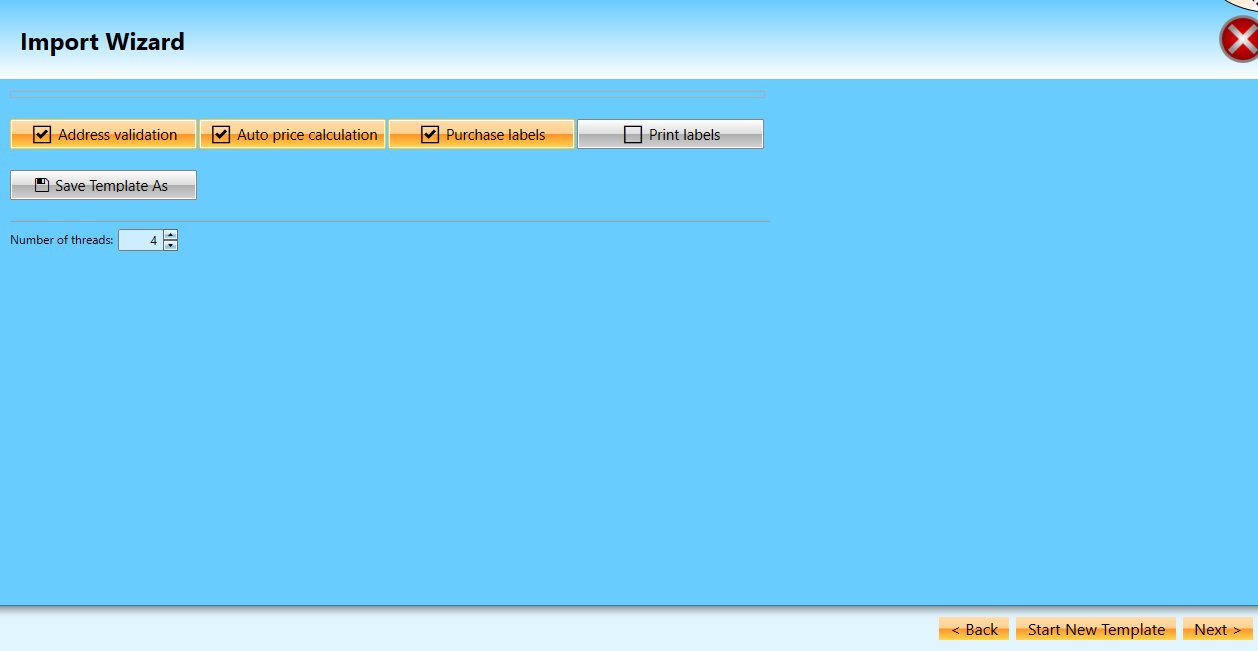
The third Import Wizard screen allows the user to choose what options to run.
Options
Address validation: Validates the address information during the data import.
Auto price calculation: Calculates prices based on the data import (if possible).
Purchase labels: Immediately purchases labels upon the completion of import.
Print labels: This option becomes enabled when Purchase Labels is selected. It will automatically print the purchased labels.
Save Template As: Saves the Import Wizard settings for future use.
A Prompt dialog will display when you click Save Template As. Enter a name for the template and click OK to close the dialog.
Update Template: When using an existing template and you make changes to any settings clicking this will update the template.
Number of threads: The larger the set of data, the more time it takes. This option allows you to simultaneously increase the number of API calls to the providers when performing price calculations or purchasing labels. However, using this feature will increase the amount of RAM required to complete the import. The maximum number of threads is eight (8).
Start New Template: Users can set up templates in advance without importing the data.If there are any Prompt Values, such as Shipping Date, Screen 4 will ask you to populate them.
If there are any Prompt Values, such as Shipping Date, Screen 4 will ask you to populate them. At the bottom of the page, there are two links for Screen 4. One is when you have any fields in the Prompt Values panel, and the other link is for when you do not.
Screen 3, no Prompt Values, click Import.

Screen 3, if Prompt Values, click Next.
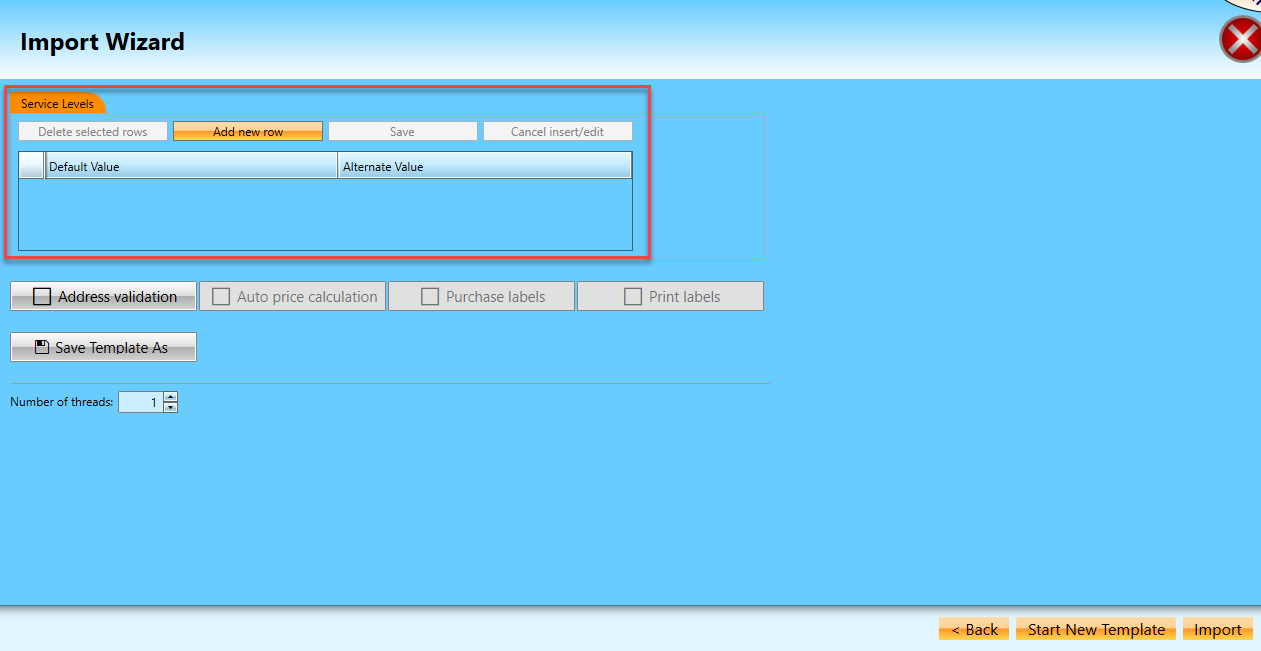
Adding Alternative Values
This screen allows users to define alternate values for any Available Field’s default values. This tool only displays a discrepancy in the field mapping; for example, ES field values do not match the data source values.
The Available Field’s Service Level is mapped to Service Level in the data source in the example below. But, the service level for all the data records is “PM” (Priority Mail), but “PM” is not a service level value in the Available Fields list. Instead, the value is Priority Mail, so there is no correlation between the two values..

In this example, when Screen 3 of the Import Wizard displays, an additional section appears to enter the data source’s Alternate Values to associate with ES Default Values. The steps are below this image.
-
Click Add new row.
-
Select the affected Default Value. In this example, we select the Service Level Default Value of “D-USPS-Priority Mail” from the drop-down list.
-
Equate an Alternate Value by selecting the values contained in the data source. In this example, we set the Alternate Value to “PM.”
-
Click Save to confirm.

-
The screen will update and when ready, click Next to proceed to the final Import Wizard screen.
Continue Using the Import Wizard - Screen 4 - Prompt Values Selected or Using the Import Wizard - Screen 4 - No Prompt Values