TDM - Pooled Quotes
TDM Pooled Quotes is a feature to allow multiple Mail.dat files representing versions of the same job, create consolidated quotes that include mail from various versions. You can also use it to pool different jobs that have the same mail class and processing category.
Create A TDM Pooled Quote
-
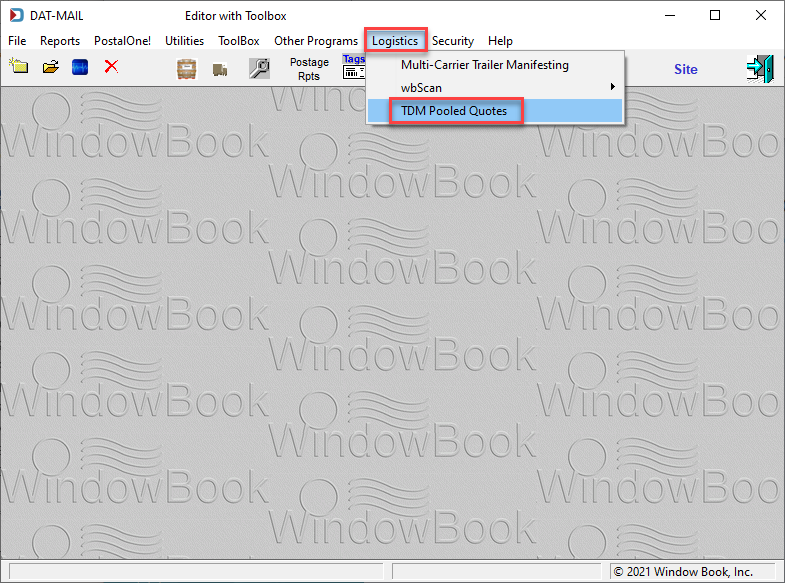
The TDM Pooled Quote feature is accessible via the Logistics > TDM Pooled Quotes in DAT-MAIL’s main screen.
-
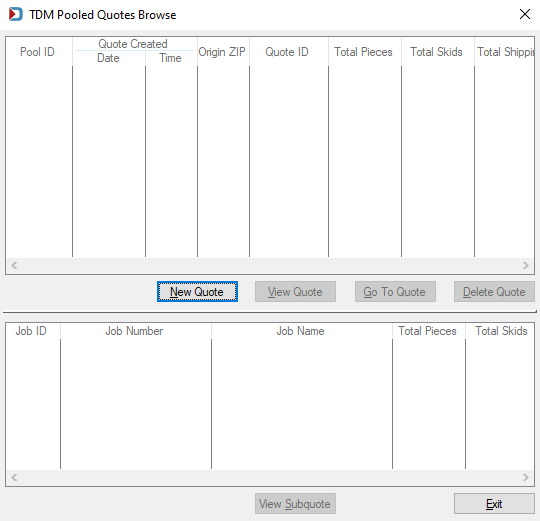
When the TDM Pooled Quotes menu option is selected, the TDM Pooled Quotes Browse displays. Existing pooled quotes will display on this screen (in the screen image, no pooled quotes exist). To create a TDM pooled quote, click New Quote.
-
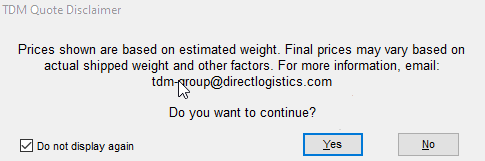
A TDM Quote Disclaimer dialog will display. If you do not wish to display this dialog again, select the Do not display again checkbox. Click Yes to continue.
-
The Select Mail.dat Files to TDM Pooled Quotes creation screen will display. Here there will be a list of all available jobs. You can help prevent accidentally selecting jobs that cannot pool together by marking or filtering the list. For example, use the
 Tag files by mailing date function (assuming all files have the Actual Container Ship Date field populated) or create or select a filter that stipulates the mail class and processing category of Mail.dat files.
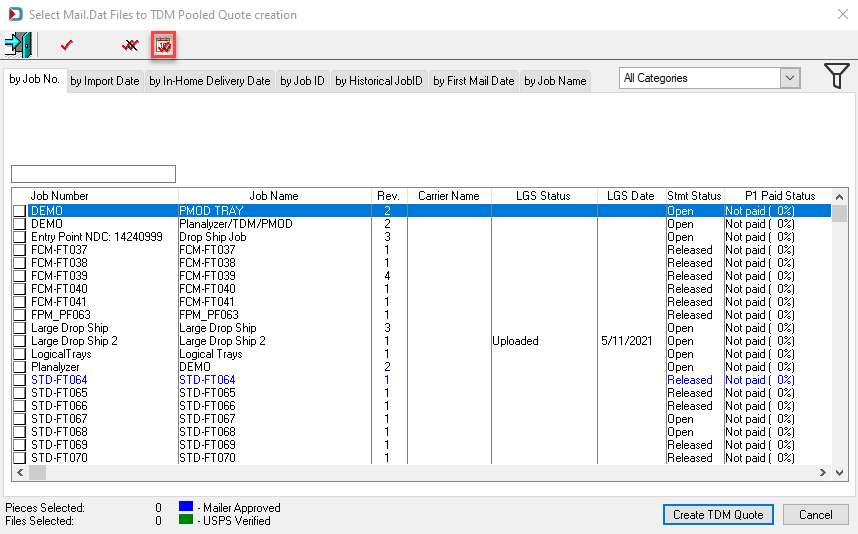
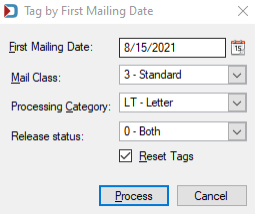
Tag Files by Mailing Date
The Tag files by mailing date function will tag the files that meet the criteria set in the Tag by First Mailing Date screen. It does not filter jobs from the list but tags them for selection. If a job does not meet the criteria, it does not get tagged. Note, the field here called First Mailing Date represents Actual Container Ship Date [CSM-1113], not Postage Statement Mailing Date.
If your jobs only have the Scheduled Ship Date populated, this feature will not tag any jobs. Also, we recommend using filters instead. See Filter by Class and Processing Category.
Filter by Class and Processing Category
Using the filter option removes jobs from the list that do not meet the filter's criteria. Only jobs that meet the criteria are displayed in the list, and then you can tag which of those jobs to include in the pool. Click
 Filter to create/set the filter.Denotes no filter is applied.
  It means a filter is already in use.
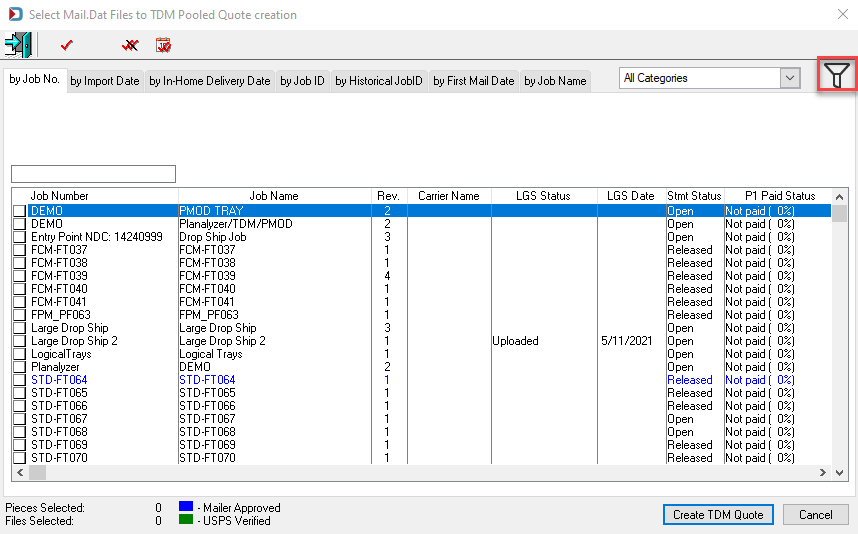
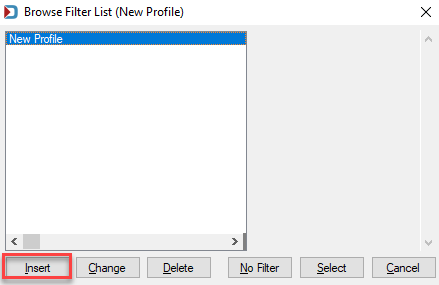
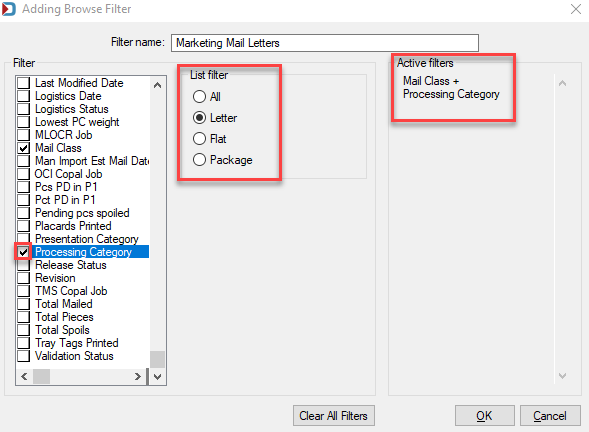
The Browse Filter List screen will display. If previously created filters exist, they will show in the list. Click Insert to create the “Marketing Mail Letters” filter mentioned above
The Adding Browse Filter screen will display. First, enter a filter name, for example, “Marketing Mail Letter.” Next, scroll down the Filter pane, select the Mail Class checkbox, and select the Standard radio button from the List filter section. Next, select the Processing Category checkbox in the Filter pane and the Letter radio button from the List filter section. Click OK when finished.
Adding Mail Class
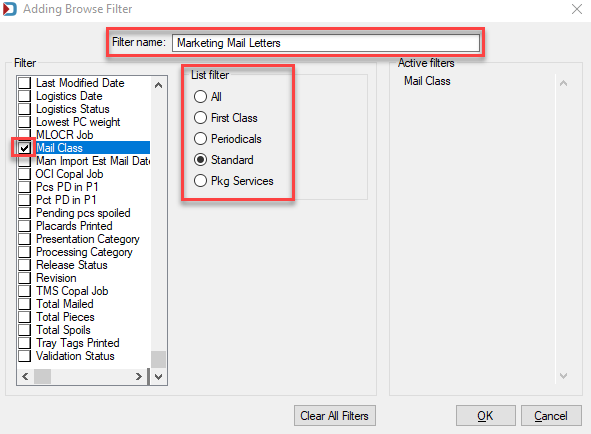
Adding Processing Category
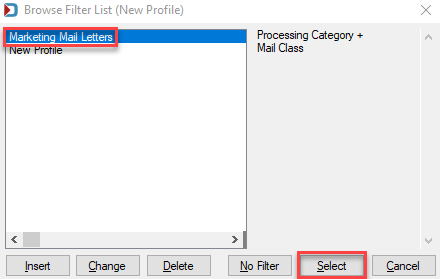
The Browse Filter List screen will display, and the newly created filter (“Marketing Mail Letters”) will show in the list. With the new filter highlighted, click Select.
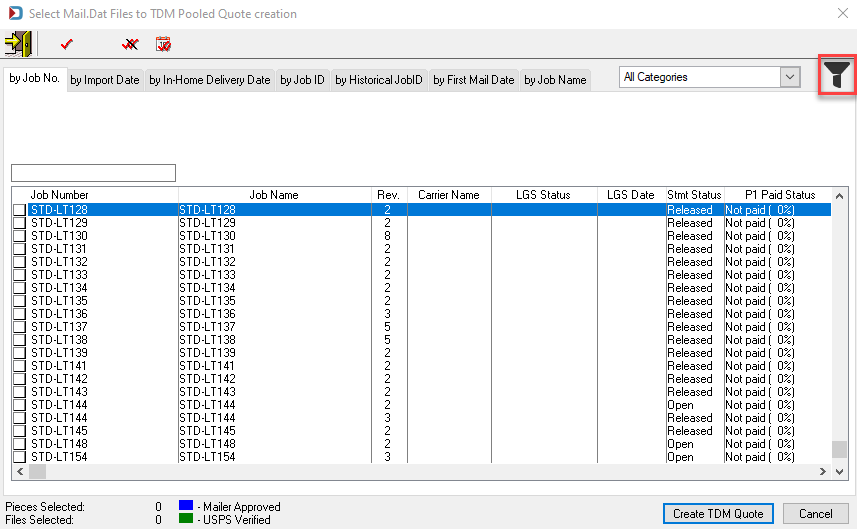
The Select Mail.dat Files to TDM Pooled Quotes creation screen will display with the “Marketing Mail Letters" filter applied. Only those jobs that meet the filter's criteria will display.
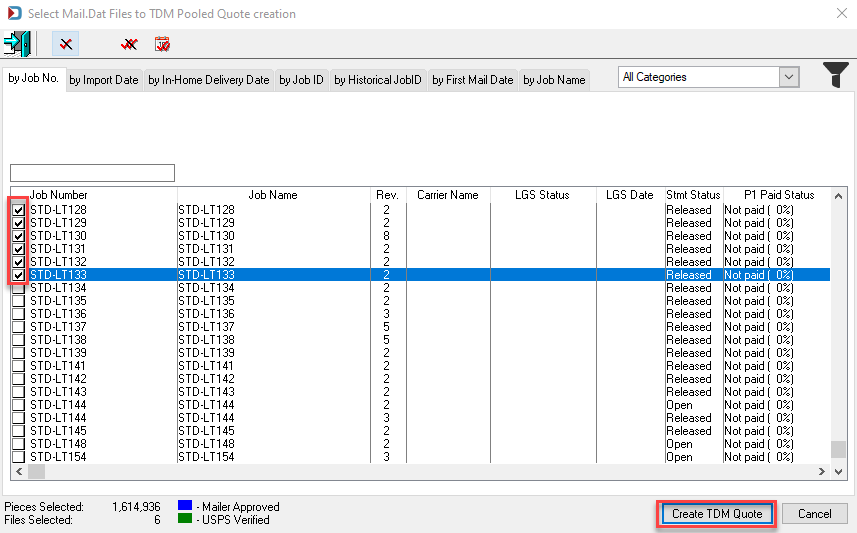
Select the Mail.dat files that should be “pooled” together and click Create TDM Quote.
-
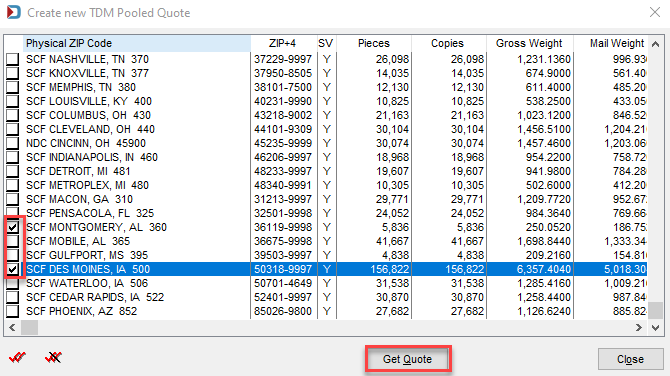
The Create new TDM Pooled Quote screen will display, listing all of the entry points contained in the pooled Mail.dat files. Select the entry points to get quotes for and click Get Quote (you can select all of the destinations listed by using the double-check marks located in the bottom left corner of the screen).
-
A TDM Quote Disclaimer dialog will display (if not previously ‘turned off’ when shown earlier). If the user does not wish to display this dialog again, select the Do not display again checkbox. Click Yes to continue.
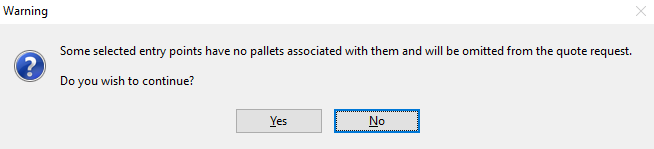
If multiple entry points are selected, and one or some of the entry points do not contain pallets, a Warning dialog will display. Click Yes to continue.
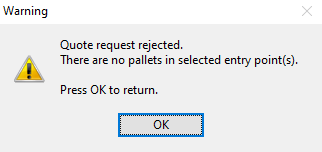
If no pallets exist in any entry points selected, a different Warning dialog will display. Click OK to be returned to the Create new TDM Pooled Quote screen.
-
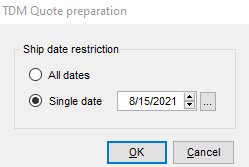
A TDM Quote preparation screen will display. This screen allows the user to include all entry point pallets or only those with the same Scheduled Ship Date. To change dates, refer to Vertical Panel - Palletize - Entering Scheduled Ship Dates or Advanced Navigator - Mail Schedule View for more information. Select the All dates option if all pallets associated with the selected entry points should be included in the quote. Or select the Single date option and specify the scheduled ship date to choose only pallets with the same date. Click OK when finished to request the quote.
-
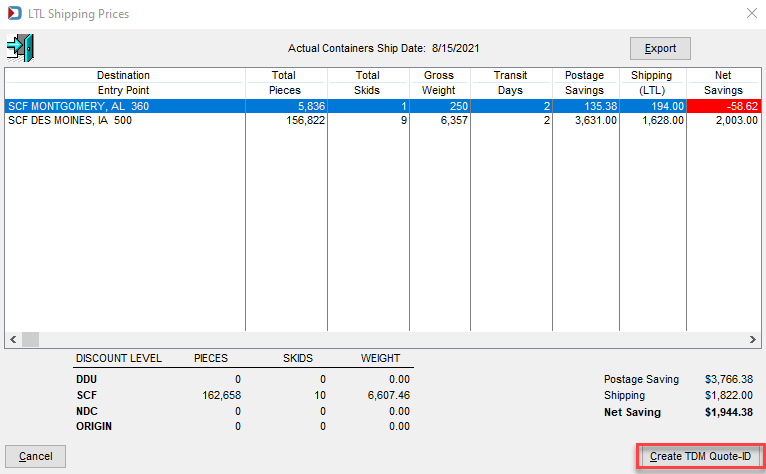
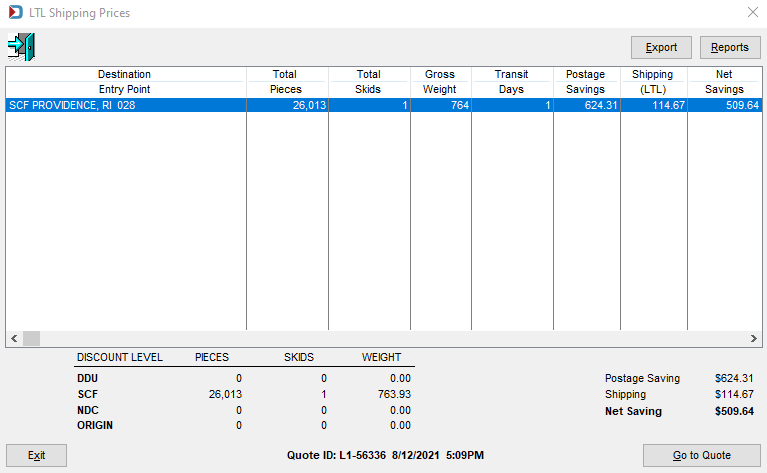
The LTL Shipping Prices screen will display the returned quote information. In addition, the selected entry points will be listed, along with the Total Pieces, Total Skids, Total Weight (rounded up or down to a whole number), Transit Days, Postage Savings, Shipping (LTL) cost, and the Net Savings, for each. The total of Pieces, Skids, Weight, Postage Savings, Shipping Charges, Net Savings for the selected entry points is displayed at the bottom of the screen.
A TDM Quote ID must be assigned to it to save the quote for future reference/use. To create/assign a TDM quote ID for the displayed quote, click Create TDM Quote-ID.
Loose trays or sacks will not be included in a quote.
-
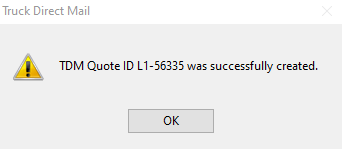
A confirmation dialog will display containing the TDM Quote ID (TDM Quote ID L1-56335). Click OK to close.
-
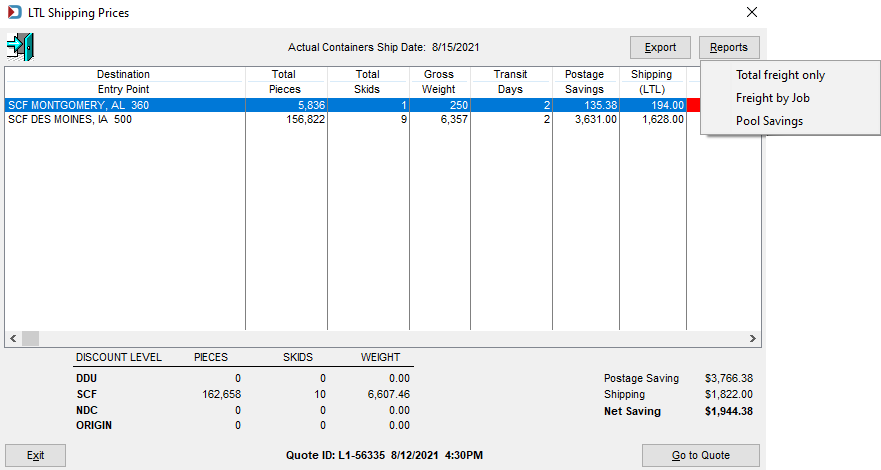
The Quote ID will display at the bottom of the LTL Shipping Prices screen. In addition, you have the option to print the total freight details of the quote, the freight details by job, or pool savings by clicking Report.
Example: Total Freight Only Report (TDM Pooled Quote Report Totals)

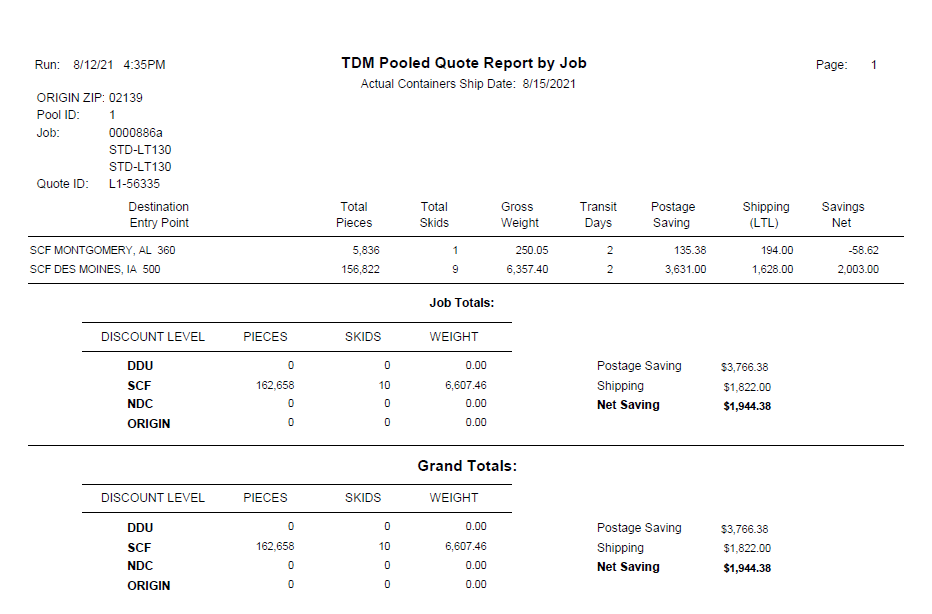
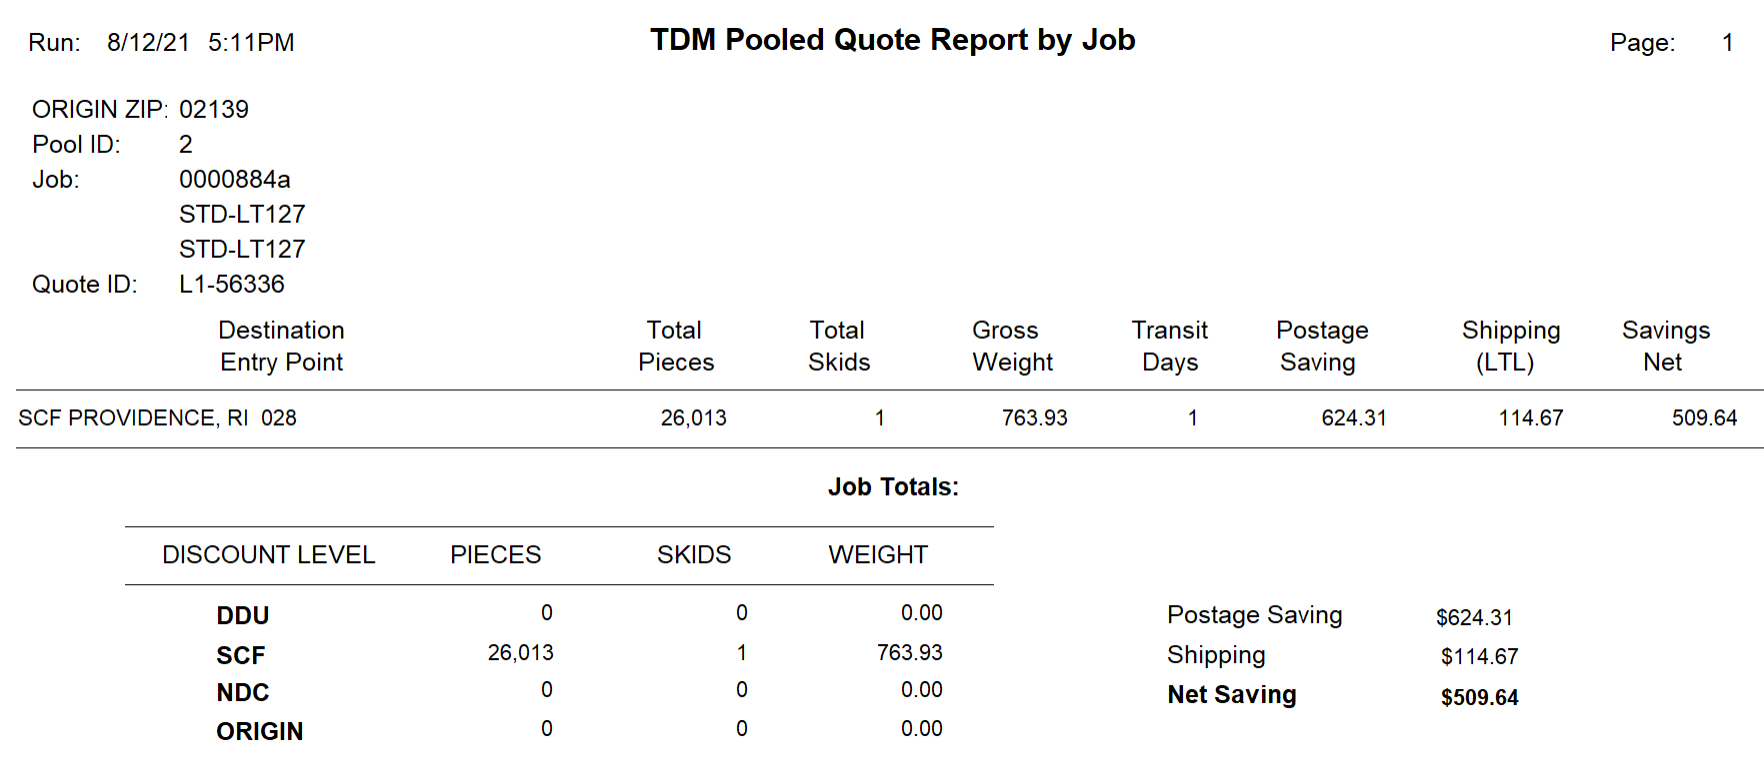
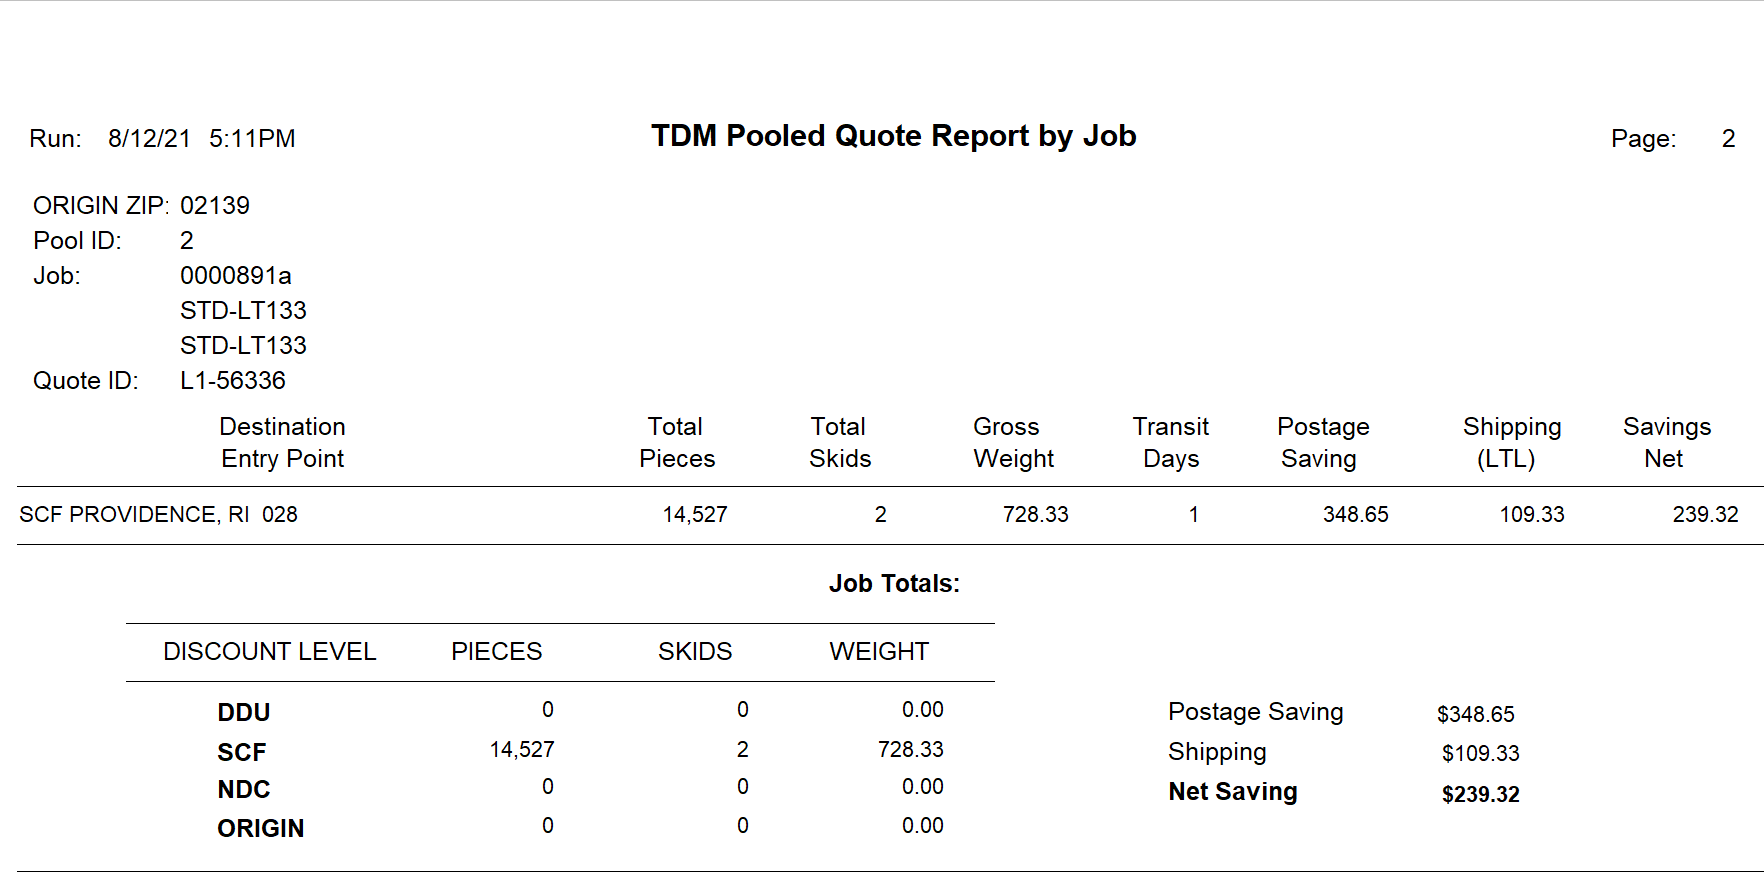
Example: Freight by Job Report (TDM Pooled Quote Report by Job)
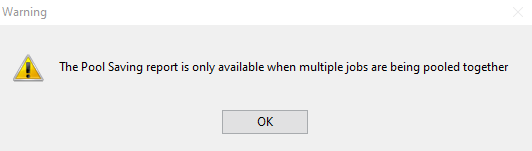
Like the above example, if the entry points turn out to be from only one job, you will receive this message when attempting to run the Pool Savings report.
To show an example of the Pool Savings report, we ran a new quote.

Here is the Freight by Job Report (TDM Pooled Quote Report by Job) when two jobs are pooled.
-
At this point, you can either close the screen by clicking Exit or launch the quote on the TDM website to request a shipment by clicking Go to Quote.

Refer to TDM Website - Go to Quotes for information on what happens when Go to Quote is clicked.
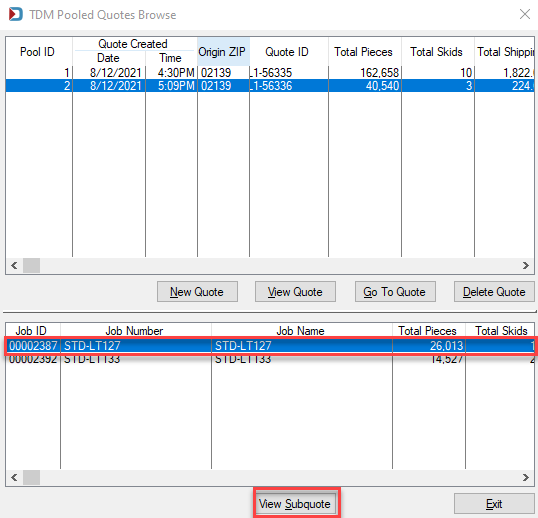
Clicking Exit will close the screen, and it will return to the TDM Pooled Quotes Browse screen, where your pooled quote has been saved and assigned an ID number (in the example here, a Pool ID of 1). A summary of the quote is displayed in the top half of the screen.
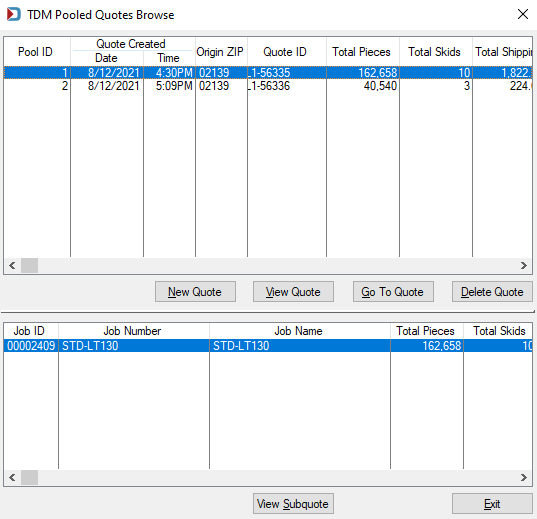
The bottom half of the screen displays information from the individual Mail.dat files included in the pool (such as Job ID, Job Number, and Job Name). Quote information about each Mail.dat can be viewed by highlighting the Job in the list and clicking View Subquote. In this example, we will select Pool ID 2, to show more than one job.
The LTL Shipping Prices screen displays the Job ID 00002387 portion of SCF Providence, RI.
From the TDM Pooled Quotes Browse screen, users can also create a new Pooled Quote (New Quote), view an existing quote’s details (View Quote button), launch a Pooled Quote on the TDM website to request a shipment (Go To Quote), and delete an existing Pooled Quote (Delete Quote).
Refer to TDM Website - Go to Quotes in this Guide for information on what happens when Go to Quote is clicked.
Continue TDM Website - Manage Jobs