AWAM - Creating & Using an Import Profile
For a description of Import profiles, refer to Import Profiles.
To create a profile and then import a file, perform the following:
This procedure assumes that the AWAM service has already been installed and is running.
-
From DAT-MAIL, click
 AWAM to launch AWAM.
-
From the Control Center, click Edit Profiles.

-
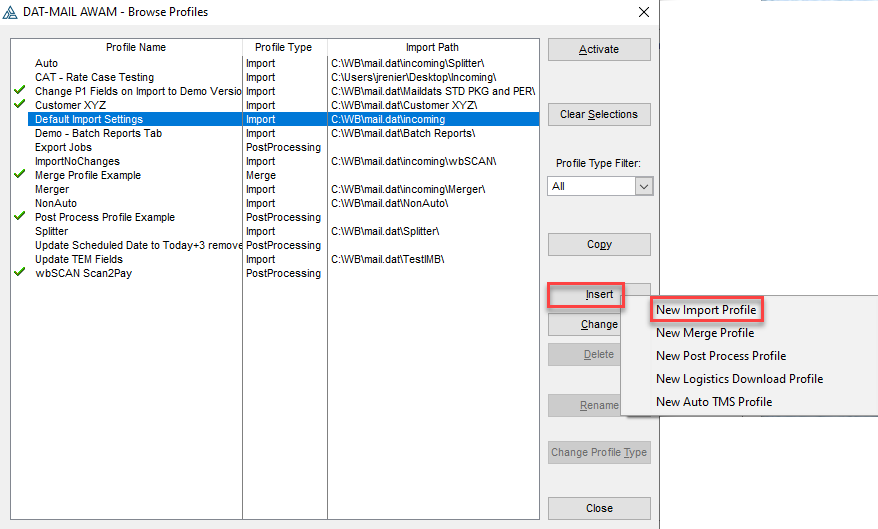
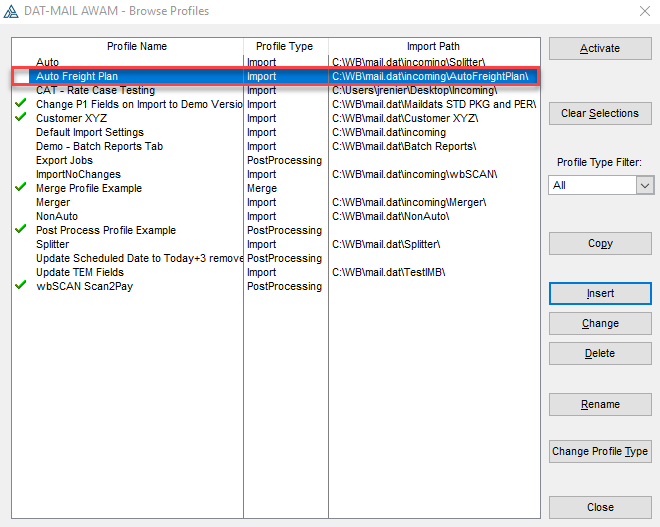
The Browse Profiles screen will display. Any previously created profiles (active and deactivate) will be listed, along with the import path they use. In addition, a "Default Import Settings" profile is automatically provided when AWAM is registered/activated and is intended to import Mail.dat files into DAT-MAIL only, highlighted in the image below. This default profile is created based on the settings specified for the Daemon within DAT-MAIL.
To create a new profile, click Insert and select New Import Profile.
Once AWAM’s "Default Import Settings" profile is created the first time, it is no longer tied to DAT-MAIL's Daemon settings. In other words, changing the settings for the Daemon in DAT-MAIL will have no impact on the "Default Import Settings" profile in AWAM.
When a new Import profile is inserted, it will have the same settings as the "Default Import Settings" profile.
-
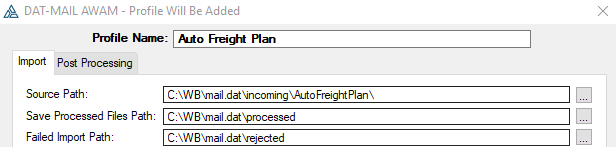
A Profile Will Be Added screen will display. Enter a profile-specific name (in the example here, “Auto Freight Plan” is entered as the profile name.

-
From within the Import tab, click Browse for the Source Path. Next, locate the ‘c:\WB\Mail.dat’ folder and create a new directory specifically for the import folders used by AWAM Import profiles. In our example, we use a subfolder called 'Incoming' ('c:\wb\Mail.dat\Incoming'), shown in the image below step 7.
In a server-with-workstations environment, the 'Incoming' directory (and any other import folders) must be accessible by all workstations. One way to accomplish this is by creating the new directory (and any import folders) under the ‘\\. . . WB\Mail.dat’ folder on the server. This step ensures the contents of the ‘Incoming’ directory or folder will be accessible by all workstations. In addition, UNC path names must be used.
Once the 'Incoming' directory is created, any new AWAM import profiles import folders should be located within or under the ‘Incoming’ directory on the server (‘\\. . . WB\Mail.dat\Incoming’). -
Within the new ‘Incoming’ directory (Source Path), create the import folder used by the new “Auto Freight Plan” Import profile (in the example here, the import folder ‘AutoFreightPlan’ is created and then selected.
-
Create or select a folder in the ‘C:\WB\Mail.dat’ location to save any processed files and the files that failed import (in the example used here, the default folders are used, ‘processed’ and ‘rejected’).
-
Set or enable any other actions available on the Import tab that should be performed when a file is imported into DAT-MAIL using this Import profile.
If an option exists in both DAT-MAIL and an AWAM profile, it will override the DAT-MAIL setting if that option is different.
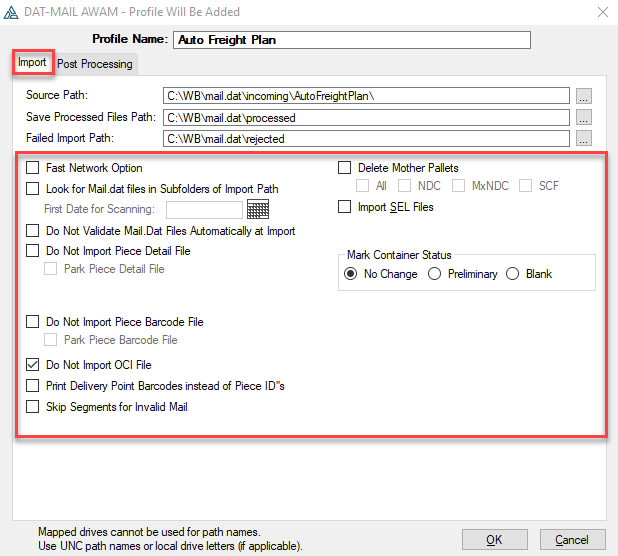
The ‘Fast Network Option’ is intended for users in a server-with-workstations environment, specifically, those users doing single file imports from a workstation. If a workstation user attempts to import files over a network, having this option enabled will make a copy of the Mail.dat in the workstation’s TEMP folder to speed up the import process. If importing is done on a server or a stand-alone where the data resides, there is no benefit to enabling this option.
-
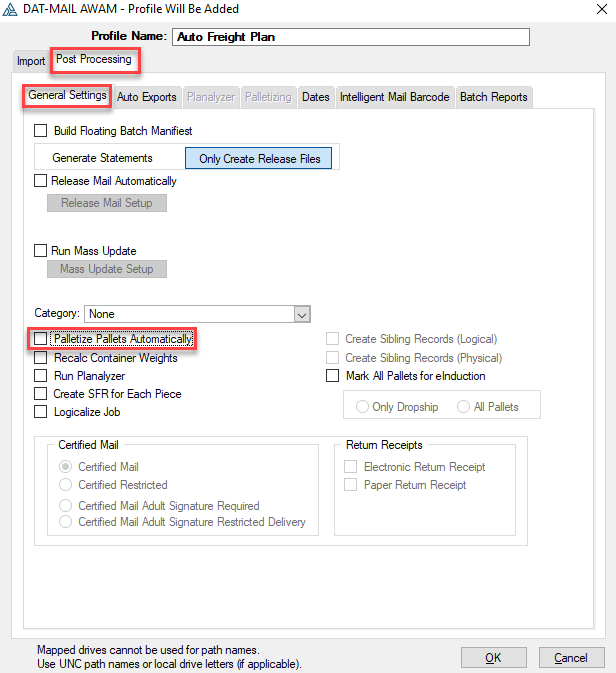
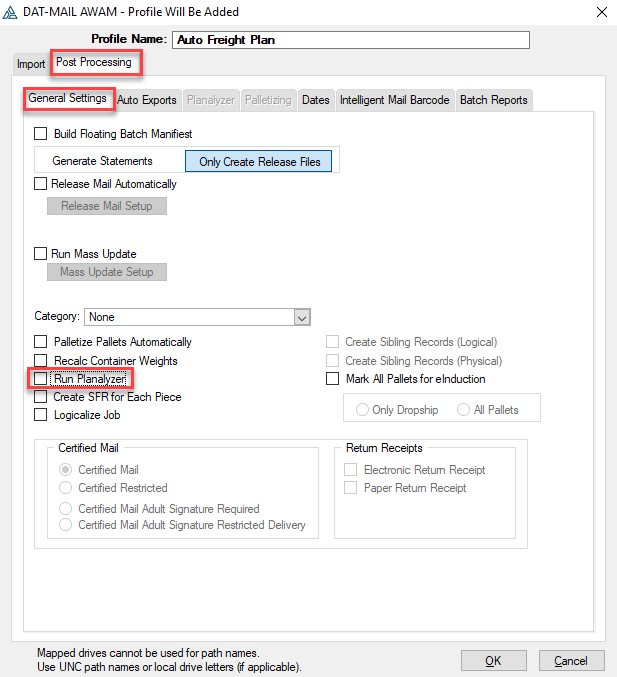
Click on the Post Processing tab. From within the screen’s General Settings tab, set or enable any of the available actions that should occur after the file has been imported into DAT-MAIL.
Below are print screens of before and after selecting the Palletize Pallets Automatically or Run Planalyzer checkboxes. Each enables their respective tab.
Palletizing (requires DAT-MAIL Toolbox or Editor with the Palletization module) and Planalyzer (both require DAT-MAIL Toolbox). Instead, for DAT-MAIL Editor, you can run Quick Plan. For Editor, you will see the option Run Quick Plan After Import and when this checkbox is selected, the Quick Plan tab is enabled.
As mentioned in Import Profiles, please check out using the Category field, see File > Category Maintenance.
If you are interested in creating or selecting a Mass Update Profile, see AWAM - Creating and Using the Run Mass Updates Function or AWAM - Enabling and Selecting the Run Mass Updates Function
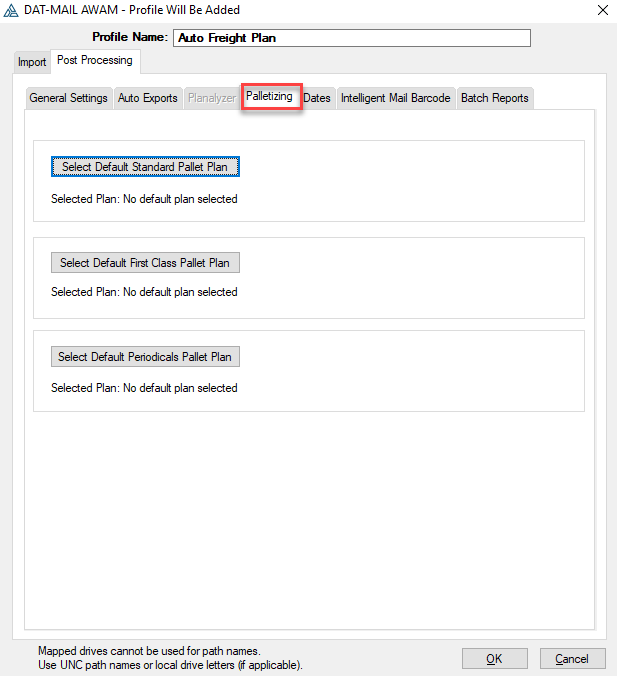
Selecting the option to Palletize Pallets Automatically will enable and display the Post Processing tab’s Palletizing screen to be used for additional configurations.
The DAT-MAIL Toolbox or the DAT-MAIL Editor with the Palletization add-on can use the Palletizing option. For more information about the Palletization module, see Advanced Navigator - Vertical Panel - Palletization Module or View Pallets.
Auto Palletize
Post Processing Screen Prior to enabling Palletize Pallets Automatically
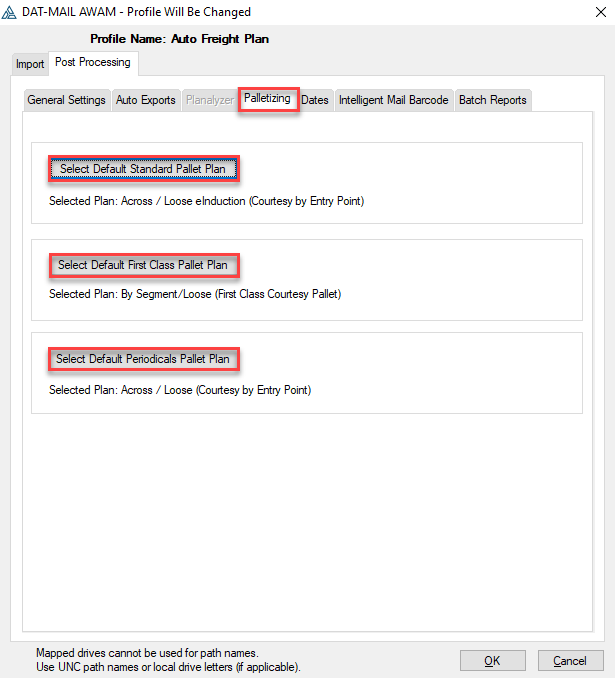
After selecting the Palletize Pallets Automatically checkbox, you are automatically moved to the Palletizing tab to set your pallet plans. All three classes require a pallet plan.
The Palletizing tab, after pallet plans are selected. For more information on Pallet Plans, see Advanced Navigator - Vertical Panel - Palletization Module or View Pallets.
Selecting the option to Run Planalyzer will enable and display the Post Processing tab’s Planalyzer screen to be used for additional configurations.
The DAT-MAIL Toolbox is required to use the Planalyzer option. For more information about Planalyzer, see Advanced Navigator - Freight Planning.
Auto Freight Planning
Post Processing Screen Prior to enabling Run Planalyzer
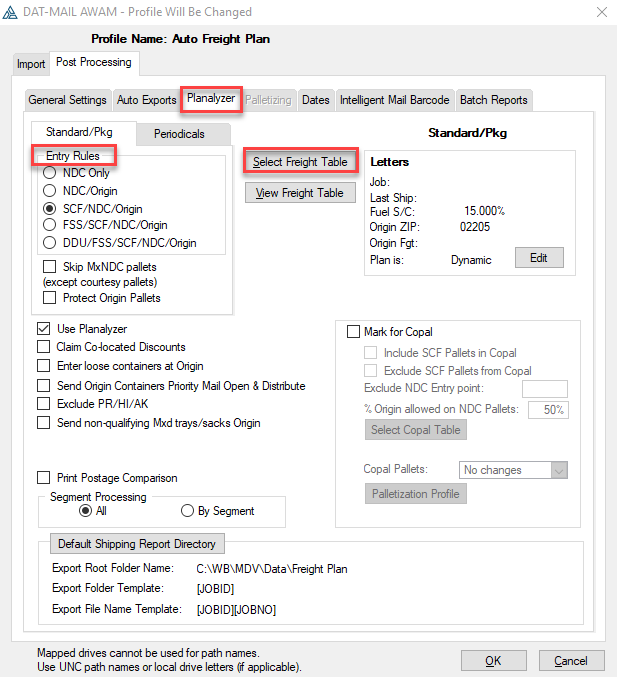
After selecting the Run Planalyzer checkbox, you are automatically moved to the Planalyzer tab to set your freight planning strategy.
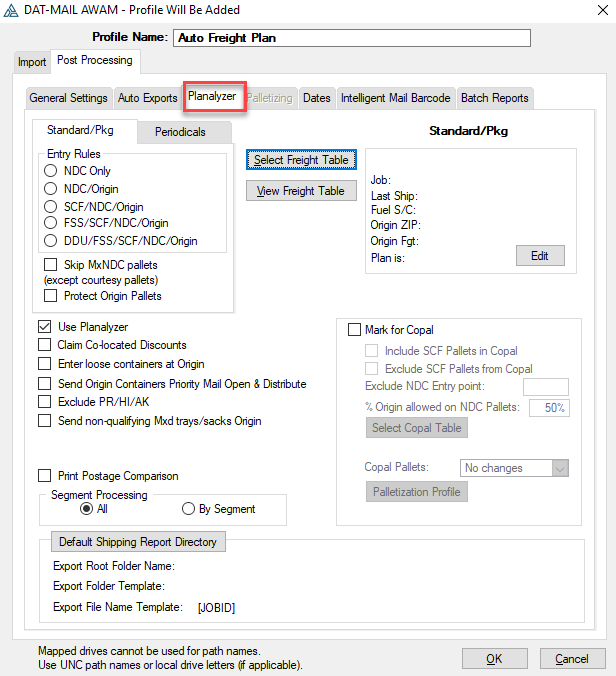
Select one of the Entry Rules, load your Freight Table and select any other options you want to use to assign entry points. For more information, see Advanced Navigator - Freight Planning.
-
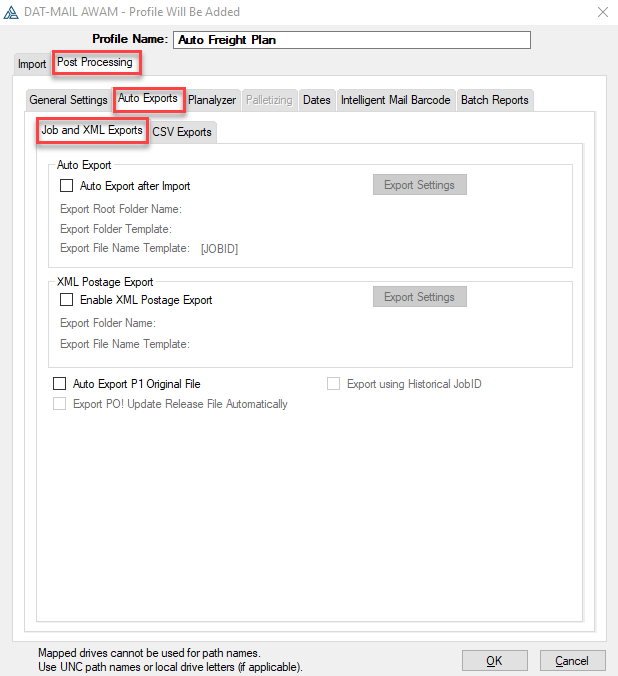
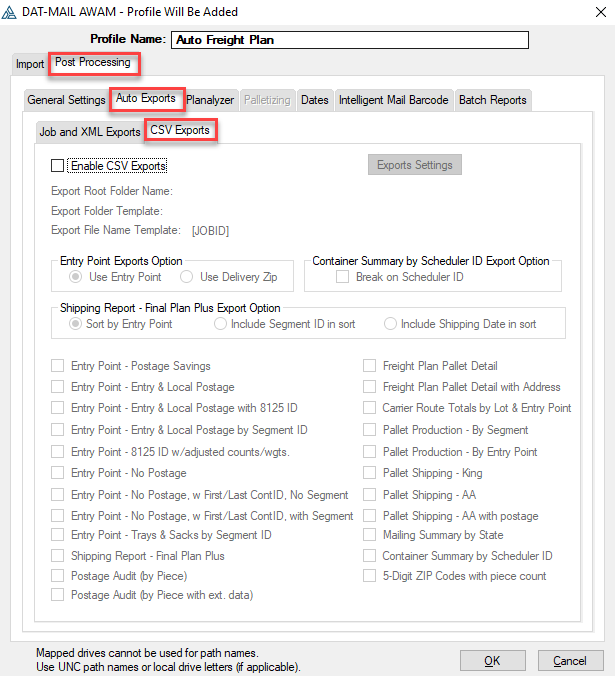
Select the Auto Exports tab. Set or enable any of the available actions that should occur after the file has been imported into DAT-MAIL.
-
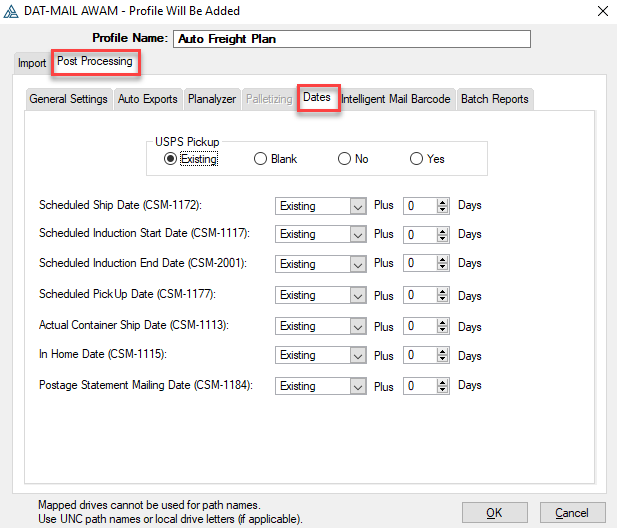
Click on the Dates tab. Set or enable any of the available actions that should occur after the file has been imported into DAT-MAIL (for more information on how to use the functions located under the Dates tab, refer to AWAM - Using the Dates Tab).
-
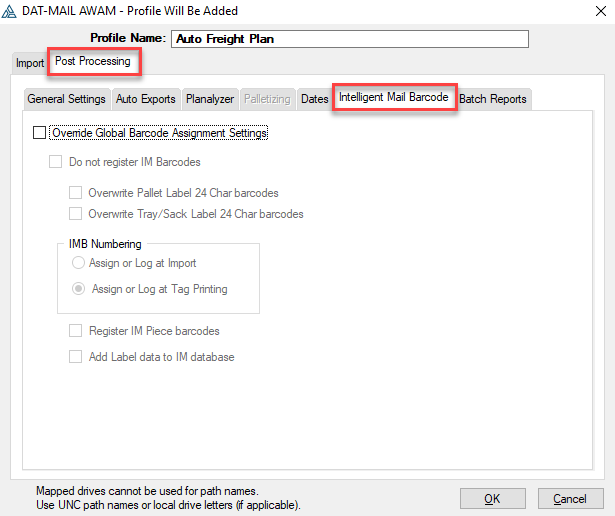
Select the Intelligent Mail Barcode tab. Set or enable any of the available actions that should occur after the file has been imported into DAT-MAIL (for more information on how to use the functions located under the Intelligent Mail Barcode tab, refer to AWAM - Using the Intelligent Mail Barcode Tab).
-
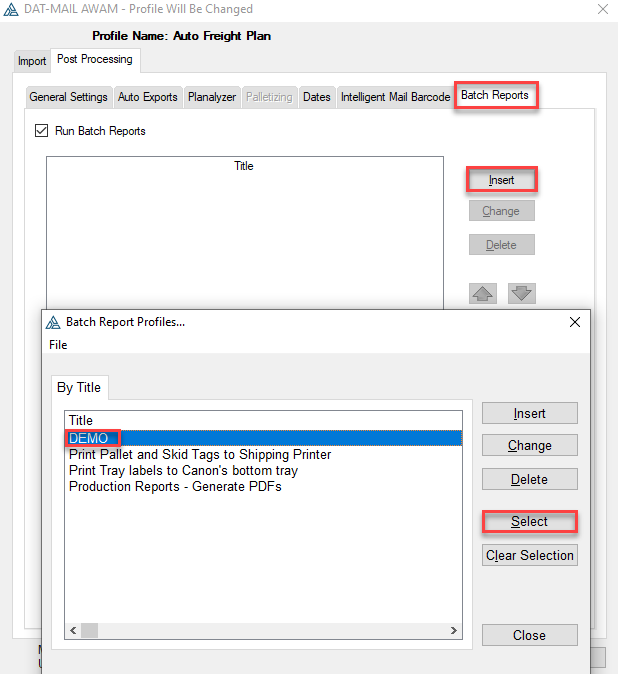
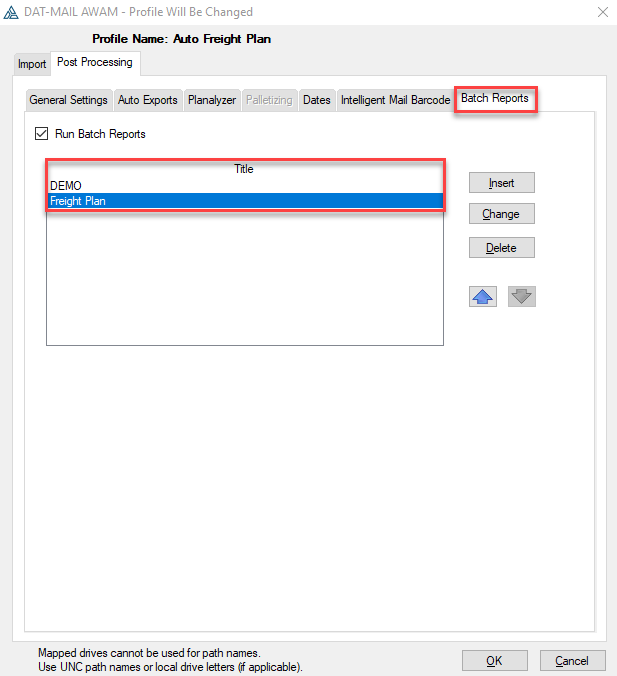
Click on the Batch Reports tab. If you need to generate production reports, select the Run Batch Reports checkbox and then Insert to add Batch Reports profiles you have already created, change an existing before selecting, or insert new ones.
You can select multiple Batch Reports profiles. Since you can select various profiles, you can send reports to multiple printers and save reports to PDF.
-
Click OK when finished entering all of the necessary criteria for the new Import profile ("Auto Freight Plan").
The Profile Will Be Added screen will close, and the Browse Profiles screen will display and contain the newly created profile ("Auto Freight Plan").
-
To activate the new profile, “Auto Freight Plan,” highlight the profile and click Activate.

A
 green checkmark will display next to the profile, signifying that the profile is now active.
-
Click Close to close the Browse Profiles screen.
-
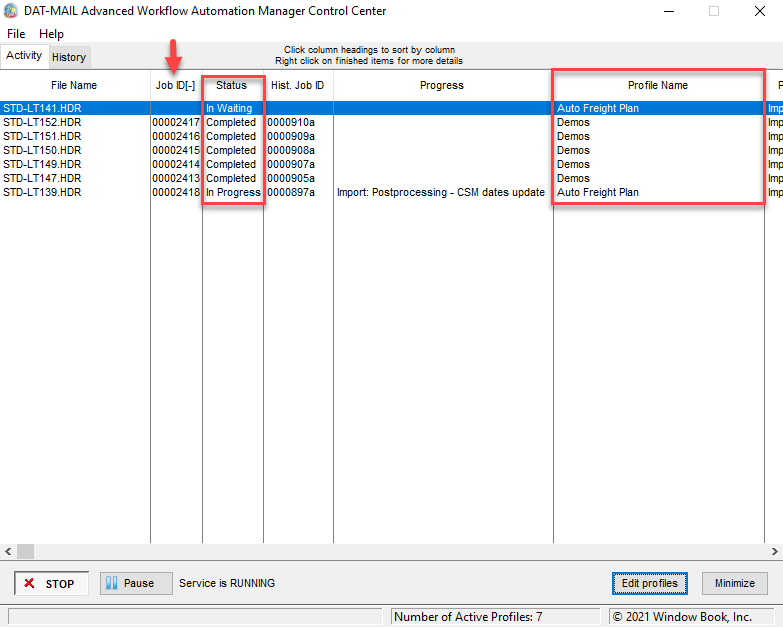
As Mail.dat files are dropped into their corresponding Import folders, the Control Center will display the file names and report their progress in the Activity and History tabs. Based on what import folder the files are dropped, the service applies the appropriate profile.
The images below provide an example of Mail.dats in various stages from In Waiting to Complete. Note that the Profile Name column indicates the Import profile used. In this example, two different import profiles are processing jobs. Scrolling right in the Control Center offers more status information, such as the completion date/time. Scrolling right also displays the Import Path the profile used.
The job can also be referenced back in DAT-MAIL using the ‘Job ID.’
While the processing is taking place, you are free to use DAT-MAIL or any other available software on the computer or server and workstations without interruption.
The Control Center can be minimized or closed while the service runs and jobs are processed/imported (refer to the AWAM Control Center – In Detail for more information). Be aware, however, that if the Control Center is exited completely, the current status information will be lost from the Activity tab. It will, however, remain in the History tab.
Continue AWAM - Creating a Merge Profile