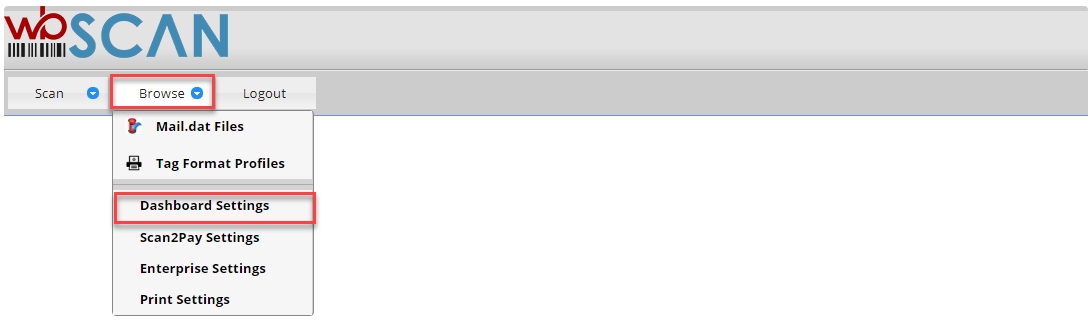
Browse > Dashboard Settings
Accessing the Dashboard’s Update Settings screen is performed by selecting Browse > Dashboard Settings.
Below the print screen is an explanation:
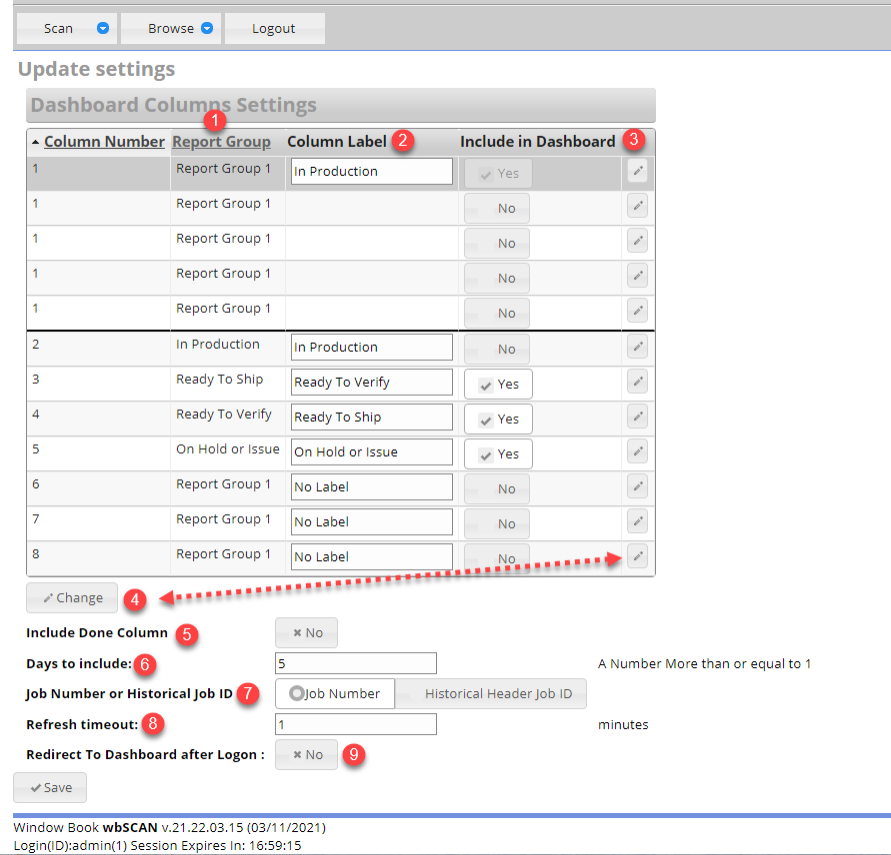
![]() Report Groups: The default or predefined Report Groups are listed for each one of the eight available columns (columns are numbered 1-8).
Report Groups: The default or predefined Report Groups are listed for each one of the eight available columns (columns are numbered 1-8).
![]() Column Label: A corresponding label representing the Report Group must be entered for each column that is to display on the Dashboard. The name of the Report Group can be used (see screen image below).
Column Label: A corresponding label representing the Report Group must be entered for each column that is to display on the Dashboard. The name of the Report Group can be used (see screen image below).
![]() Include in Dashboard: Whether a Report Group displays as a column on the Dashboard is controlled by Yes/No toggle switch in this column.
Include in Dashboard: Whether a Report Group displays as a column on the Dashboard is controlled by Yes/No toggle switch in this column.
The first column (shown as column 1), can be reported as an aggregate of up to five Report Groups. To enable the data from a Report Group to be included in column 1, highlight the line item by single-clicking on it, and then click the  Edit button.
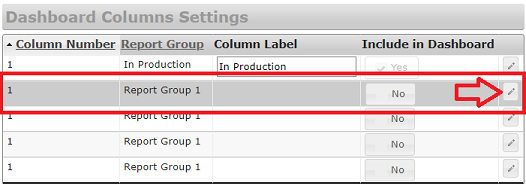
An Update… screen will display. Select the Report Group to be included in column 1 and change the toggle switch in the Include in Dashboard field from No to Yes. The existing Column Label cannot be changed here (to change the Column Label, edit the line item where the Column Label was entered by the user). When ready, click Save.

The screen will close, and the Dashboard Columns Settings will update accordingly. With the example being used here, column 1 of the Dashboard will be labeled In Production and will be an aggregate of data from both the In Production and On Hold or Issue Report Groups.

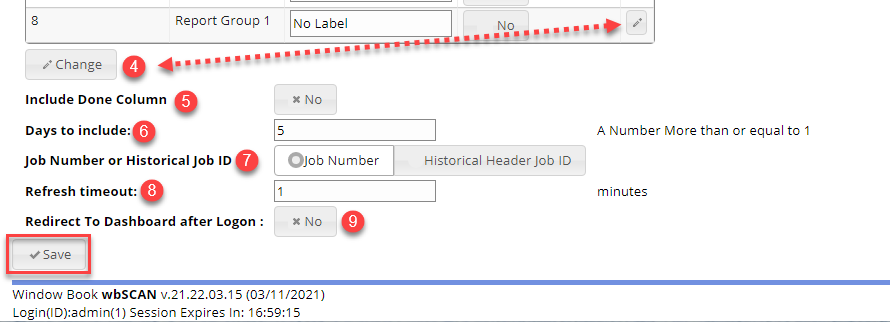
![]() Columns can be edited by highlighting the line item and clicking the corresponding Edit button or clicking Change.
Columns can be edited by highlighting the line item and clicking the corresponding Edit button or clicking Change.
![]() Include Done Column: If the Client wishes to have a Done column included on their Dashboard, set the toggle switch to Yes.
Include Done Column: If the Client wishes to have a Done column included on their Dashboard, set the toggle switch to Yes.
![]() Days to Include: Enter the number of days that data should be reported for on the Dashboard. The default is 5.
Days to Include: Enter the number of days that data should be reported for on the Dashboard. The default is 5.
![]() Job Number or Historical Job ID: Select whether the Job column should display the DAT-MAIL’s Job Number or Historical Job ID.
Job Number or Historical Job ID: Select whether the Job column should display the DAT-MAIL’s Job Number or Historical Job ID.
![]() Refresh timeout: The default is 1 minute, which can be changed.
Refresh timeout: The default is 1 minute, which can be changed.
![]() Redirect to Dashboard after Logon: If you would like to see your Dashboard, after signing on, change the toggle switch to Yes.
Redirect to Dashboard after Logon: If you would like to see your Dashboard, after signing on, change the toggle switch to Yes.
Any time changes are made to the Dashboard’s Update Settings screen, make sure to click Save when finished.
Return to Browse Menu List
See also