Addresses
Screen Overview
 Clicking Addresses in the left vertical menu displays the Addresses screen. Return, Delivery, and Pickup addresses are created/managed in this screen, along with the Address Book contents.

Address Type: The addresses that display in the Address List is controlled by the Address Type selected in the Address Type section (Return, Delivery, Address Book, or Pickup). To view a list of all existing addresses that are in the ES system, click Show All.
Return address: The location to return packages if packages are undeliverable or the recipient wishes to ship the package back to the sender.
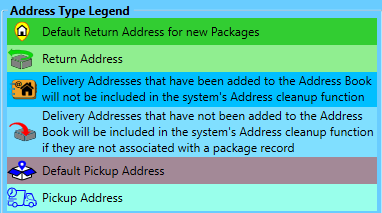
The first Return address created/added to the system is automatically set as the default. The default return address is used by the system to automatically populate the Return Address section when a new package record is created. ES requires at least one return address (default address) to be in the system before creating packages. The default Return address is visually indicated in the application using  Home icon. Return addresses not set as the default are visually displayed in the application using
  Return Box icon.
Creating a default Return address is part of the ES setup process (refer to the Add Return Address for more information).
The Return Address specified as the default can be changed by selecting the Use this Address as DEFAULT checkbox, when creating a new Return address, editing the details of a current Return address.
Delivery address: A location a package will deliver. Delivery addresses can be added to the Address Book. Delivery addresses are visually indicated in the application using this  Delivery icon.
Address Book: A location for delivery addresses users wish to keep in the system whether used or not. Delivery addresses added to the Address Book will not be deleted from the system as part of the ES address purge process (refer to Address Cleanup Section for more information). Delivery addresses added to the Address Book are visually indicated in the application using  Home icon .
Pickup Address: The location where the carrier will pick up packages for shipping. ES requires at least one Pickup Address (default address) in the system if creating or scheduling package pickups. The system's default pickup address automatically populates the Pickup Address field as a user creates a new package record. The default Pickup address is visually indicated in the application using this icon  . Pickup addresses not set as the default are visually indicated in the application with a
  Truck icon .
Below this print screen is additional detail about the Addresses screen.
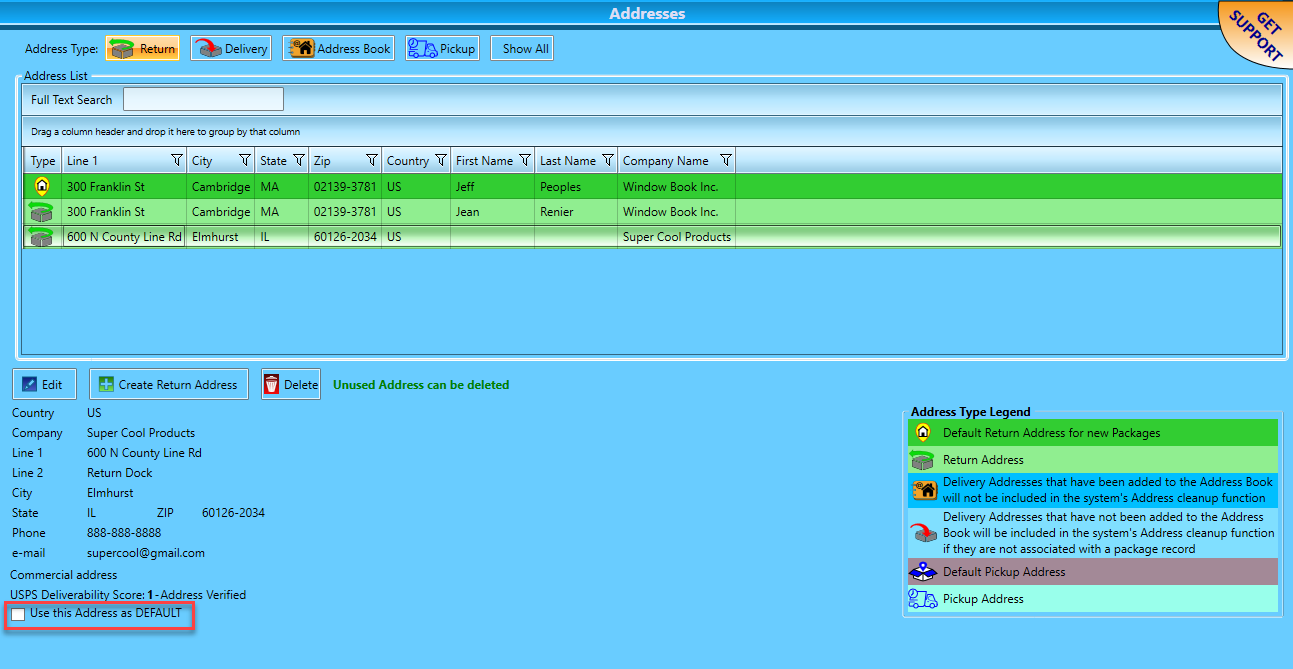
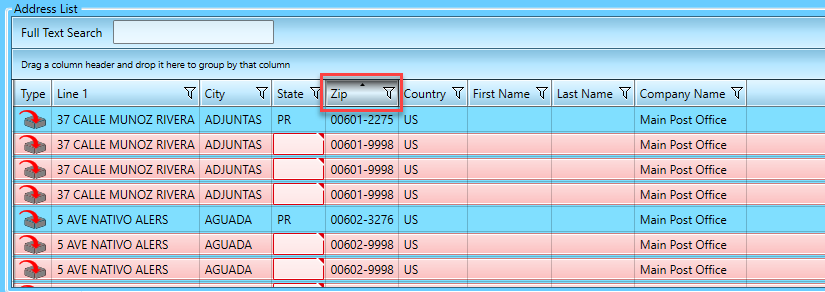
Address List: This list displays any existing addresses in the system. The addresses displayed are controlled based on which button is selected for the Address Type.
The Address List layout allows users to search for an address or group of addresses easily. An address can be searched by using the Full Text Search field. Or users can group addresses by dragging a column header into the area immediately above the column headers in the Address List. Clicking a group's caret in the list will expand it and display the addresses that make up that group.
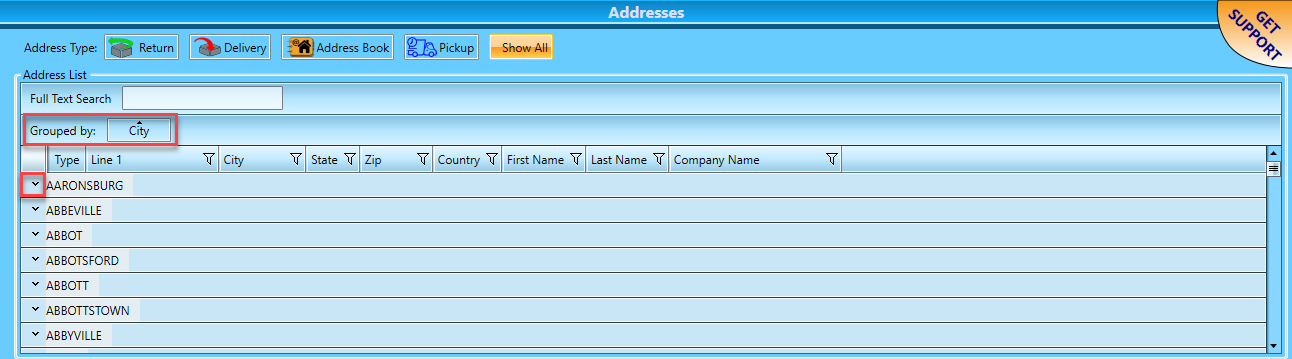
To remove a grouping, hover the computer mouse over the selected group and click the  X.
X.

The Address List can also be filtered in multiple ways by using any field's  Filter. To close the filter window, use the X located in the top, right-hand corner.
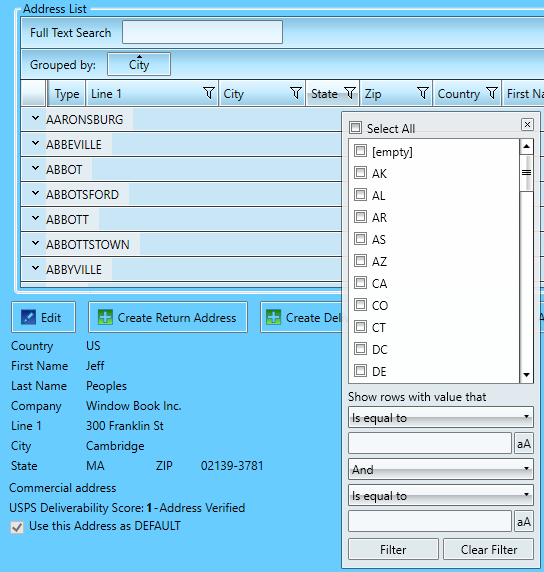
The contents of the Address List can also be sorted by clicking the desired field's column header. Click the column header a second time for descending order and a third time to return the contents of the Address List to its original sort order.
Address Type Legend: Each address is assigned an image to identify its type and status in the system. These images, along with a brief description, are provided in the Address Type Legend for easy reference. A single Address Type can have a different image associated with it, depending on its status.
Edit, Create Return Address, Create Delivery Address, Create Pickup Address, or Delete: The details of an existing address can be edited by selecting the desired address in the list and using the corresponding button (Edit or Delete). New addresses can also be created by clicking the appropriate Create…Address button.

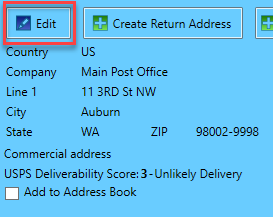
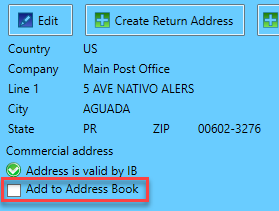
Validation Status: Denotes whether the selected address is validated is indicated below the address, including the source of the validation (EasyPost, International Bridge, Pitney Bowes, or TrueAddress).
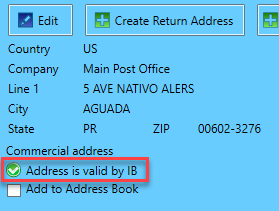
To validate an existing address that was not previously validated or the provider indicates its undeliverable, select the address in the list and click Edit.
Add to Address Book: Denotes whether the selected delivery address is in the Address Book. The Address Book is for delivery addresses users wish to keep in the system regardless of whether they are used or not. Delivery addresses added to the Address Book are not deleted from the system as part of the ES address purge process, see Address Cleanup Section. To add an existing delivery address to the address, select the Add to Address Book checkbox.
Regarding ES and Addresses, users should note the following:
Creating/adding a default Return address is required to create packages.
A Pickup Address is required for creating/scheduling a package pickup.
Continue Addresses - Creating Addresses