Pitney Bowes - Add Account
Pitney Bowes provides a PROD and a TEST API. Each API requires a separate account. Therefore, if a user wishes to use both APIs, you must create two individual accounts. The registration procedure is the same for each API except for the URL used. Each API uses its URL for the registration procedure.
-
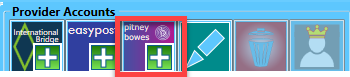
In Enterprise Shipper (ES), go to Settings > Required Settings > Provider Accounts, click Pitney Bowes.
-
In this example, ES is in Test mode.
-
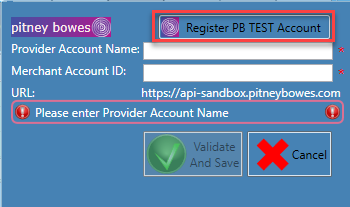
When you click Register PB TEST Account, it directs you to https://developer.pbshippingmerchant.pitneybowes.com/home?developerID=75158420
Complete the registration and add funds to your account. Both accounts need funds; we will describe how to fund a TEST account below in How to fund a Pitney TEST Account.
-
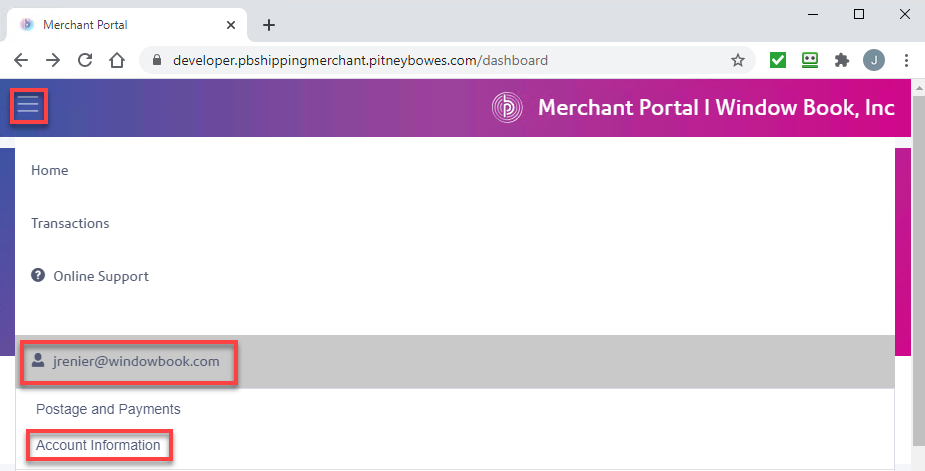
Now that registration is complete; you need the Merchant Account ID for ES. First, in your Company's Merchant Portal, click the menu. Then click on your email address and finally click on Account Information.
-
At the top of the Account Information page, the User Information section will show the Merchant ID.

-
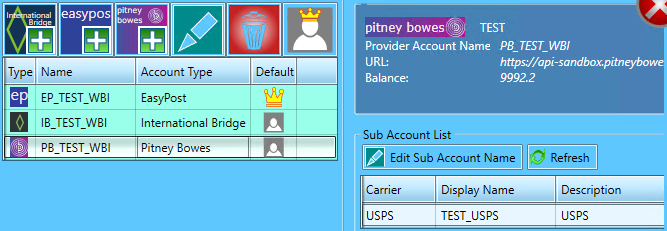
In ES, in the Pitney Bowes setup screen, Enter a Provider Account Name and the Merchant Account ID. Then click Validate and Save.
In this example, we create an Pitney Bowes TEST account with the Provider Account Name of 'PB_TEST_WBI.' We begin with 'PB' to distinguish this provider from others quickly. Furthermore, we include 'TEST' to show the mode used for this payment account. And finally, since your customers can also have TEST and PROD accounts, we recommend including your Company in the Provider Account Name. In our example, we use 'WBI.'
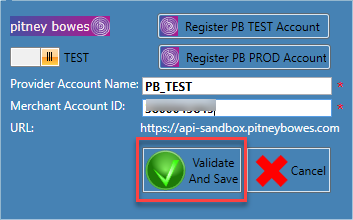
- After clicking Validate and Save, it will provide account details on the right. Including the Balance available in this account. In this example, the balance is 9992.2. You will need to fund your TEST account and PROD accounts with Pitney Bowes.
How to fund a Pitney TEST Account
-
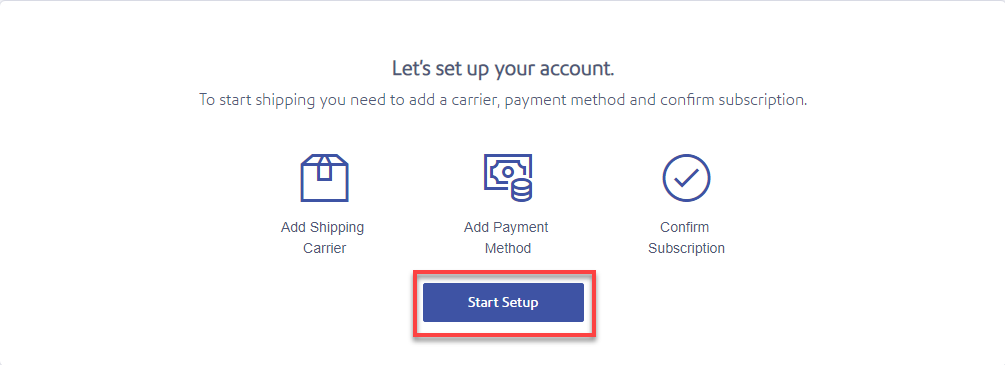
When the Let’s set up your account page appears, click Start Setup to continue.
-
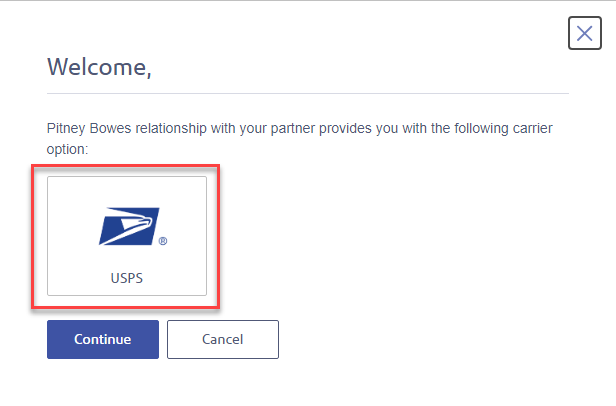
The Welcome window will appear, click on USPS and then click Continue.
-
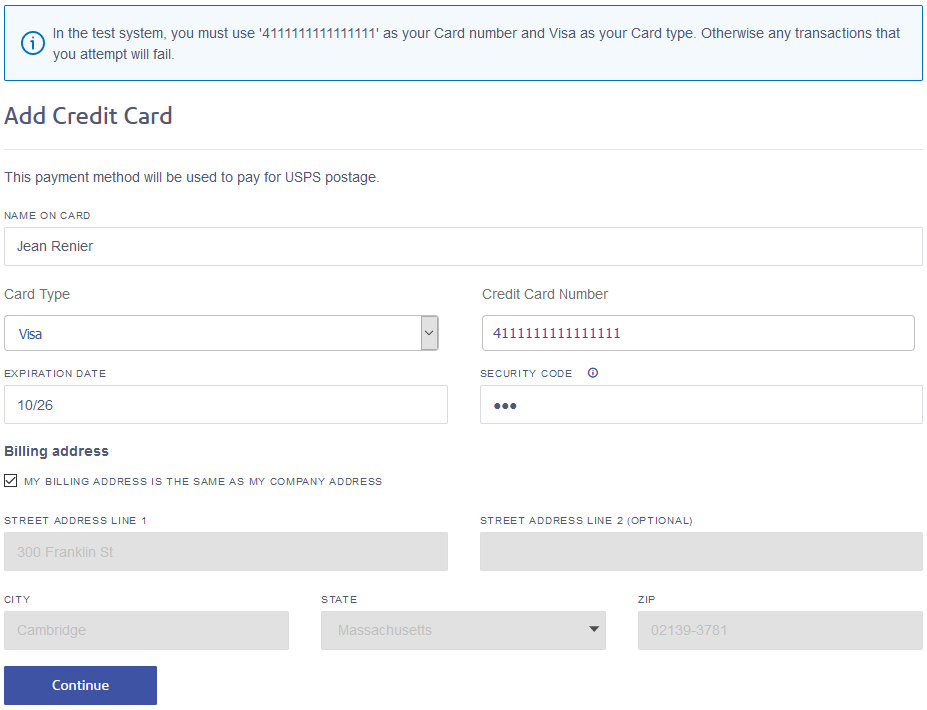
When setting up a Production account, you have multiple payment options. However, when setting up a Test account, this is the information you need to fund it:
Select Credit Card for the Payment Method.
Name on Card: Enter your name.
Card Type: Select 'VISA'.
Credit Card Number: Enter '4111111111111111'.
Expiration Date: We do not know if this matters, so enter a date a few years out.
Security Code: Enter '123'.
-
Click Continue.
-
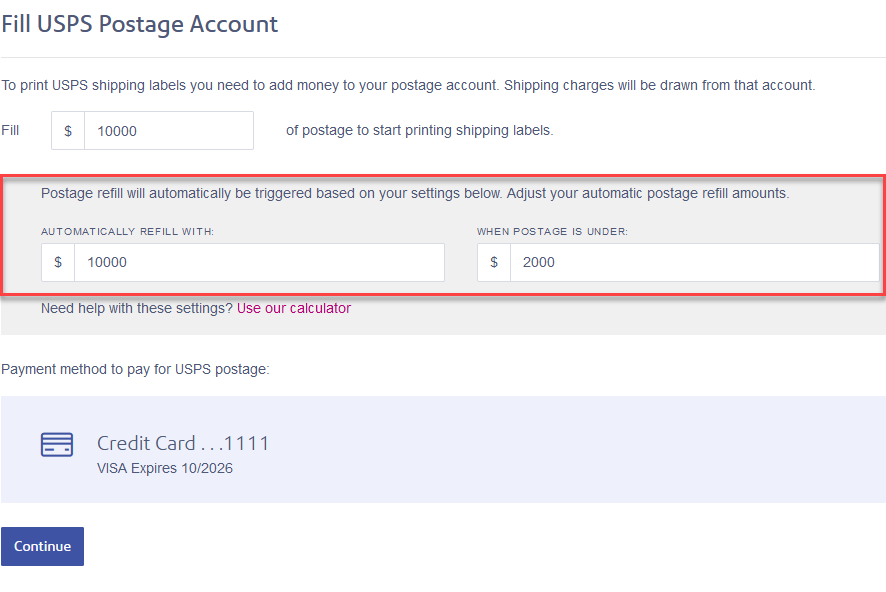
When the Fill USPS Postage Account page appears, put postage into your test account and set up auto-replenishment. When ready, click Continue.
-
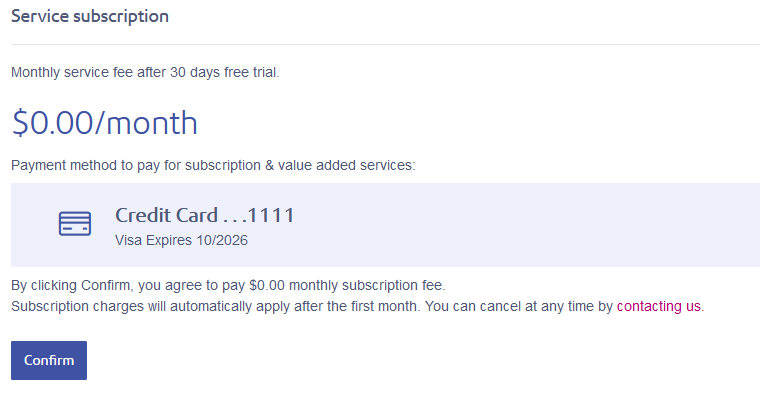
When the Service subscription page appears, click Confirm.
Continue Settings > Required Settings > General
See also