Advanced Navigator - Palletization - Create Pallets
To view the loose containers that can be palletized, perform the following:
-
Within DAT-MAIL, launch the Advanced Navigator by selecting a job from the Jobs List.
-
In the Advanced Navigator, click
 Palletize, located in the vertical panel on the right side of the screen.
If Palletize is not visible in the vertical panel, refer to Advanced Navigator - Missing Buttons (Options).
-
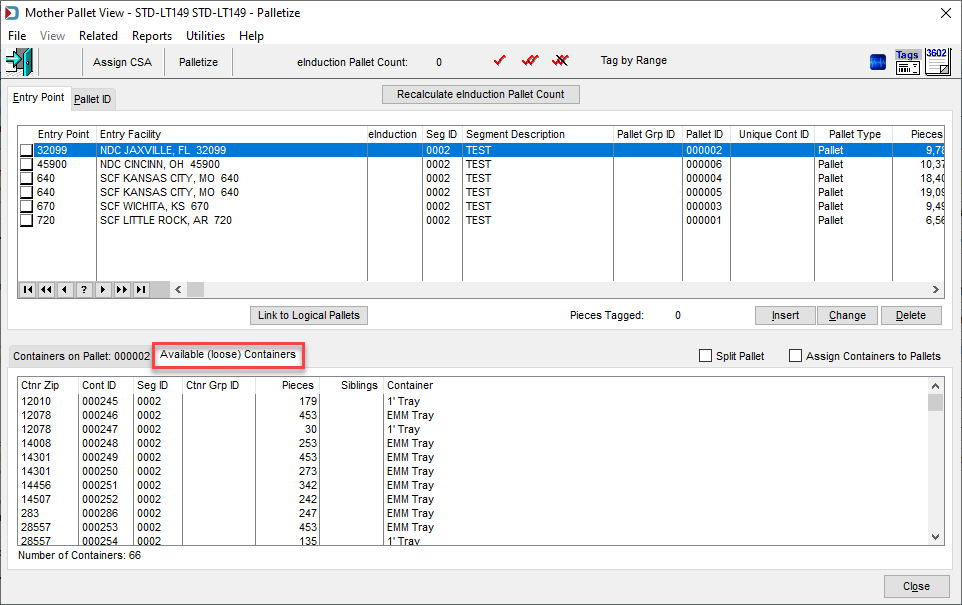
The Mother Pallet View screen will open. In the bottom pane, click on the Available (loose) Containers tab.
For a description of the Mother Pallet View, see .
-
Click Palletize in the Mother Pallet View to open the Browse the Palletization Plans window. Based on your goal for palletizing the mail, highlight the palletization plan you wish to run and click Select.
Click either link to see a description of each plan:
Advanced Navigator - Palletization by Mailing Type (First Class)Advanced Navigator - Palletization by Mailing Type (Marketing Mail, Periodical, and Package Services).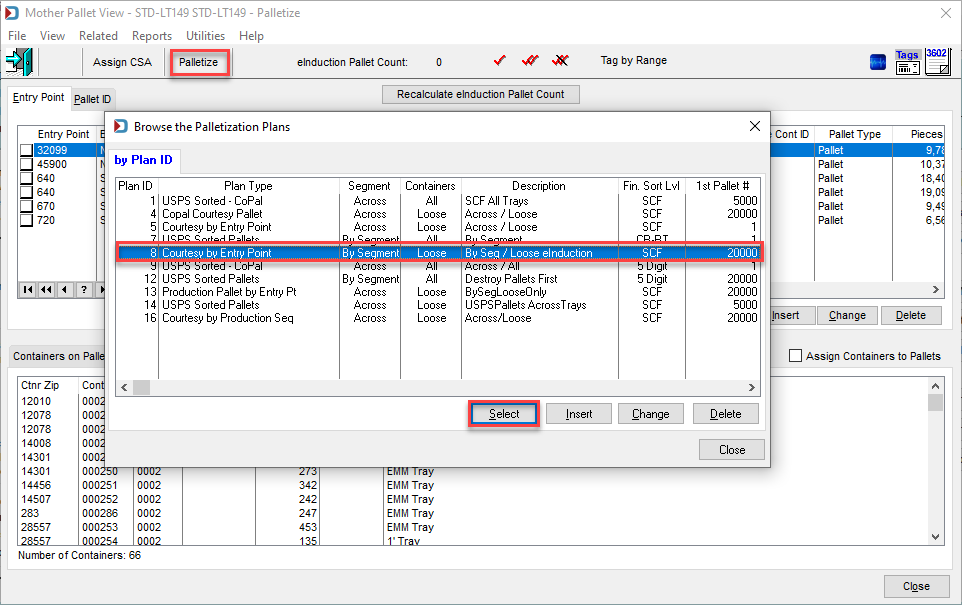
-
-
The Palletization Parameters screen will display, giving you the opportunity to review/edit the plan prior to applying it to the selected Mail.dat. For additional information on creating palletization plans, see Toolbox > Palletization - Creating Palletization Plan.
Any edits made on the this screen are not saved to the original plan unless you click Save Plan.
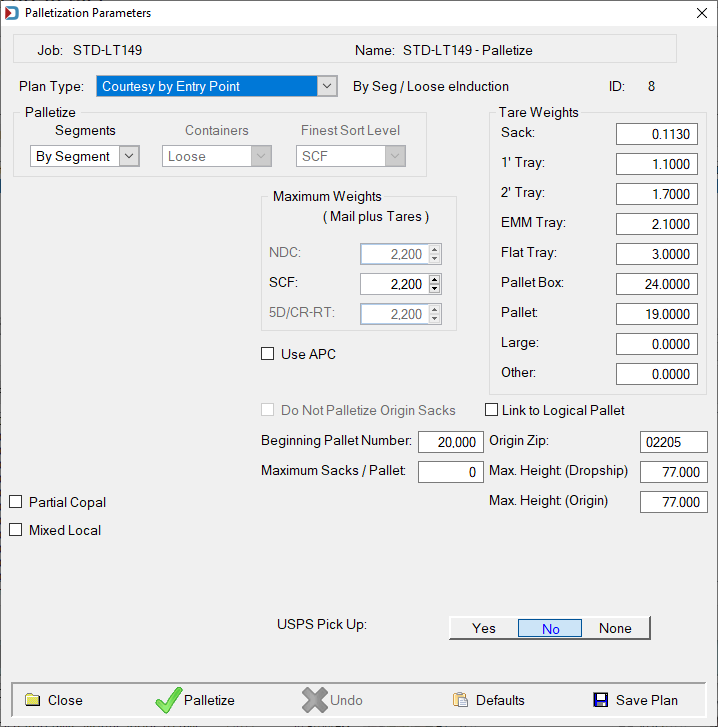
Make sure your Origin Zip is populated before palletizing.
-
When ready, click Palletize to run or apply the plan.
When complete, the Defaults button will change to a View button.

-
Click View to see the processed file (you can also click Undo to reverse or remove palletization from the selected Mail.dat).
-
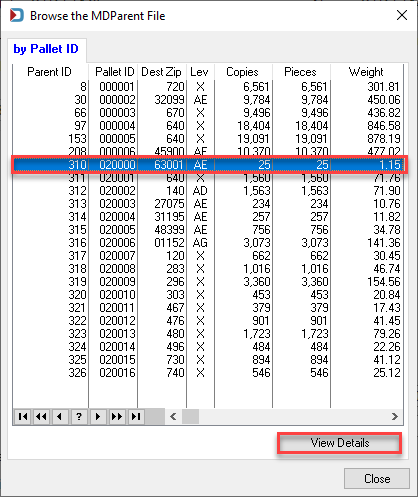
The Browse the MDParent File screen will display, providing the pallet list. Highlight a pallet and click View Details to view more info on it.
-
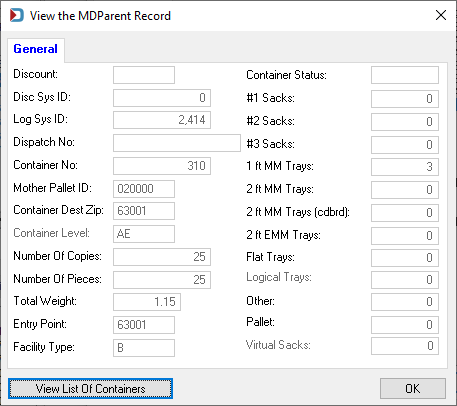
The View the MDParent Record screen will display, providing the details for the pallet selected on the previous screen. If you would like to see which containers were assigned to the selected pallet, click View List of Containers.
-
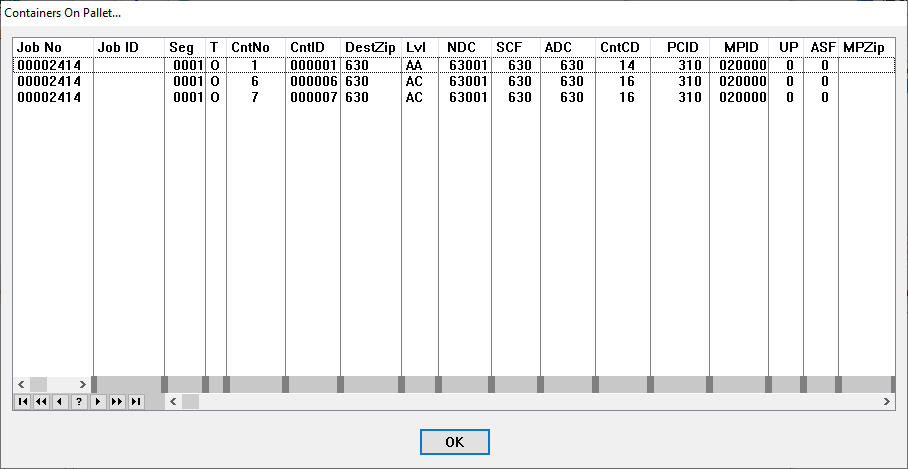
The Containers On Pallet screen will display, providing the container information. Click OK or Close to exit each of the screens.
Notice in the image below that the tray ids skip. This is what may occur when palletizing after Presort.
-
When you are ready to apply this palletization plan, click Finish.
If you want to run with other different options or settings, click Undo and try again.
If you find that most pallets are what you need, you have pallets that no matter what you try, you cannot get them the way you like. You can delete pallets and add trays to existing pallets, which we will cover.

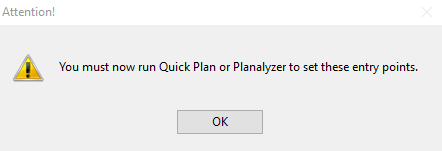
Please note, certain palletization plans will require you to either run a Quick Plan or the Planalyzer AFTER you palletize.
In the example provided, since the pallets are being created using the Courtesy by Entry Point plan, the Planalyzer screen will not appear. However, if you, for example, have a job where all the mail is repalletized, or you want to change Origin entry pallets to drop ship, then this is where either Quick Plan or Planalyzer is used. Below, we will show you the screens you'll see when running either Quick Plan or Planalyzer.
-
The Quick Plan allows you to set Entry Rules based on where you would like to enter your mail such as NDC, SCF, or Origin. You will use Minimums such as pounds, containers, or pieces. You will need to enter your Origin Entry Zip.
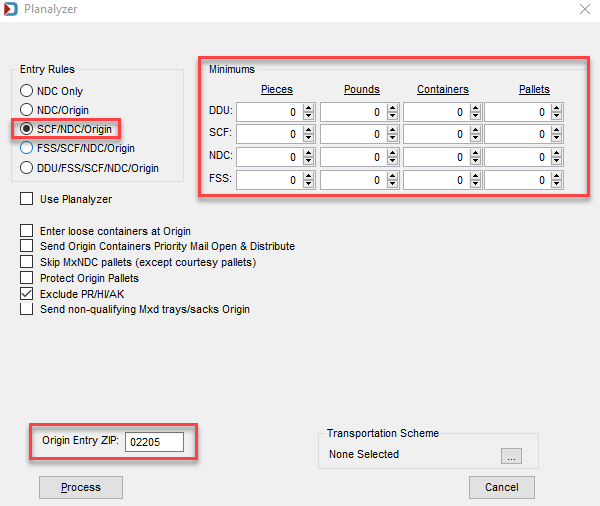
The Use Planalyzer option allows you to use a designated freight table or tables with preset options to help palletize your mail.
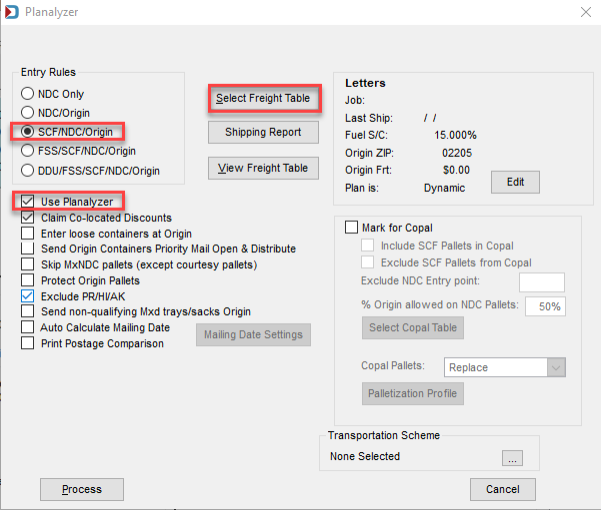
There are also additional options available with the Quick Plan or Planalyzer as seen above (the available options may vary). For more information about Quick Plan and Planalyzer, see Advanced Navigator - Freight Planning.
Continue Advanced Navigator - Palletization - Deleting Pallets