View/Dispatch Manifests - Create Manifest
The Create Manifest button is used to create a new manifest.
-
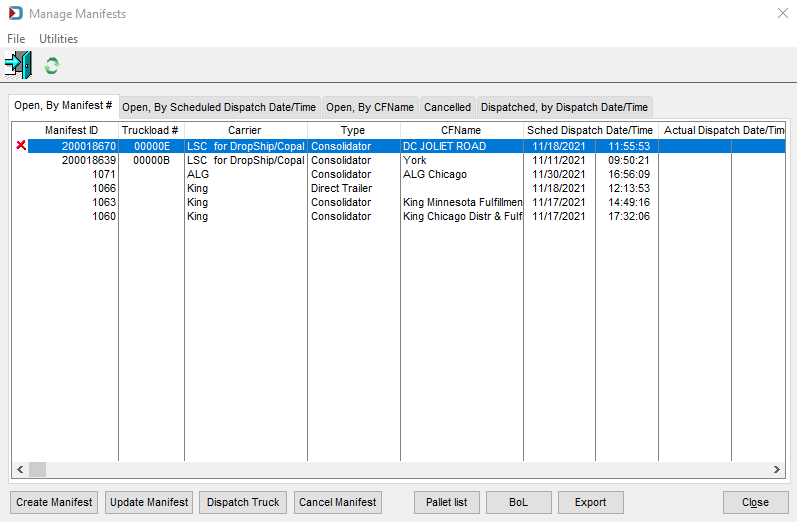
When View/Dispatch Manifests in the MCTM menu is clicked, the Manage Manifests screen will display. Click Create Manifest.
-
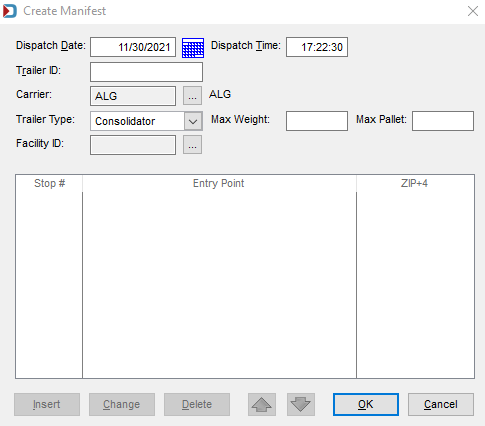
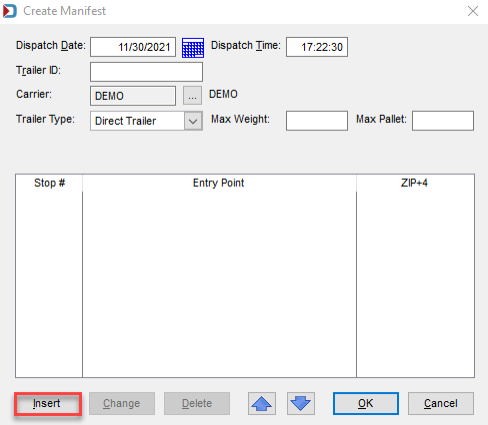
The Create Manifest screen will display.
-
Populate the appropriate fields, which are explained below:
Dispatch Date: Select/specify when the truck should be dispatched to your facility. It defaults to the current date.
Dispatch Time: Users can enter a specific dispatch time, if necessary. It defaults to the current time.
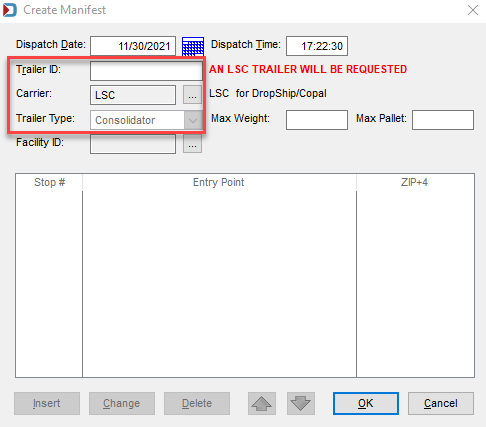
Trailer ID: This field will be auto-populated by the system for LSC. It will be blank for Non-LSC Users but can be updated later.
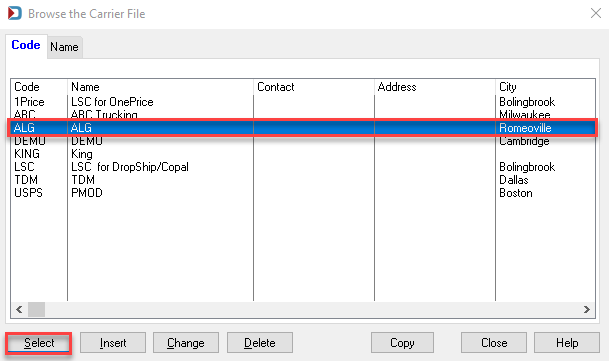
Carrier: Using the corresponding Browse to select a carrier. When Browse is clicked, the Browse the Carrier File screen will display. Highlight the carrier in the list and click Select.
If the desired carrier does not display in the list, they can be inserted. Refer to Add a Generic Carrier, Adding ALG to Carrier List, Adding King to Carrier List, Adding LSC DropShip/Copal to Carrier List, or Adding LSC OnePrice to Carrier List for instructions).
-
Trailer Type: Use the drop-down provided to specify a trailer type (except for LSC). The options are Consolidator, LTL, Commingle, Direct Trailer, and Origin.
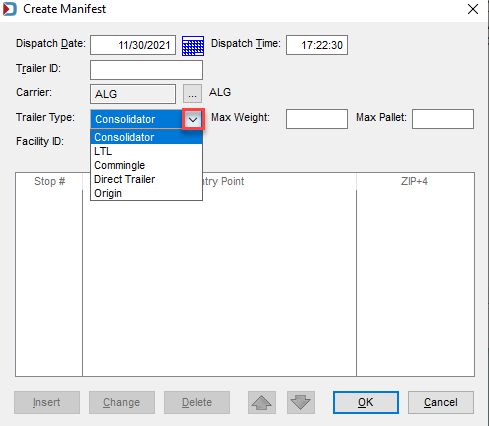
If "LSC" is selected as the Carrier, the Trailer Type field will be disabled.
-
Depending on the Trailer Type selected, the screen may update and display more or fewer options.
-
Consolidator: If the trailer type is Consolidator, the Facility ID is enabled. Click the corresponding Browse to select a Facility ID.
For LSC, the Consolidation Facility Listing will display to select the facility where the mail will go. If non-LSC, the Browse Distribution Centers screen will display. Highlight the desired consolidation facility or distribution center and click Select.
LSC's Consolidation Facility Listing Screen 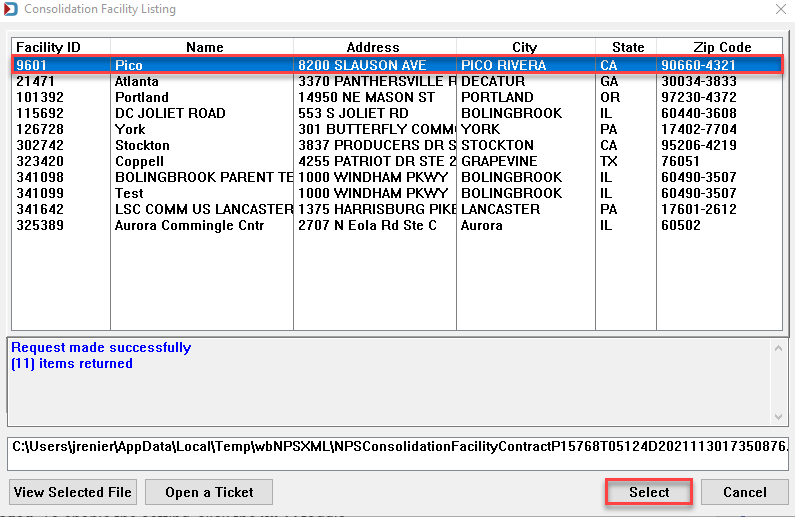
Non-LSC's Browse Distribution Centers Screen 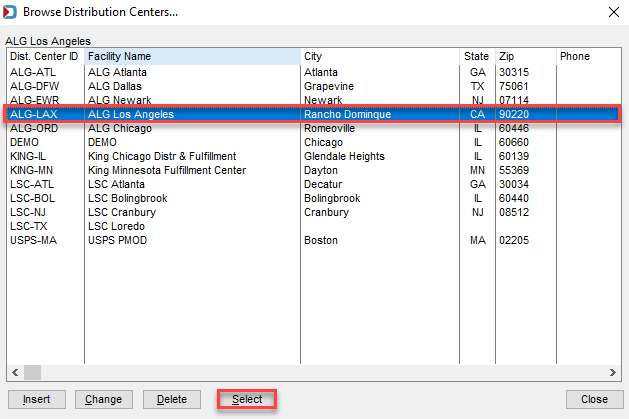
-
LTL: If a trailer type of LTL is selected, the option to select a Facility ID is not required.
-
Origin: If a trailer type of Origin is selected, select a Facility ID is enabled.
-
Direct Trailer: If a trailer type of Direct Trailer is selected, the option to select a Facility ID is not displayed.
-
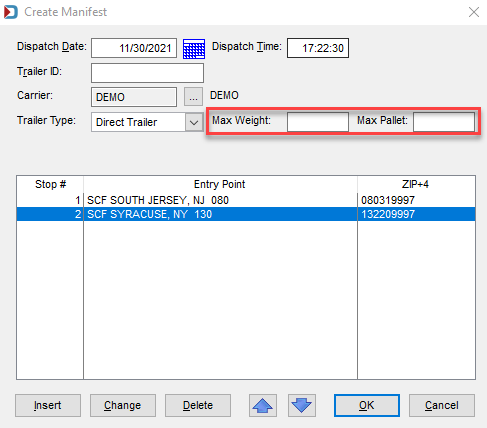
However, you add entry points (stops) to the manifest for a direct trailer by clicking Insert.
-
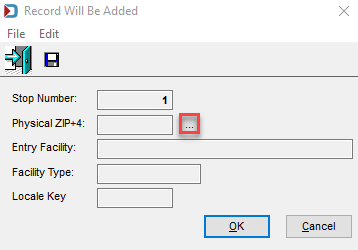
A Record Will Be Added screen will display. In addition, the system automatically generates stop numbers.
-
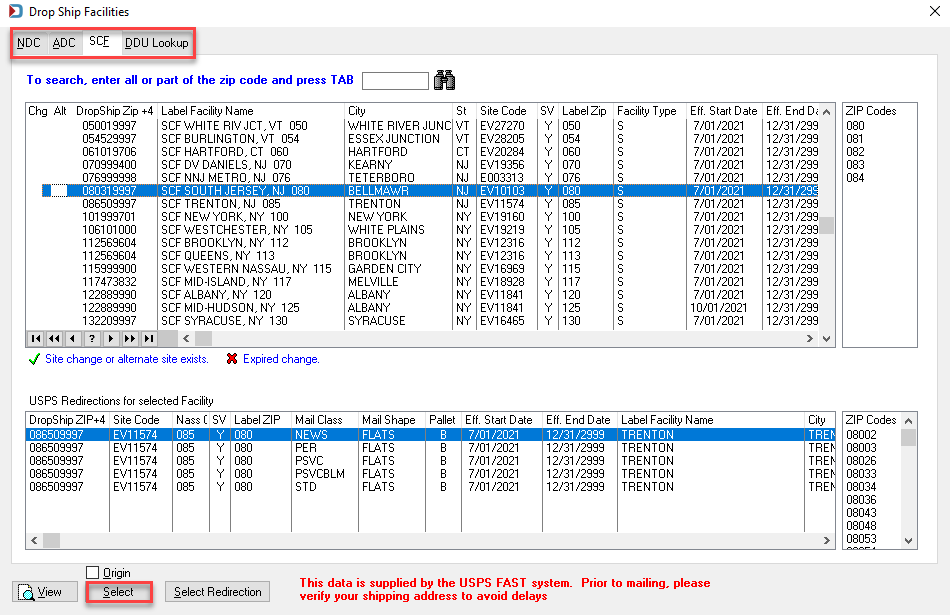
Using the corresponding Browse, highlight the appropriate facility from the list provided by the USPS FAST system and click Select. Make sure to select the appropriate facility type as designated by the tabs provided near the top of the screen.
If a user needs to redirect a shipment (not use the default facility), they should click Select Redirection versus Select.
-
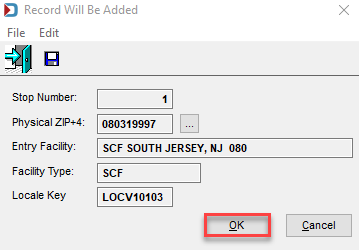
The Entry Facility, Facility Type, and Locale Key fields will be auto-populated based on the Physical ZIP+4 selected. Click OK.
-
The screen will close, and the stop information will be added to the Create Manifest screen.
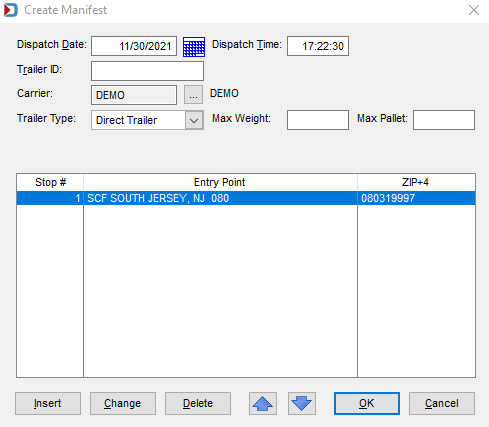
-
Add additional stops using the Insert. Once all stops are added, the user can change the stop order if necessary by highlighting the stop to be changed and clicking the
 Up or
Up or  Down arrow.
 The first stop (stop 1) (mail to be unloaded first) should be placed at the end or back of the trailer, and the final stop should be placed at the nose of the trailer (mail to be unloaded last).
-
-
A Max Weight (maximum) for the trailer can be entered. As pallets are added to a manifest/trailer, if the trailer's total weight exceeds the maximum weight entered here, a warning will display. Also, or instead, a Max Pallet count can be entered. Again, a warning will display if too many pallets are added to a manifest.
