Transportation View - PMOD - Create Shipments from Mail.dat
To create a PMOD shipment from a Mail.dat, perform the following:
-
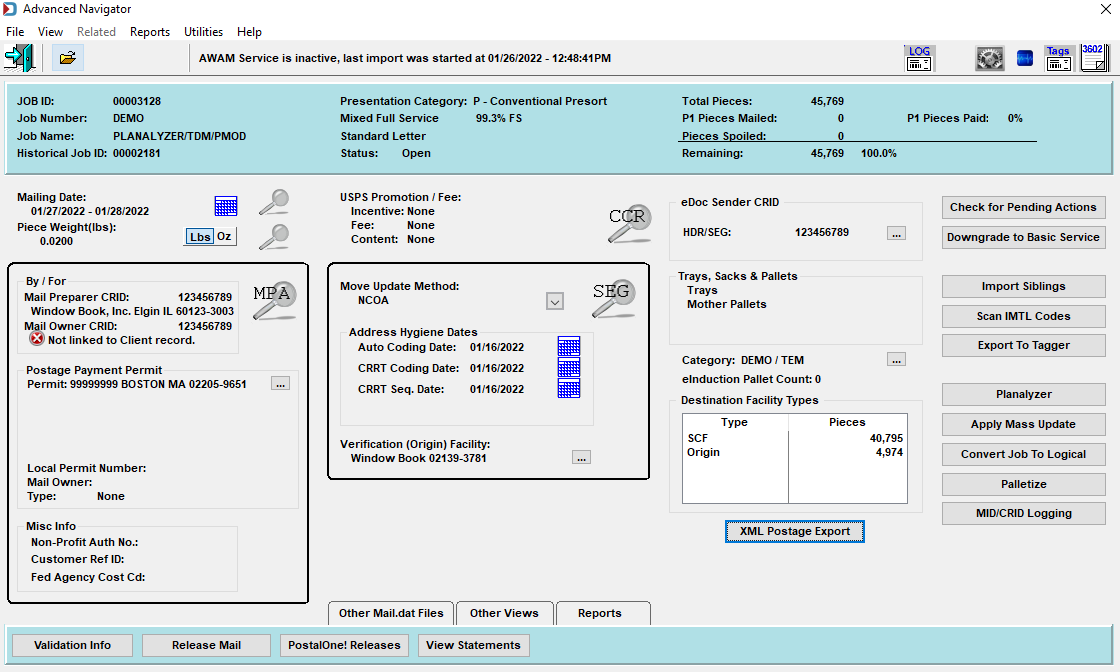
Select a job from the jobs list in DAT-MAIL to launch the Advanced Navigator. In the Advanced Navigator, click on Other Views and select Transportation View.
-
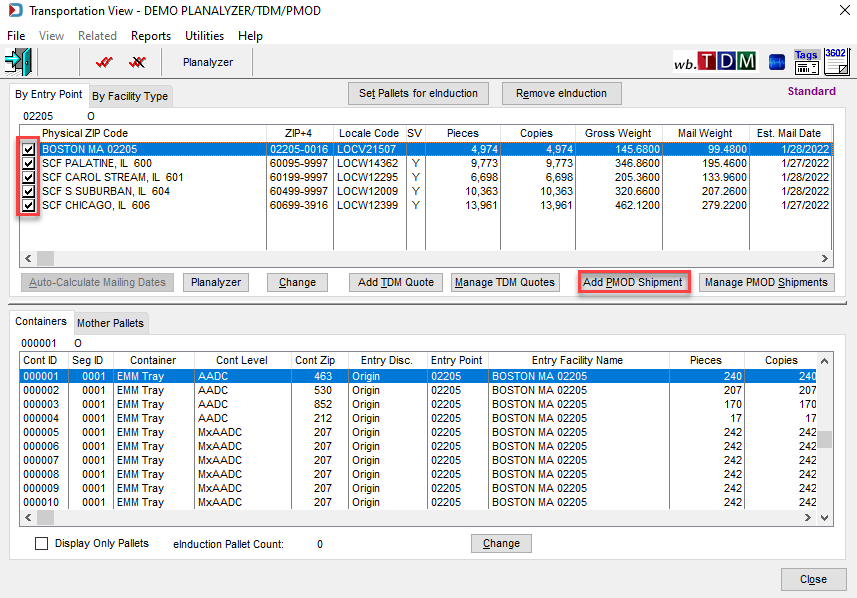
Select the entry points to create PMOD or PMEOD shipments in the Transportation View screen and click Add PMOD Shipment. If some shipments will be PMOD and others PMEOD select the entry points for each service separately.
-
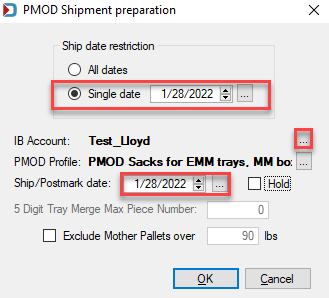
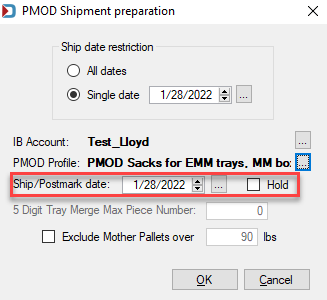
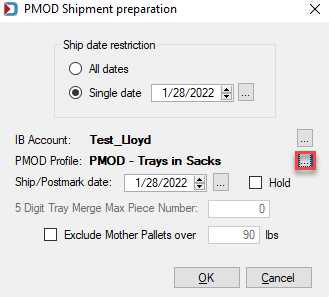
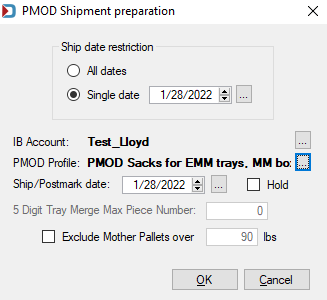
The PMOD Shipment preparation screen will display. Do you have entry points that have pallets ship on different dates? Do you want an entire entry point to ship PMOD or just a pallet? By populating the Scheduled Ship Date for each entry point’s pallets, you can select the entry point and create a PMOD shipment for a specific scheduled ship date. For this example, you would select the Single date radio button and enter the Schedule Ship Date.
In addition, the default IB Account (if there is a default account) will appear for the shipment. You can choose another payment account by clicking Browse.
Instead of using the Scheduled Ship Date, you could use Exclude Mother Pallets over to create PMOD shipments for any pallet less than the amount specified in this field. To use this option, select the check box and enter a weight.
Payment Account Selection Window 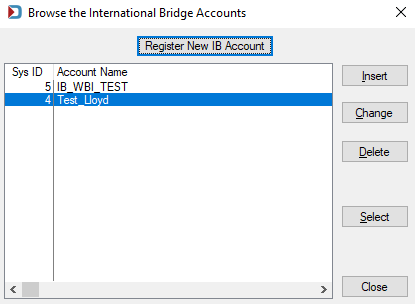
-
Confirm whether the correct PMOD Profile is selected. Click Browse to choose or create another PMOD profile.
-
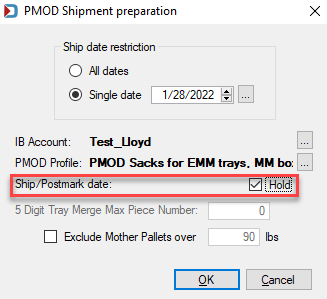
Specify the Ship/Post Mark date (this defaults to today’s date). The Ship/Post Mark date cannot be older than the system date and not more than 14 days past (or newer) than the system date. If you are unsure of the shipment date, select the Hold checkbox. Then, when the mail is ready to ship, you will enter a ship/post mark date.
If you are shipping to DDU entry points, select Enable 5 Digit Container Merge in the PMOD profile, enter the maximum number of pieces that will fit in the container in the Max Pieces Number field. This number becomes the default value of the 5 Digit Tray Merge Max Piece Number field on the PMOD Shipment preparation screen. You can change this default value for future shipments without changing the field value in this profile.
Example of a DDU Profile with 5 Digit Merge Selected 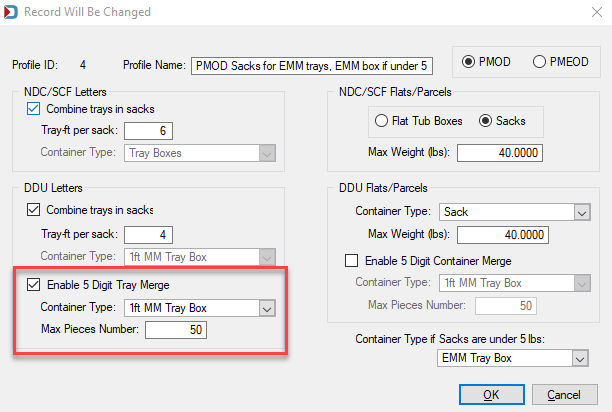
The 5 Digit Tray Merge Max Piece Number field will not be active if the selected job does not contain DDU entry points.
-
Press OK to process the shipments.
-
You will see the Processing Records dialog as prices are being calculated. It may take a few moments before processing is complete. Before we move on to the next of purchasing labels, let's cover more about the PMOD Shipment Estimates screen and the options you have within this screen.
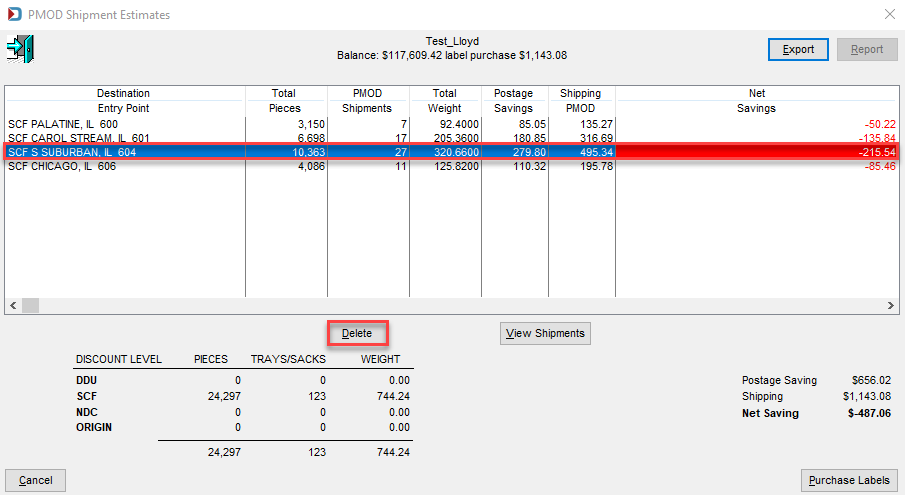
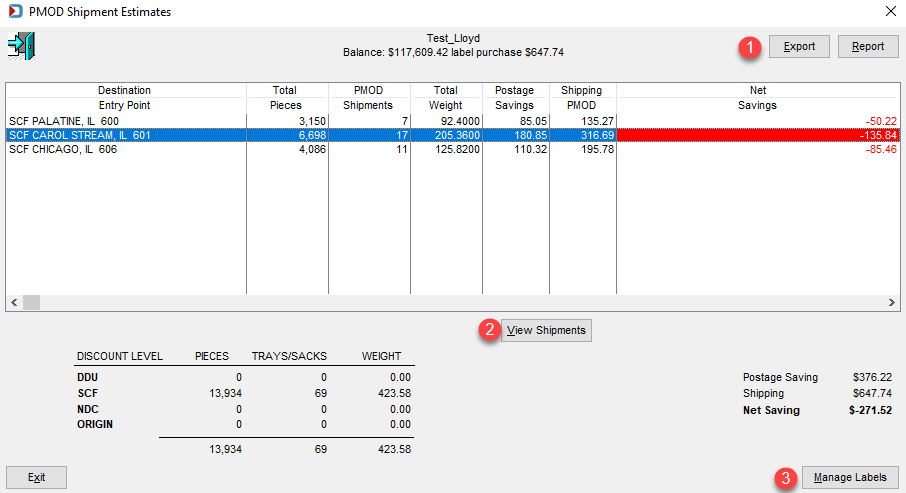
After the shipment charges are received from International Bridge (IB) or EasyPost (EP), the PMOD Shipment Estimates screen will display. The assigned IB or EP Account used for the shipment displays at the top of the screen (in this example, “Test”). In addition, the postage balance for that account displays for IB. And then the cost of the labels associated with the selected shipment.
All of the selected/processed entry points will be listed. The following columns are
 Destination Entry Point, Total Pieces, PMOD Shipments, Total Weight, Postage Savings, Shipping PMOD, and Net Savings. In addition, the screen provides a section with
  Discount Level, Pieces, Tray/Sacks, and Weight. Also, the total
  Postage Savings, Shipping, and Net Savings for the entry points.
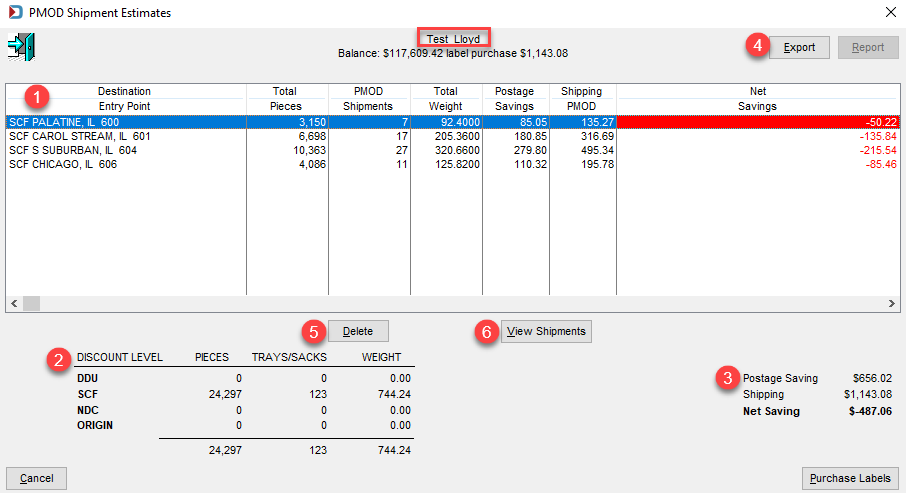 While you are familiar with most of the columns, there are a couple with explaining.
 First, the PMOD Shipments column represents the number of PMOD sacks or tray boxes.
Second, in the Net Savings column, unless you are going to DDUs, the postage savings for NDCs and SCFs is not enough to cover the cost of shipping PMOD. And it may not even be enough when shipping to DDU. The point of sending via PMOD is improved delivery.
 Export: you can export a CSV file with the costs if you need your customer's approval or want to provide the information to someone internally.
If you void any labels, this report will not be available.
When you click Export, the PMOD CSV Export window will appear, click Browse to the select a folder to save the file and if you prefer a different filename, update the Export File Name.
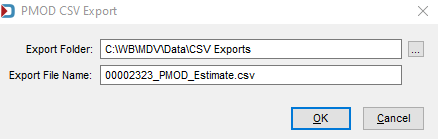
Exported CSV file 
 Delete: if you decide not to ship an entry point via PMOD or at a later time, highlight the entry point and click Delete.
If there is only one entry point, the Delete button will be disabled. Click Cancel instead.
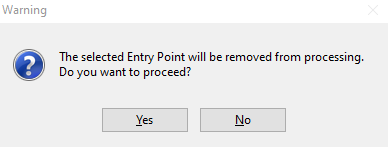
A Warning dialog will display. Click Yes to close the dialog and continue with the deletion. The entry point will be deleted, and the screen will update to display the recalculated totals.
 View Shipments: to view shipment details associated with a specific entry point, highlight the entry point and click View Shipments.
The PMOD Shipments screen will display, providing the details of the shipments for the selected entry point. You can either use the bottom scroll bar to see the columns or expand the size of the screen by dragging.
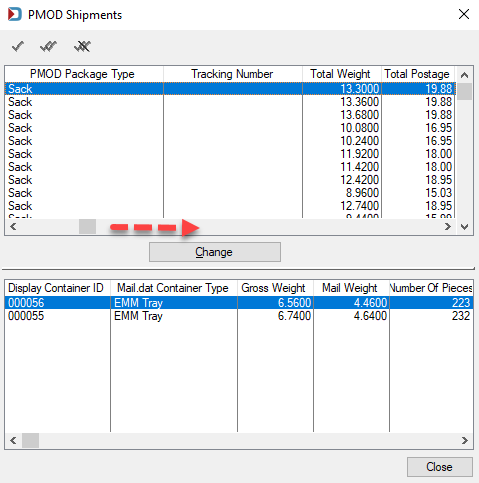
Change: the Container Type or Contents Weight can be changed by highlighting the shipment and clicking Change.
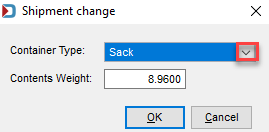
Click OK when finished. If a change is made, the system will automatically re-calculate the postage. When ready, click Close on the PMOD Shipments screen.
Sacks cannot exceed 70lbs.
Some information about Contents Weight: this weight includes the tare weight of the trays or sacks and pieces within a PMOD sack or tray box.
-
When ready, click Purchase Labels.
If the cost of the labels exceeds the balance of funds available in the selected Window Book/International Bridge account, a warning will display, and Purchase Labels will be disabled.
-
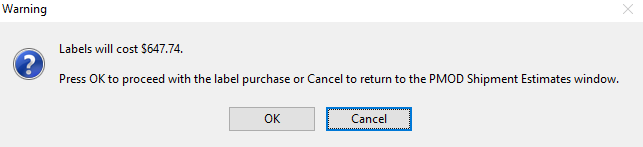
A Warning dialog will display the total cost for the labels and ask you wish to proceed with the purchase. Click OK to purchase the labels.
-
When the purchase is complete, the PMOD Shipment Estimates screen will update. All function buttons related to the payment account, entry point modification, and obtaining prices or labels will no longer be available.
A Manage Labels button will replace the Purchase Labels button.
 At this point, if users wish to view/print a report containing the original shipment estimate information, they can do so by clicking Report or click Export for the CSV file.
 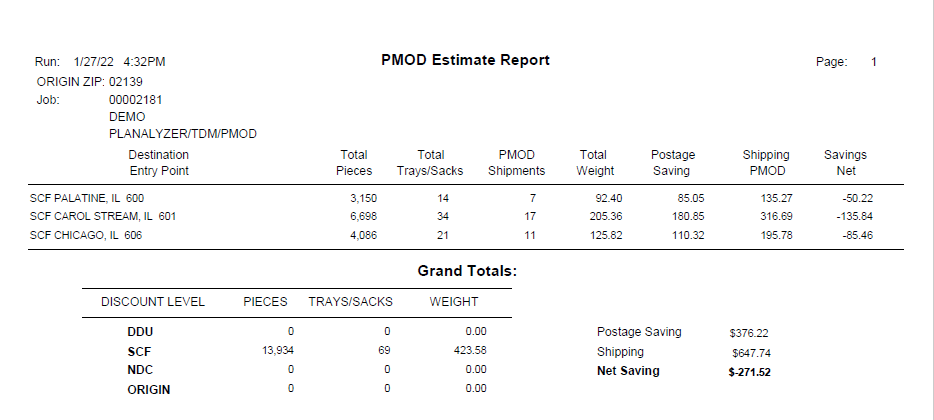 To get tracking information for the individual shipment and void, print, or view labels, click View Shipments.
The PMOD Shipments screen will display, listing each package, along with the package’s tracking information. In addition, you can view PMOD labels (PNG label image type only), voided, or printed by highlighting a package in the list and clicking the related function button.
IB PMOD Shipments Window 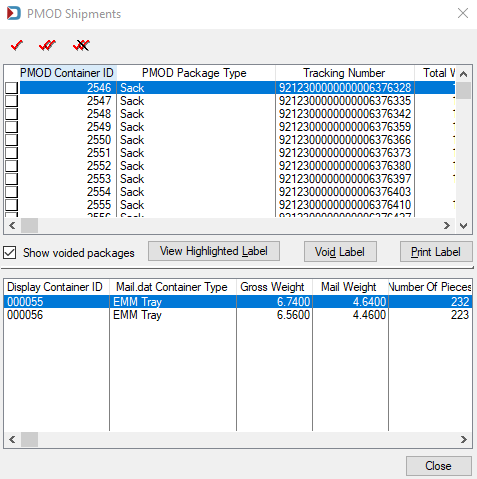
EP PMOD Shipments Window 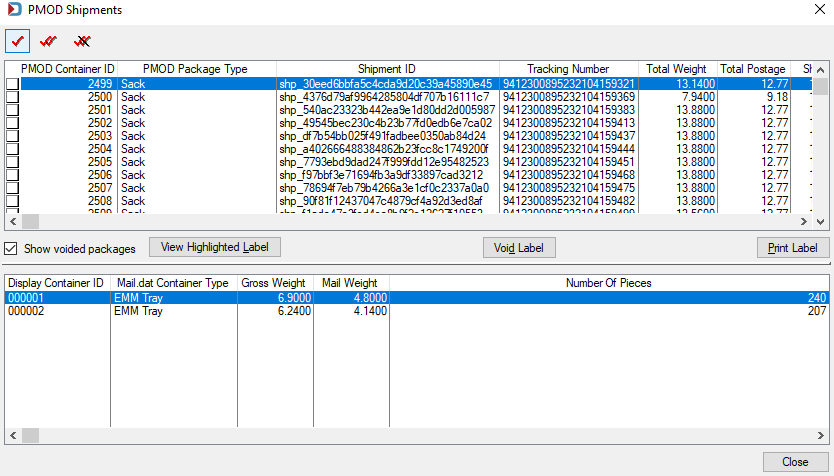 If you click Manage Labels, it will show you all the PMOD batches for this job. For more information on this function, see Transportation View - Managing PMOD Shipments.©
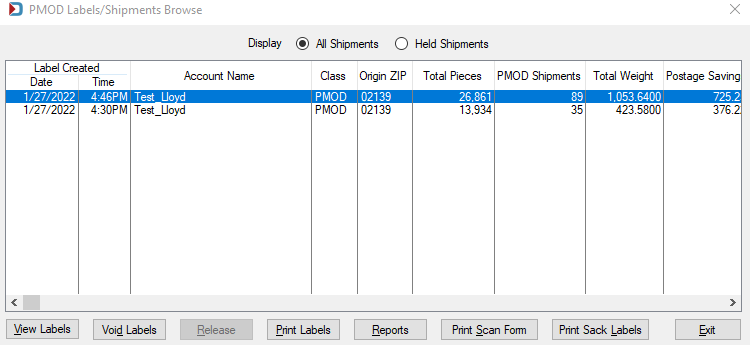
-
When finished, click Close.
As long as a profile exists, one is always automatically selected, so you should confirm that it is the correct profile to be used for the particular shipment. The only time a profile will not automatically be selected is when the first-time PMOD is being used (first-time use requires creating a profile).
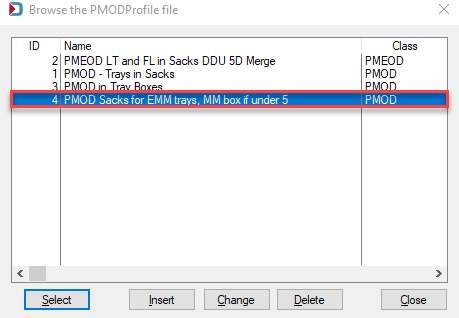
When you click Browse, Browse the PMOD Profile file screen will display. Next, highlight the profile to be applied to the shipment and click Select.
Or, if you need to create a profile, click Insert.
For information more information about PMOD Profiles, go to PMOD - Shipment Profiles for Mail.dats and Manually Imported Files.
The PMOD Shipment preparation screen will display, updated with the selected profile name.
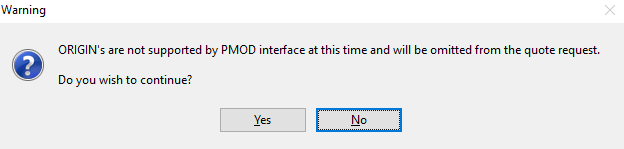
If origin mail is accidentally selected, a Warning dialog will display. Click Yes to continue processing the non-origin pallets.
If an entry point is selected and you have selected the Single Date option, some mail may be excluded.

Continue Transportation View - Managing PMOD Shipments
See also