Planalyzer - How to Use
This page will show the step-by-step process of using Planalyzer. First, it will show how it works and then show how to set up freight tables, etc.
If you are familiar with Quick Plan, then you are partially there in understanding Planalyzer.
We are assuming you have a Planalyzer registration key in DAT-MAIL.
-
Select a job and in the Advanced Navigator screen, click Planalyzer.

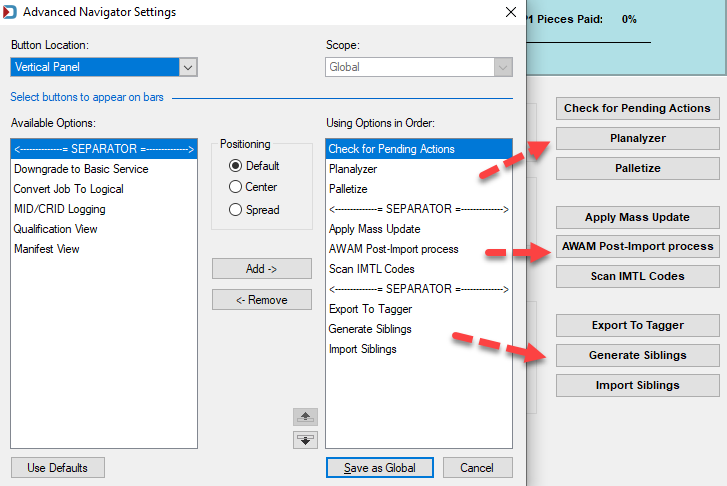
If you do not see Planalyzer in Advanced Navigator, click the  Navigator Settings button and add it to the right pane.
-
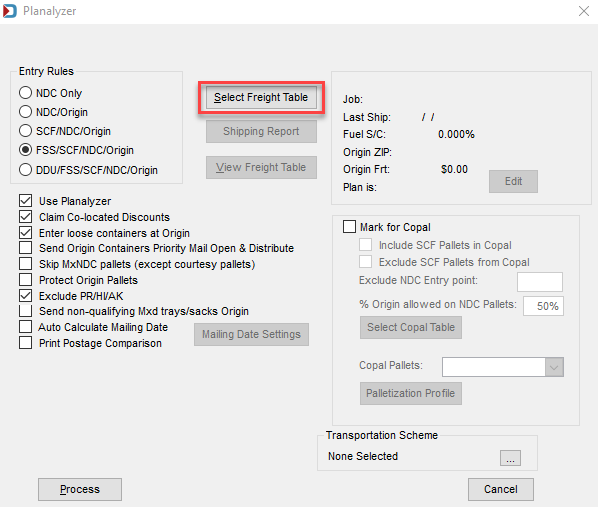
When the Planalyzer screen appears, click Select Freight Table.
-
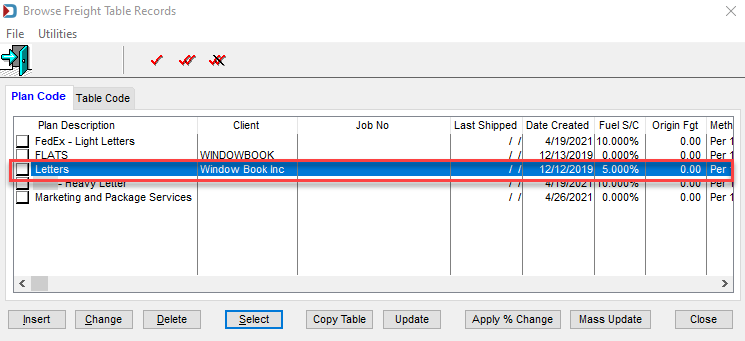
When the Browse Freight Table Records screen appears, highlight the appropriate freight table and click Select.
Later we will cover how to manually create a freight table, see DAT-MAIL Planalyzer - Creating a Freight Table. We can also help you import a freight table, if sent to you by a logistics Company.
-
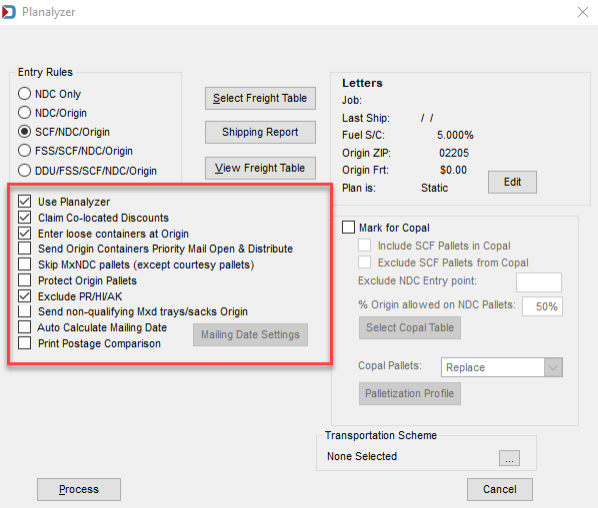
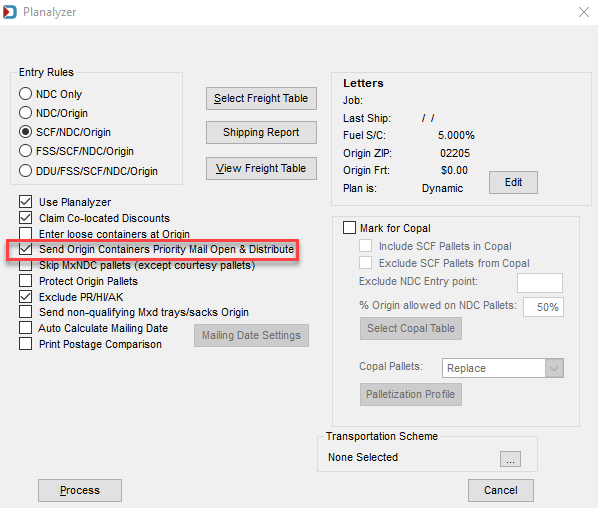
When you return to the Planalyzer screen, there are some decisions to make. If you plan to go to the SCFs, then make sure you select one of the ‘Entry Rules’ with SCF. If your goal is to drop back all the SCF to NDC, then you would select NDC/Origin. In this example, we are going to let Planalyzer decide if the SCFs are worth dropping to the SCF.
If you have a SCF pallet going to a collocated NDC, you can select the Claim Co-located Discounts checkbox and if Planalyzer takes a qualifying SCF pallet to a collocated NDC it will claim the SCF discount.
Note: some mailers chose not to do this because a logistics provider asked them not to do so or they are afraid their clerk might hold up the mail questioning the discount.
Another option, the Exclude PR/HI/AK checkbox insures that your offshore mail falls to Origin, instead of dropping at the SCF or the NDC. There is no savings on the offshore, but for example if you have a mixture of Jacksonville FL mail and PR mail on the same pallet and there is enough savings on the FL mail to drop ship, then it will take the PR mail to Jacksonville NDC also, if this is not selected.
-
Once you have selected the options you want, then click Process.
-
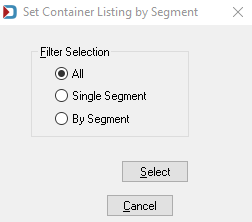
There is the option to optimize by Segment, in this example, we’ll leave the default of All and click Select.
-
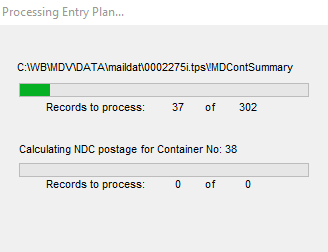
Depending on the size of the job, it might take a few minutes to process, you will see the progress as it’s running. If running using AWAM, this will happen behind the scenes.
-
When the Report: FPWorksheetRpt screen appears, if you want to send to a different printer click Select Printer, otherwise, just click OK.

-
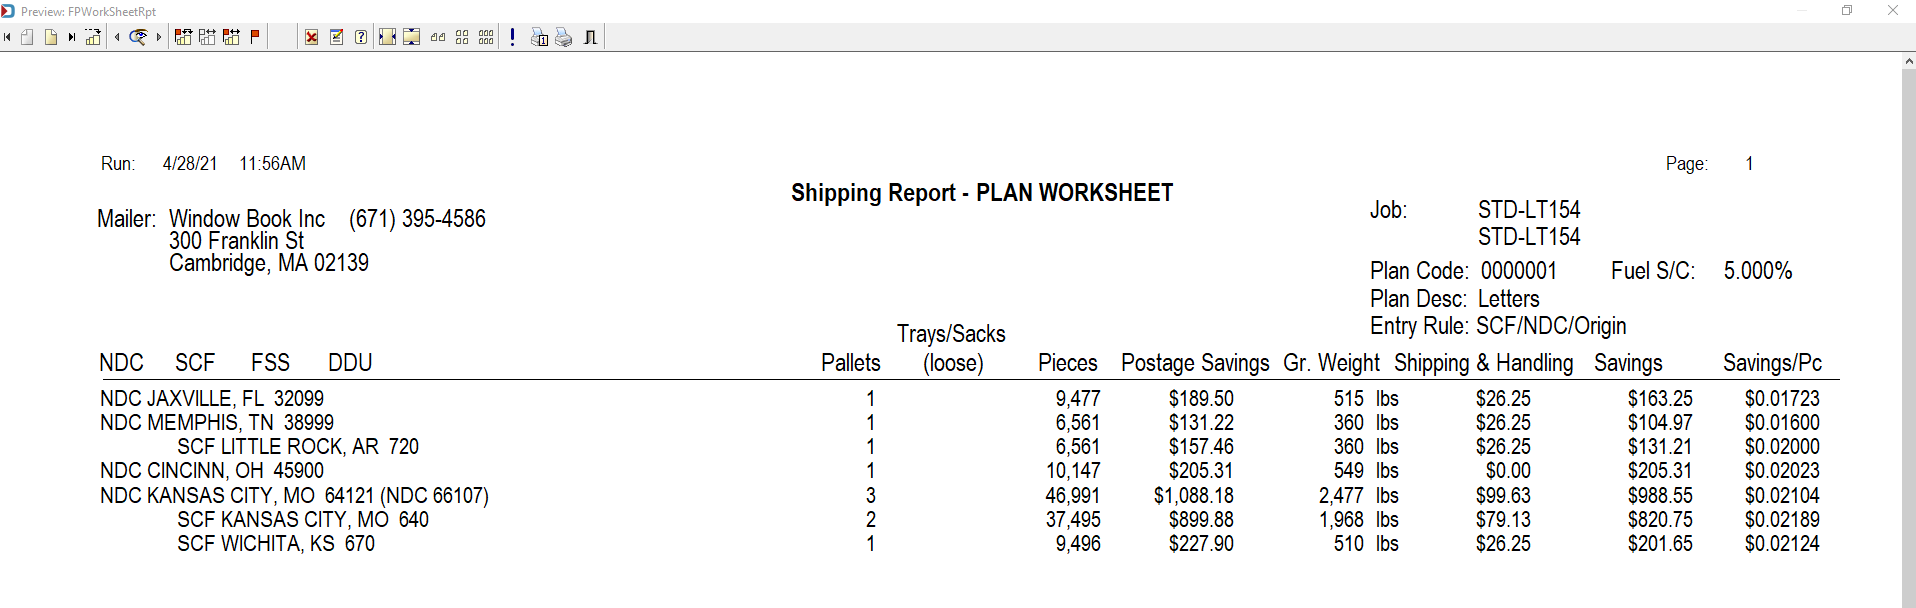
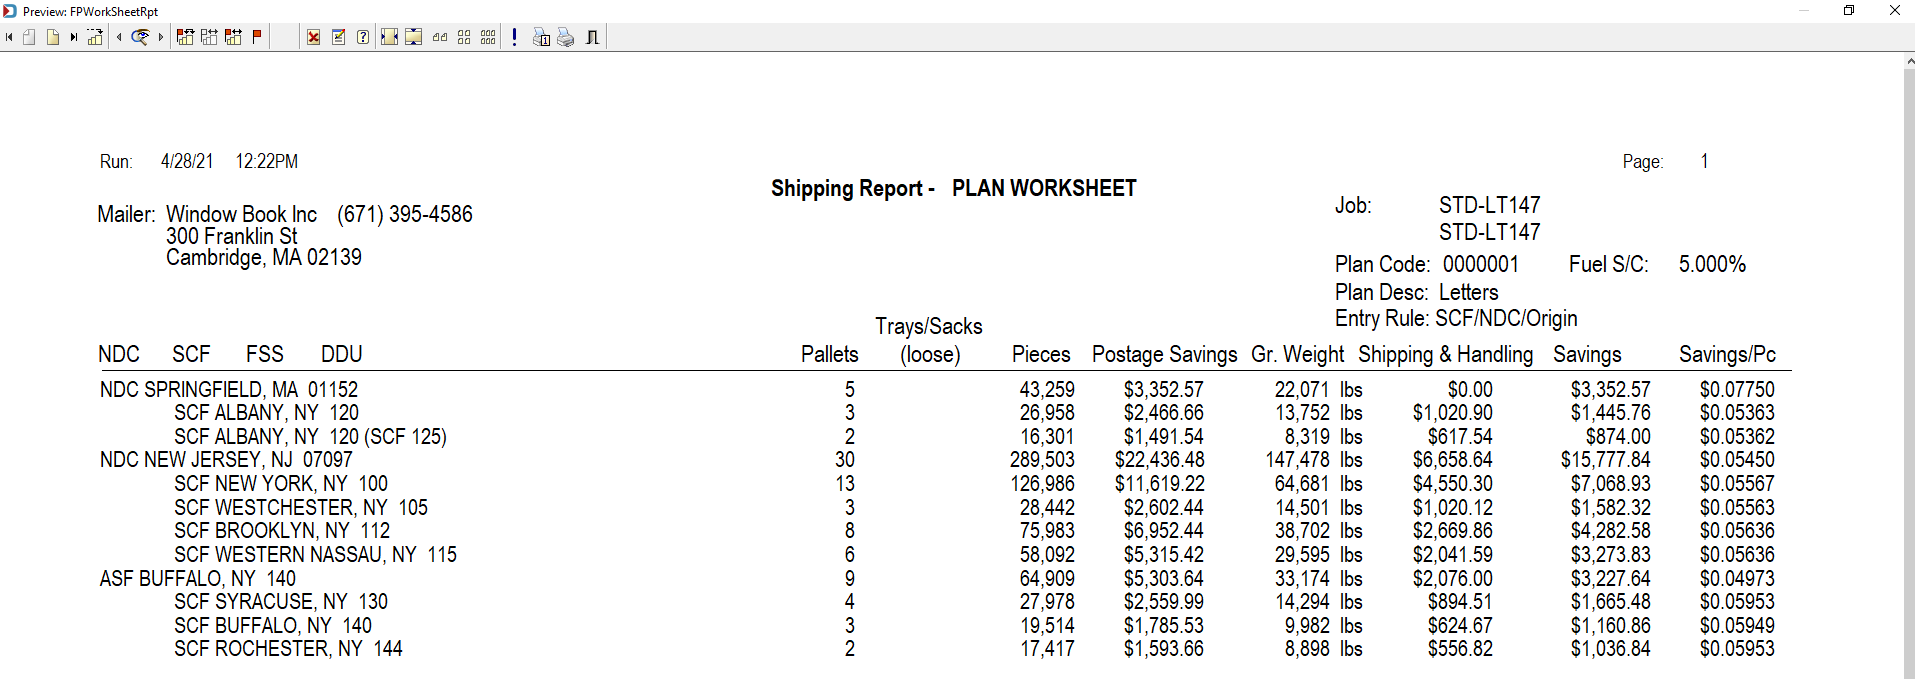
Your results will appear, the first page(s) called Shipping Report - PLAN WORKSHEET shows all the potential entry points available:
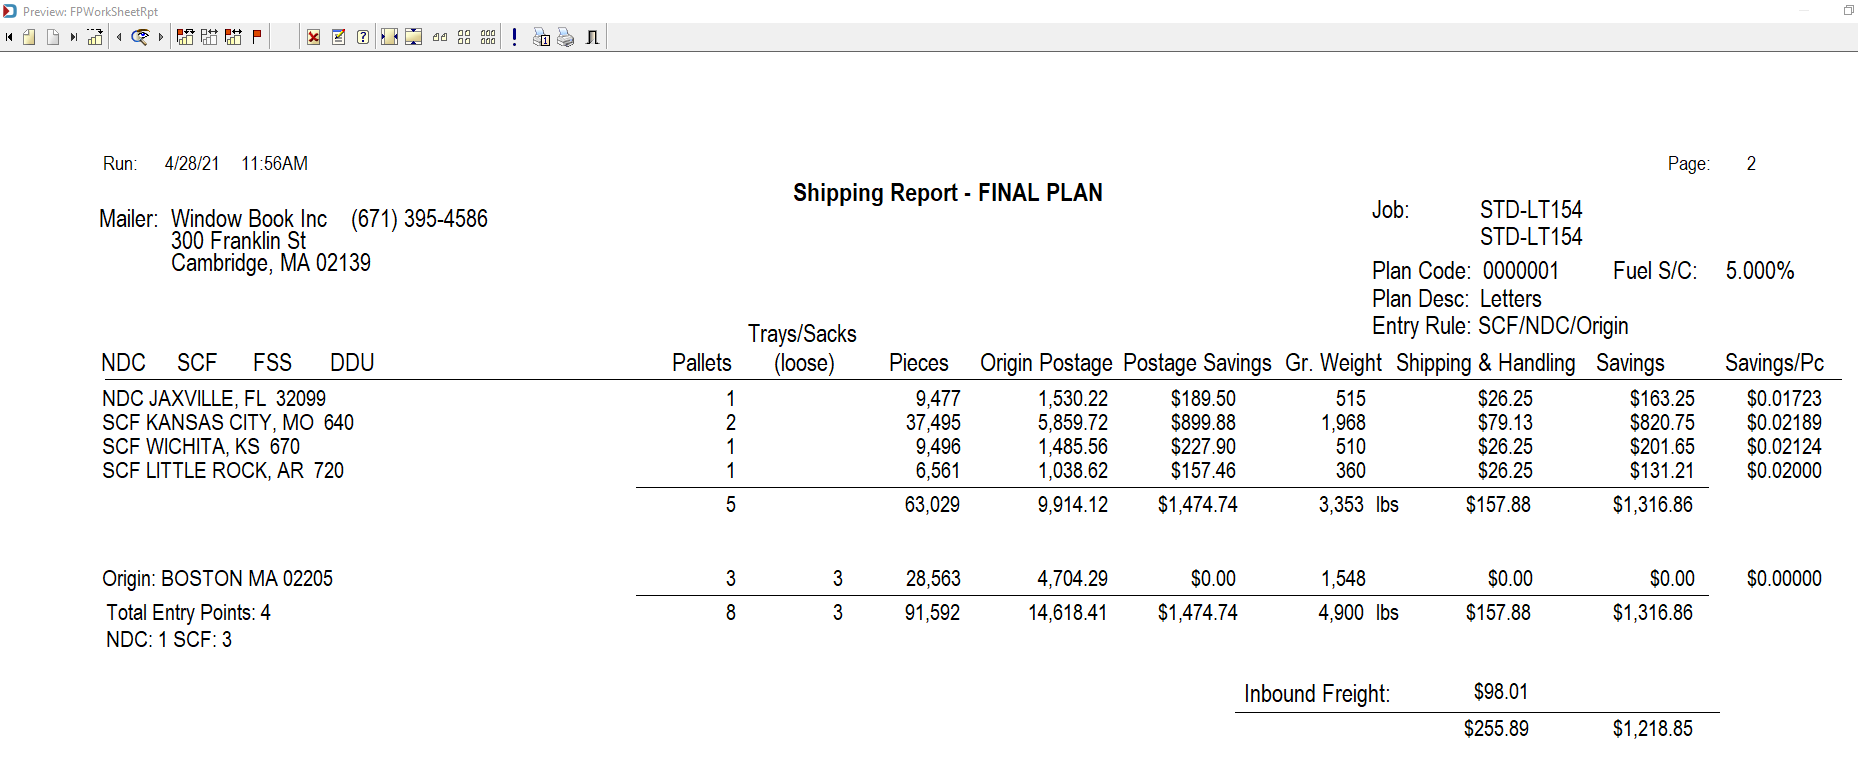
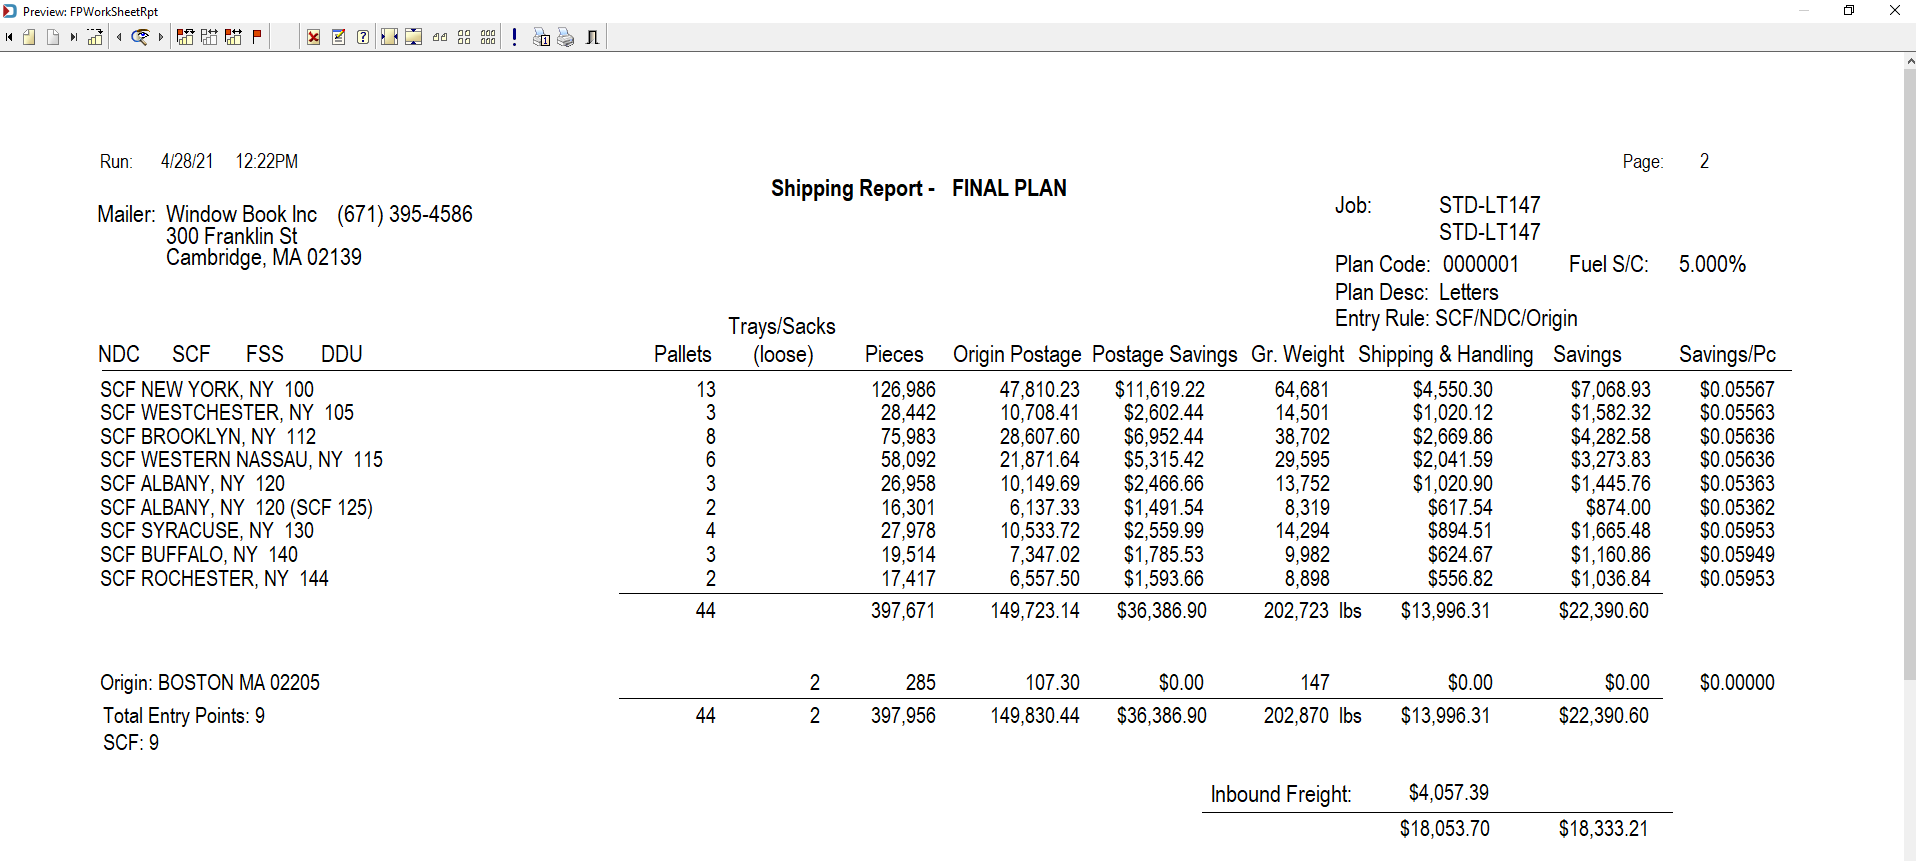
And on the next report, called the Shipping Report - FINAL PLAN, it shows how Planalyzer changed the entry points, while factoring in Fuel Surcharge, Freight Costs and Load Cost (we call Inbound Freight) charge. Based on freight costs it determined that less mail could go to the NDCs and SCFs due to cost. The amount of pieces not drop shipping increased.
This may be an opportunity to consider using Truck Direct Mail (TDM) as an option for drop shipping more of these pieces. See Transportation View - TDM®- Setup & Use for more information. TDM is an LTL carrier.
Now, let’s look at a different job that set as all Origin mail, using the same entry point settings as above.
Again, all the possible destinations:
When Planalyzer marks the file, notice there are two trays left at origin, this occurred because the option to Enter loose containers at Origin was selected:
-
If the goal is to ship any containers that qualifies for entry discount, then select the Send Origin Containers Priority Mail Open & Distribute checkbox.
-
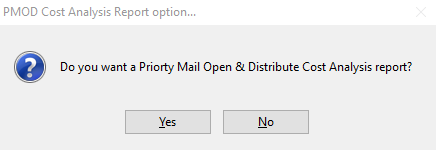
When you close the report preview screen, a PMOD Cost Analysis Report option dialog appears, click Yes to determine what containers can ship PMOD.
-
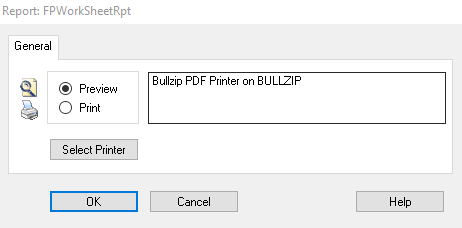
When the Report: FPWorkSheetRpt screen appears, again you can select a different printer then click OK.
-
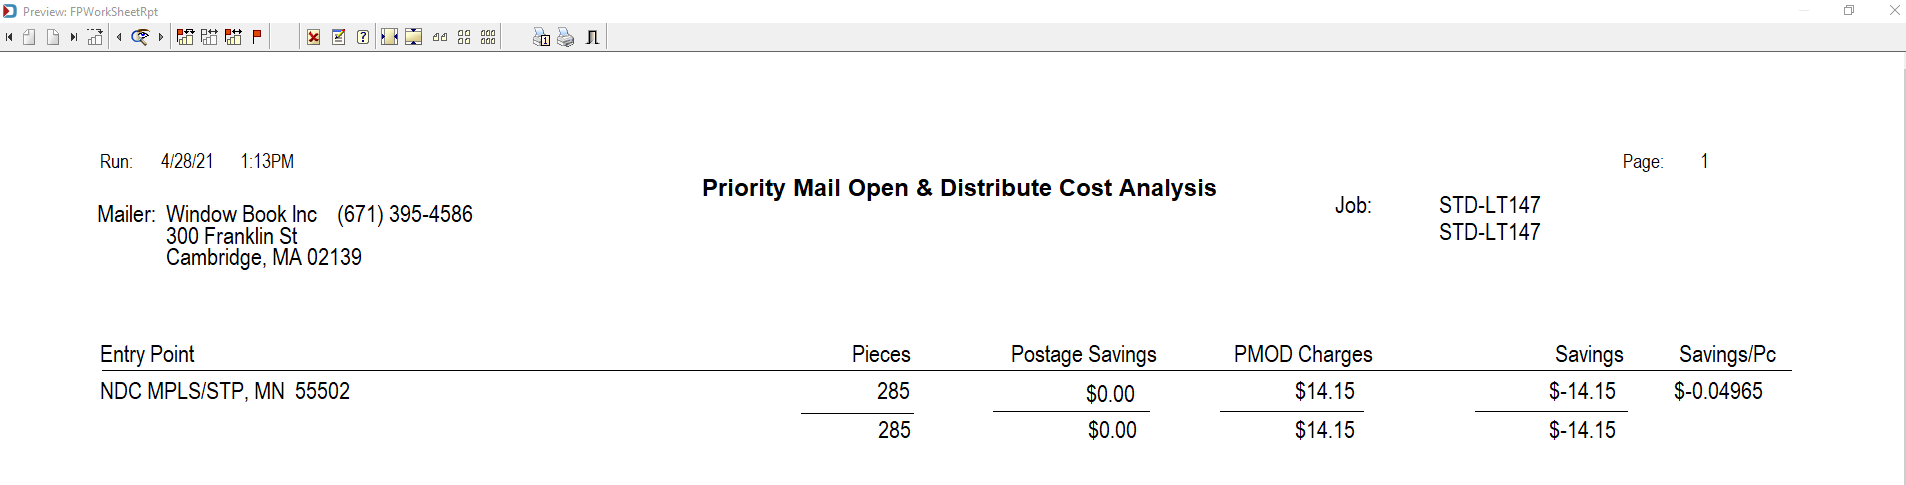
A Priority Mail Open & Distribute Cost Analysis report will appear providing you with the PMOD Charges. When ready, close the report.
-
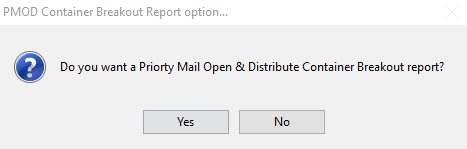
When you close the report, the PMOD Container Breakout Report option dialog will appear, click Yes.
-
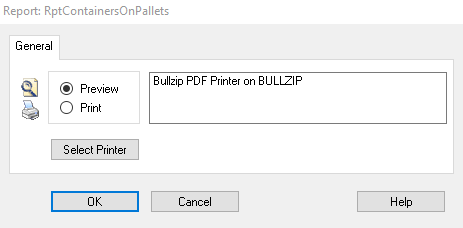
It will provide you the option to change printers. When ready, click OK.
-
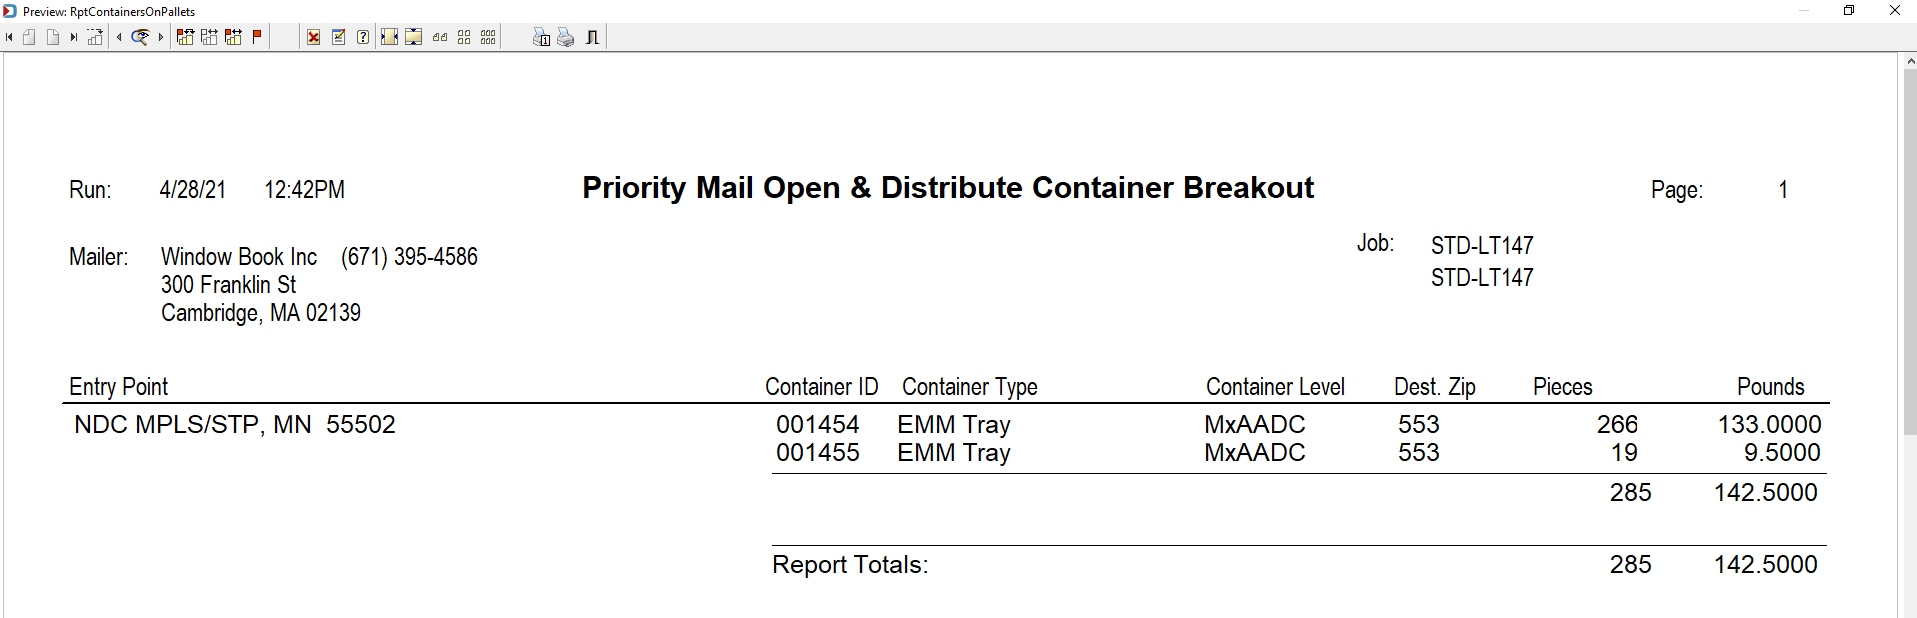
The Priority Mail Open & Distribute Container Breakout report will appear and you will see why the mail went to the NDC versus the SCF, in this example.
-
When you close the report, it will return to the Advanced Navigator screen. In order to ship PMOD, you need to print PMOD sack tags and the Scan Form which is basically a manifest for the USPS. See DAT-MAIL Transportation View > PMOD for more information.
You may run into situations where your customer instructs you not to drop ship an entry point or other reasons you need to change a destination. In Mother Pallet View (when sacks/trays are on pallets) or in Transportation View (for all mail), you can change the destination. For an example of how to do this, see Advanced Navigator - Other Views - Transportation View.
See also
Planalyzer - Creating a Freight Table
Planalyzer - Auto-Calculate Mailing Date
Planalyzer - Additional Resources
Return to Advanced Navigator - Vertical Panel