Browse > Manifests
Selecting Browse > Manifests, displays a list of existing manifests.

For MCTM users, any manifests created in DAT-MAIL will also display in the Manifests list in wbSCAN.
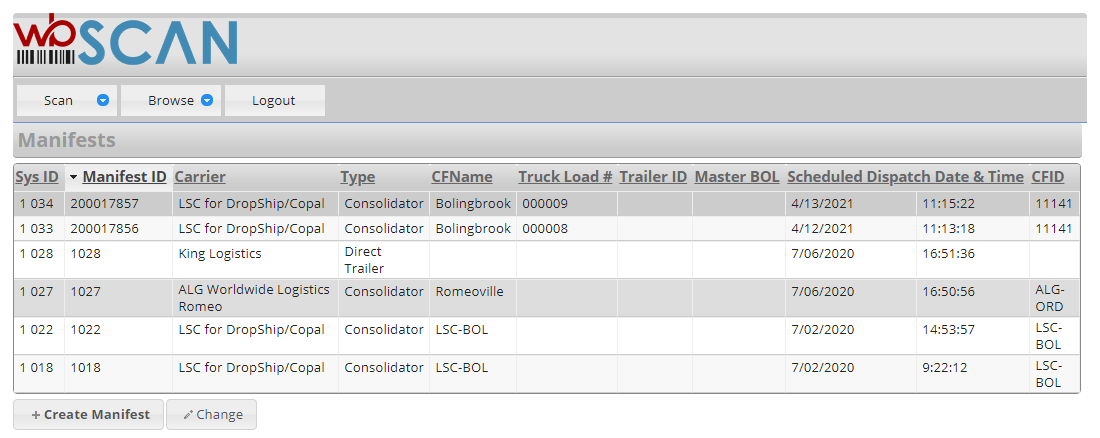
The data in the Manifests screen can be sorted in ascending or descending order by column for ease-of-use. In the image above, the data is sorted by Manifest ID in descending order (above note the ‘carrot’ next to the column label and the column header is shaded a lighter color than the rest). Click on any column header to sort the data accordingly.
Create a Manifest
To create a manifest, on the Manifests screen, click Create Manifest. The Create Manifests screen will display.
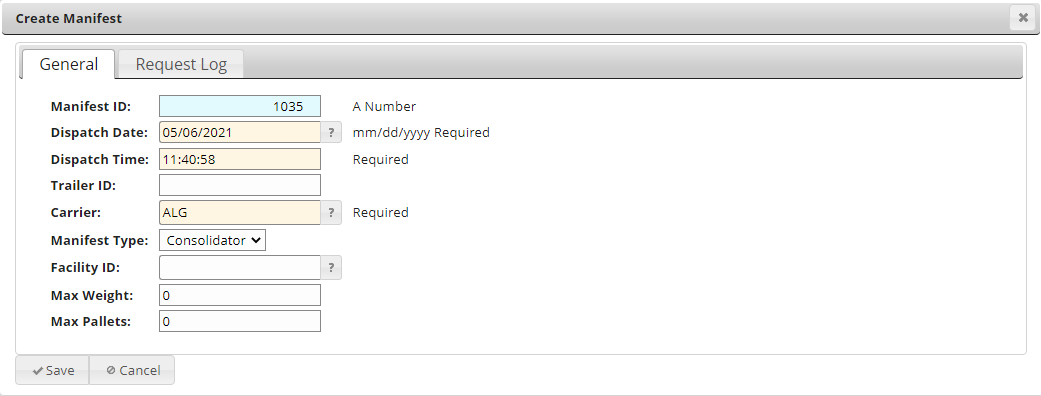
The Update Manifests screen contains the following default fields for creating a manifest:
-
Manifest ID: This unique number is used as an identifier for the manifest. It is automatically assigned by the system and cannot be changed by the user.
-
Dispatch Date: The date the mailer has scheduled the trailer be sent to them by the carrier. Click the field’s corresponding question mark to select a date.
-
Dispatch Time: The time the mailer has scheduled the trailer be sent to them by the carrier. The date auto-populates using the time the manifest is being created. Click anywhere in the field to change the time.
-
Trailer ID: The identifer of the trailer that is to be sent to the mailer by the carrier. This information is only provided (auto-populated) if the user is communicating electronically with the carrier (for example, DIME users). The mailer can; however, manually type in a value or identifier if one is provided by their carrier.
-
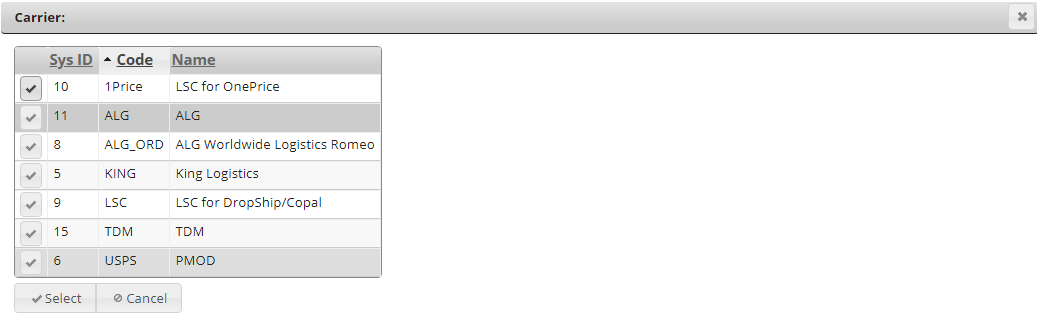
Carrier: The name of the logistics company picking up the load or shipment. Carrier information must be pre-populated in DAT-MAIL prior to creating a manifest. Use the field’s corresponding question mark to launch the Carrier screen. The carriers populated in DAT-MAIL’s Carrier List will display on the screen. Highlight a carrier in the list and click Select or click the desired carrier’s corresponding check-mark to select it.
-
Manifest Type: Used to specify the type of shipment that is to be associated with the manifest. The options are: Consolidator, LTL, Commingle, Direct Trailer, and Origin. Depending on the option selected, the screen will update to display additional fields necessary for creating the manifest, or modify the screen to disable any of the existing fields that are no longer necessary.
-
Consolidator: Requires default fields only. No additional fields display, and no existing default fields are disabled.
-
LTL: Default ‘Facility ID’ field is disabled. No additional fields display.
-
Commingle: Requires default fields only. No additional fields display, and no existing default fields are disabled.
-
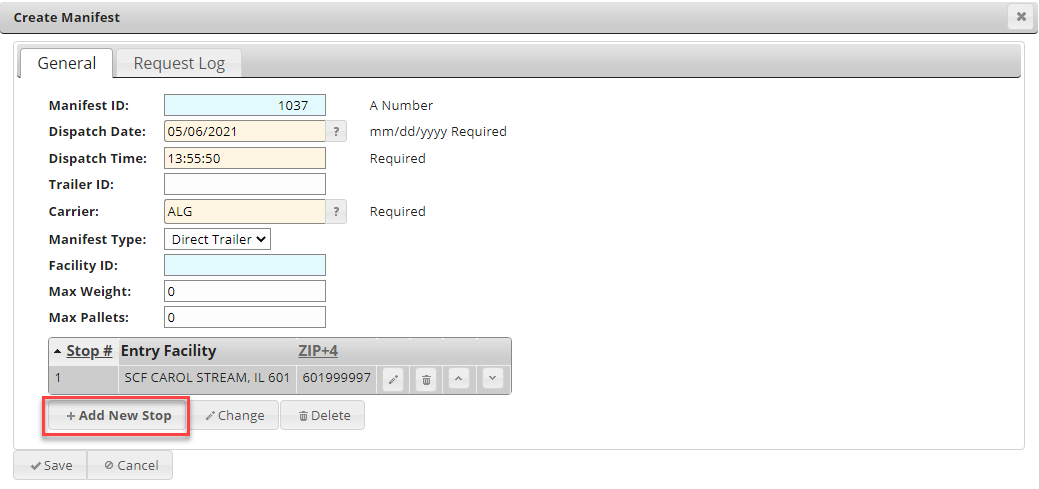
Direct Trailer: Default ‘Facility ID’ field is disabled. Screen is updated to display the Add New Stop option to be able to add required stop information (refer to Stops For Direct Trailers for more information).
-
Origin: Requires default fields only. No additional fields display, and no existing default fields are disabled.
-
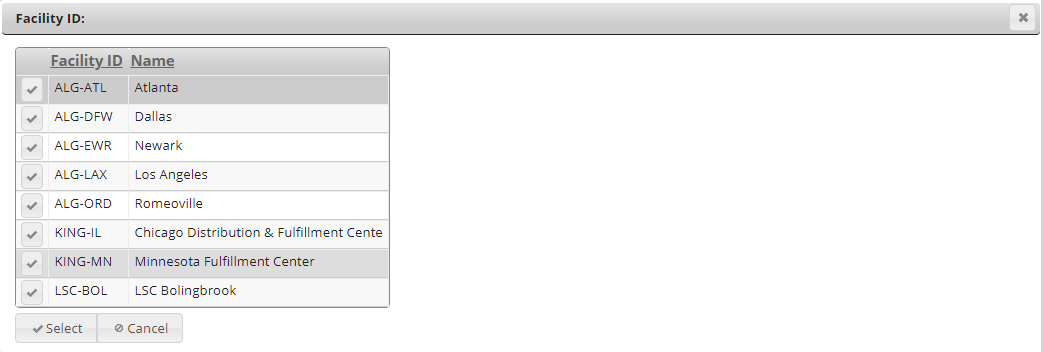
Facility ID: The name or identifier of the default facility associated with the selected logistics Company or carrier picking up the shipment. Carrier facility information must be pre-populated in DAT-MAIL prior to creating a manifest (refer to Requirements for more information). Use the field’s corresponding question mark to launch the Facility ID screen. The carriers populated in DAT-MAIL’s Distribution Center List will display on the screen. Highlight a facility in the list and click Select or click the desired Facility’s corresponding check-mark to select it.
-
Max Weight: A maximum weight for the trailer can be entered. As pallets are added to a manifest/trailer, if the total weight of the trailer exceeds the Max Weight entered here, a warning will display.
-
Max Pallets: A maximum pallet count can be entered. If too many pallets are added to a manifest/trailer, a warning will display.
The warning message that displays if the pallets scanned exceeds the Max Weight or the Max Pallets values is the same.
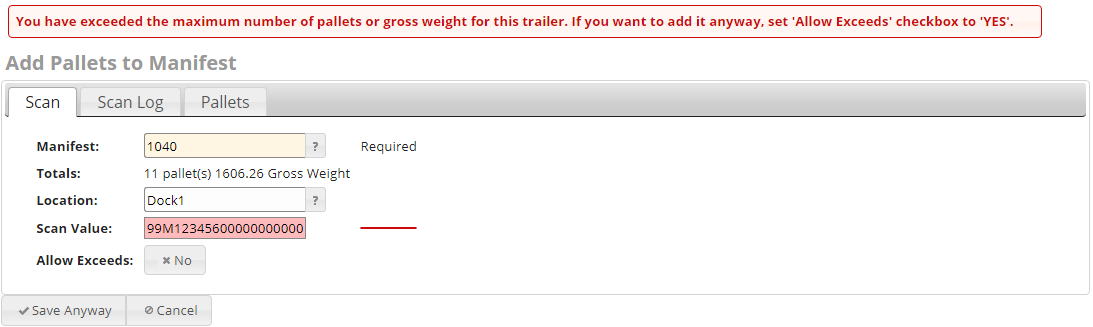
Users can override the warning when adding pallets to a manifest by clicking Save Anyway and/or setting the Allow Exceeds toggle switch to Yes. Refer to Add Pallets to Manifest – Scan tab for more information.
Stops For Direct Trailers
Stops are associated with a Manifest Type of Direct Trailer only. Facility data that is required for creating stops is provided through the Automation Scheduler’s Auto Postal Updates plug-in; therefore, the installation of these two software components must occur before attempting to create Stops.
The information provided pertaining to Stops assumes that the Automation Scheduler with Auto Postal Updates plug-in has been installed, registered, setup, and the software’s service started.
Creating Stops
-
When creating or editing a manifest that has a Manifest Type of Direct Trailers, click Add New Stop to add a Stop. The Add Stop screen will display:

-
Stop Number: Stop Numbers are are system-generated. The lower the Stop Number, the sooner it will occur during the delivery and/or unloading process. Therefore, the lower the Stop Number, the closer the pallets should be loaded to the trailer door. Once Stops are created, the order in which they occur can be changed by the mailer if necessary (refer to Changing Stop Order for more information).
-
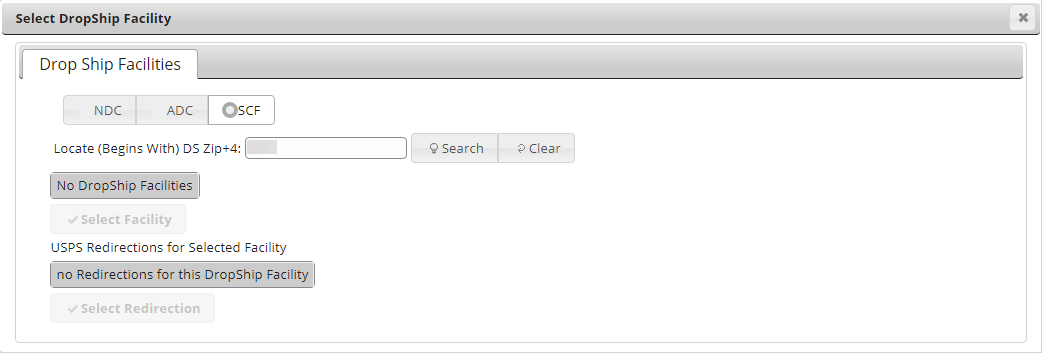
Physical Zip: Specify the physical zip code associated with the stop. Users select the zip code using the same facility data DAT-MAIL uses. Clicking the field’s corresponding question mark displays the Select DropShip Facility screen.
If no drop ship facility data displays, the Automation Scheduler with Auto Postal Updates plug-in has not been installed, registered, setup, and/or the software service run.
-
-
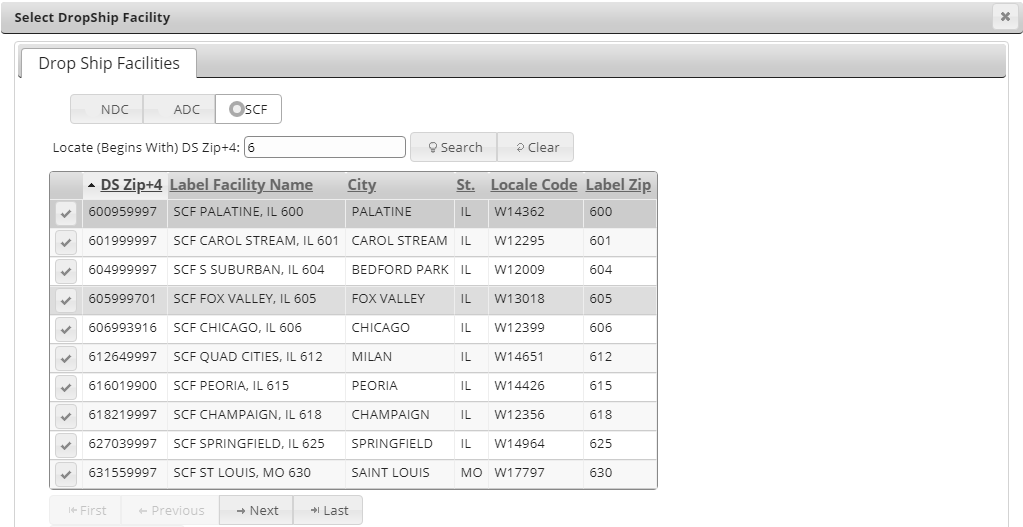
Select whether the facility should be a NDC, an ADC, or a SCF. The corresponding data can be sorted by clicking the column header (data will be sorted in ascending or descending order). A specific facility can be searched for by entering the beginning of the ‘DS Zip+4’ (for example, “6” for facilities that have a ZIP+4® that begins with a “6”). Users can also navigate through pages by using Next and Last.
-
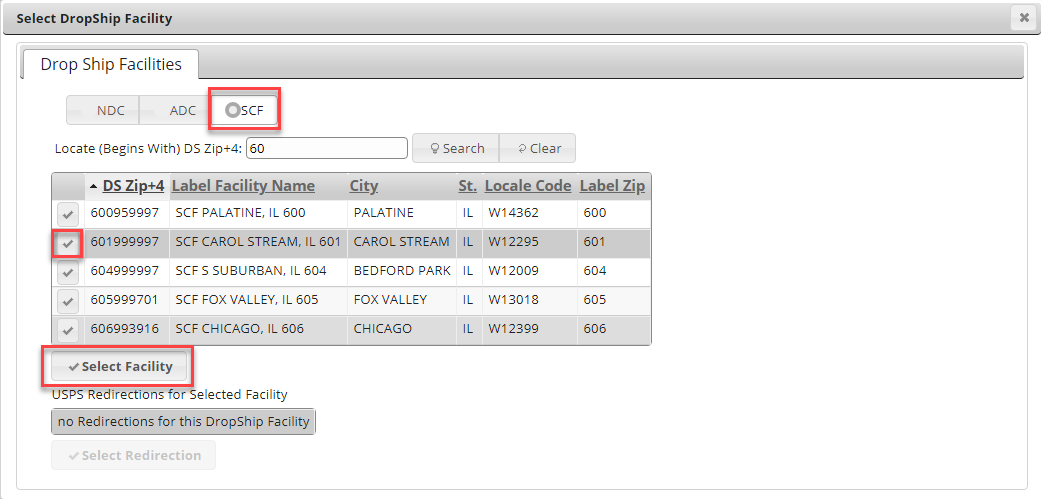
Once the desired ZIP+4 is identified, highlight it (or its redirection) in the list and click Select Facility or click the line item’s corresponding checkmark.
-
Entry Facility: This is the name of the facility that corresponds with the Physical Zip field. The field auto-populates with the Physical Zip.
-
Facility Type: This identifies the type of Entry Facility that was selected (NDC, ADC, or SCF). The field auto-populates based on what is selected when the Physical Zip is selected.
-
Locale Key: This field is auto-populated based on the Locale Key of the Entry Facility selected.
-
-
When all of the stop fields are satisfied, click Save to add the stop to the manifest. Repeat the add stop process for all stops that should be associated with the manifest.
Editing Stop Information
-
Stop information can be modified by clicking the Stop’s corresponding
 Edit button or by highlighting the Stop’s line item and clicking Change.
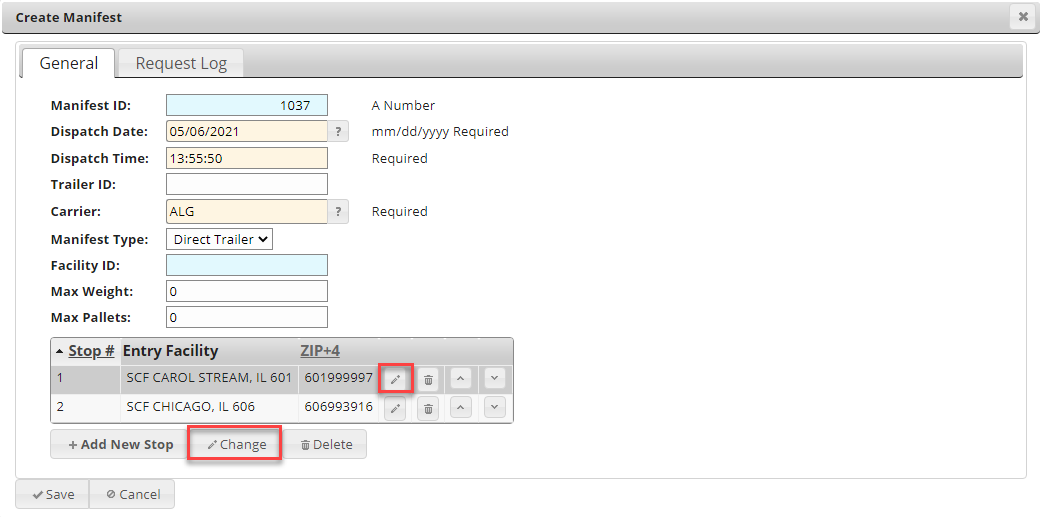
-
A screen that shows the details of the selected Stop will display. Make the necessary updates and click Save.
Deleting Stops
-
Stops can be deleted by clicking the Stop’s corresponding
 Delete button or by highlighting the Stop’s line item and clicking Delete.
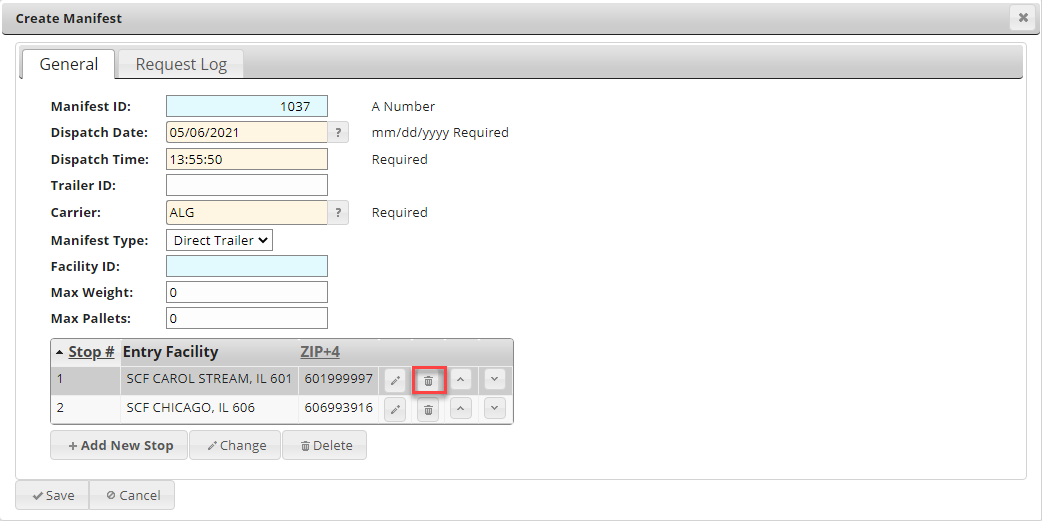
-
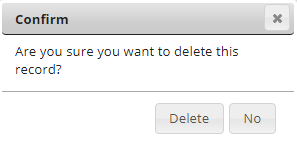
A Confirm dialog will display. Click Delete to close the dialog and continue with the deletion of the Stop.
Changing Stop Order
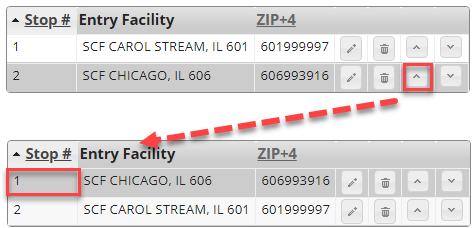
If a manifest contains multiple Stops, the order the Stops occur in can be changed in wbSCAN. Open the manifest and click the up or down arrow  button next to a stop to change it (in the screen image below, the Stop Number was changed from 2 to 1). Click Save when finished.
Scan Log
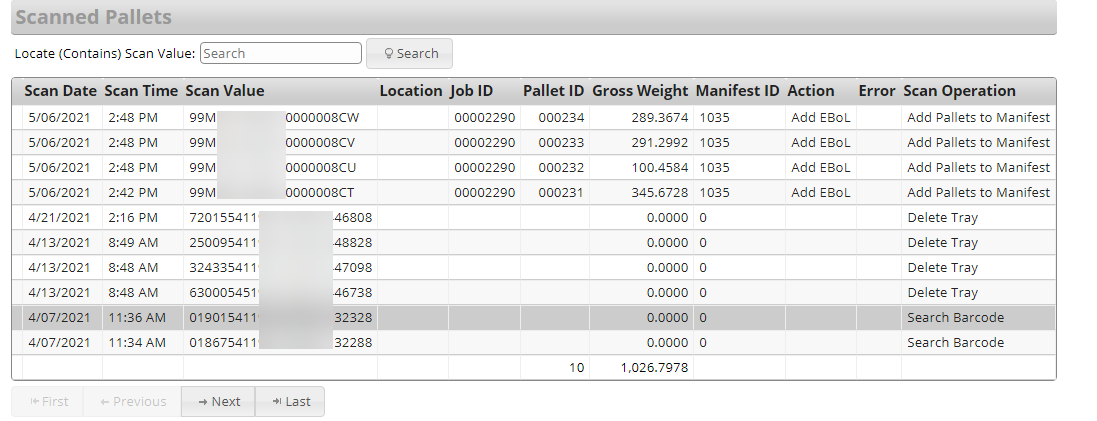
When the Scan Log option is selected from the Browse menu, a Scanned Pallets screen displays. This screen provides a list of all pallets that were scanned, for whatever reason. It also shows any deleted trays or spoiled pieces that occurred. It also provides the details around the Scan Value. The columns included are Scan Date, Scan Time, and Location to indicate when and where the scan took place; the associated Job ID, Pallet ID, and Gross Weight of the pallet; the associated Manifest ID (if any); the Action that was taken when the pallet was scanned (if any); the Error that occurred (if applicable) and Scan Operation that occurred, such as a tray was deleted.
Return to Browse Menu List
See also