Scan > Add Pallets to Manifest
Adding pallets to a manifest is a function that users who prefer to create their trailer manifests by scanning pallets onto a trailer can use.
For DIME users, the Add Pallets to Manifest process will automatically create DIME orders for the scanned pallets and associate them to the manifest that was selected assuming DAT-MAIL has been set up to automatically create orders (see wbSCAN - DAT-MAIL Setup Requirements/Options - DIME Users for details. It will take about 10 minutes for this information to reach LSC’s eBOL, however.
To add pallets to a manifest, select Scan > Add Pallets to Manifest.
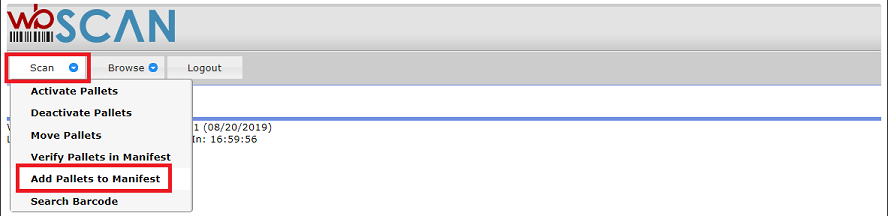
The Add Pallets to Manifest page will display (shown below). The page contains three tab options: Scan, Scan Log, and Pallets. The Scan tab is used to add individual pallets to a selected manifest, the Scan Log tab displays the list of pallets that the user has scanned, and the Pallets tab displays both a list of available pallets and a list of pallets that have already been associated with the selected manifest (added to eBOL). In addition, a fourth Scan2Pay tab may display. More information about each tab is provided below.

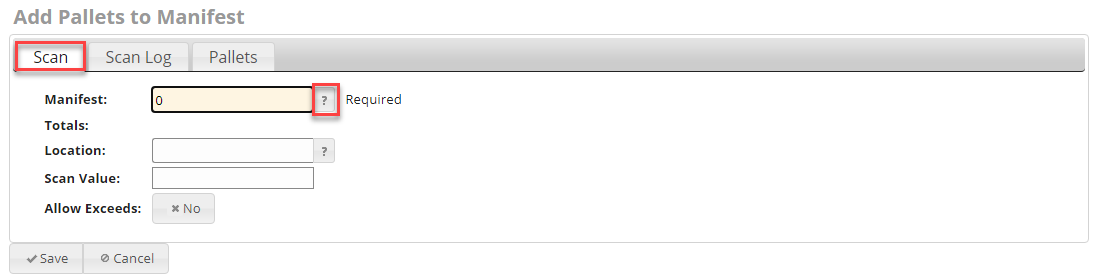
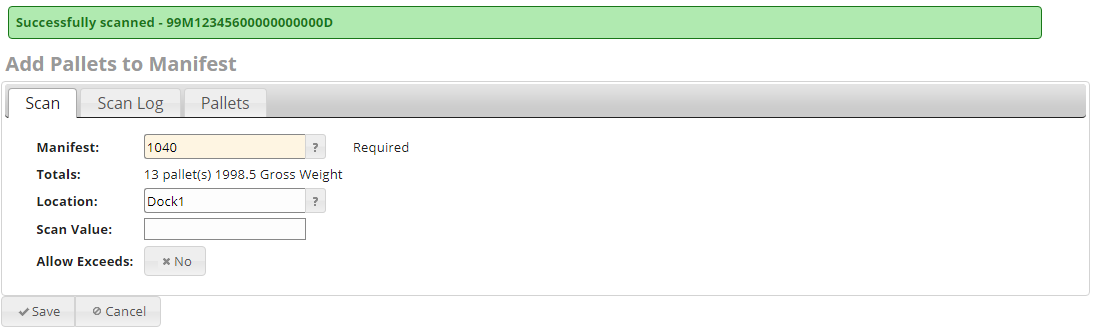
Add Pallets to Manifest – Scan tab
Select a manifest (required). To display the list of existing manifests, click the  question mark button located to the right of the Manifest field.
The Select Manifest page will display listing all the existing manifests. Select/highlight the desired manifest and then click Select Highlighted Manifest, or simply click the checkmark button that displays immediately to the left of the Sys ID column.
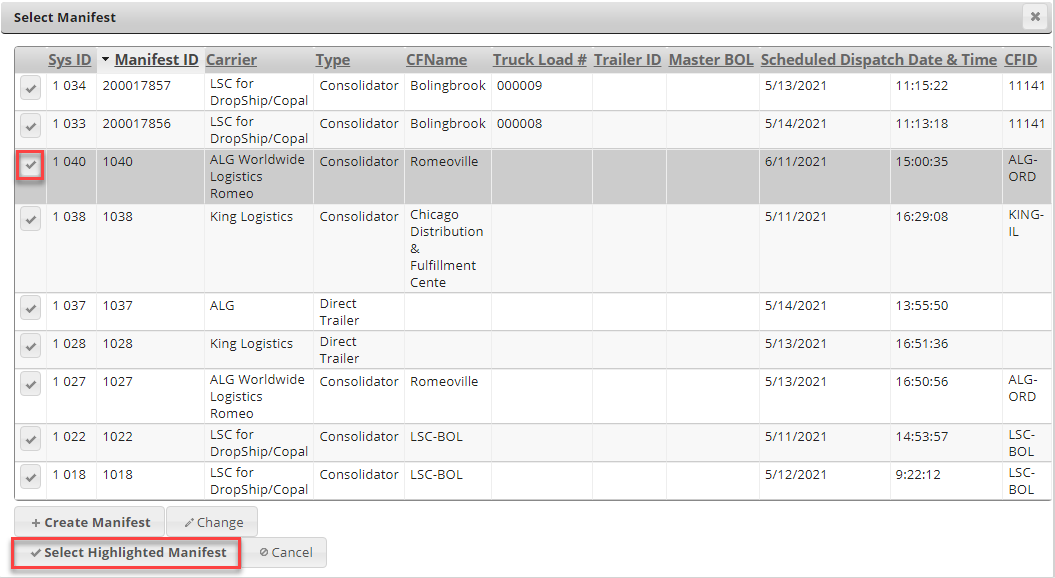
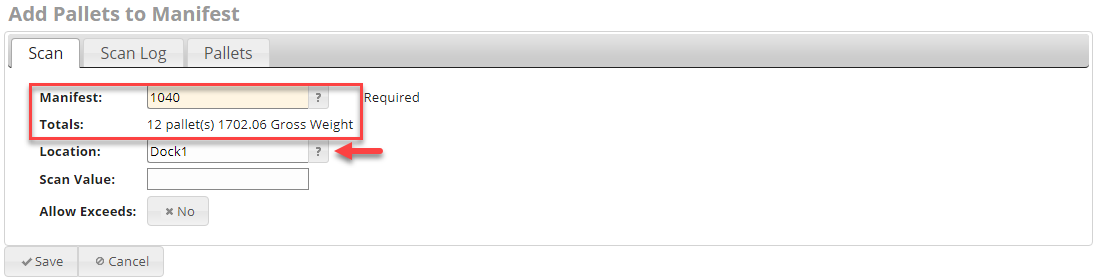
When a manifest is selected, the user will automatically be re-directed back to the Scan tab page and the manifest ID will be populated in the Manifest field. If the selected pallet already has pallets associated with it, the number of pallets and the gross weight of the pallets will also display.
If the user wants to associate the pallet to be scanned to a location or production function (optional), highlight the Location field, and enter, scan, or select a location from the list of existing locations by clicking the question mark immediately to the right of the Location field.
For more information on Locations, refer to Browse > Locations.
Scan the barcode of the pallet that is to be added to the manifest and click Save (if necessary - the barcode reader being used may be set up to append a “Return” at the end of the barcode so that clicking Save is not necessary).
If the pallet is added to the manifest successfully, a confirmation message will display on the screen. In addition, the pallet count and total gross weight will display to the right of the Totals field. As pallets are added to the manifest, the pallet count and total gross weight will increase accordingly. If the manifest already had pallets associated with it, the newly scanned pallet(s) and gross weight will be added to the existing values. This includes any pallets added to the manifest through DAT-MAIL, as well (MCTM users).
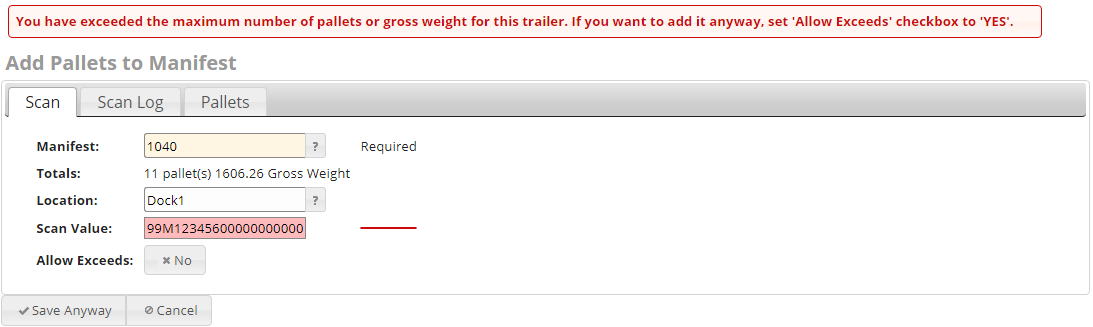
If the manifest was created with maximum limit values specified for the manifest weight and/or pallet count, and a scan exceeds either of those values, a warning message will display.
If a Origin pallet is accidentally scanned, the following error message will appear.

For more information about Max Pallets and Max Weight settings for manifests, refer to Browse > Manifests in this Guide.
If the manifest exceeds the maximum limit values specified, users can do one of three things:
-
Reject the scan by clicking Cancel.
-
Ignore the warning for this one scan by clicking Save Anyway. The warning will continue to display for future scans if the maximum values is once again exceeded.
-
Or ignore the warning for this one scan by clicking Save Anyway and disable the warning message for future scans. To do this, set the Allow Exceeds toggle switch to Yes. The system will ignore the max values set within the manifest.
Mailers should not exceed the pallet count or gross weight that LSC Logistics has given them!
Pallets will not be associated with the selected manifest until the pallet is selected in the Scan Log tab and Update eBOL is clicked.
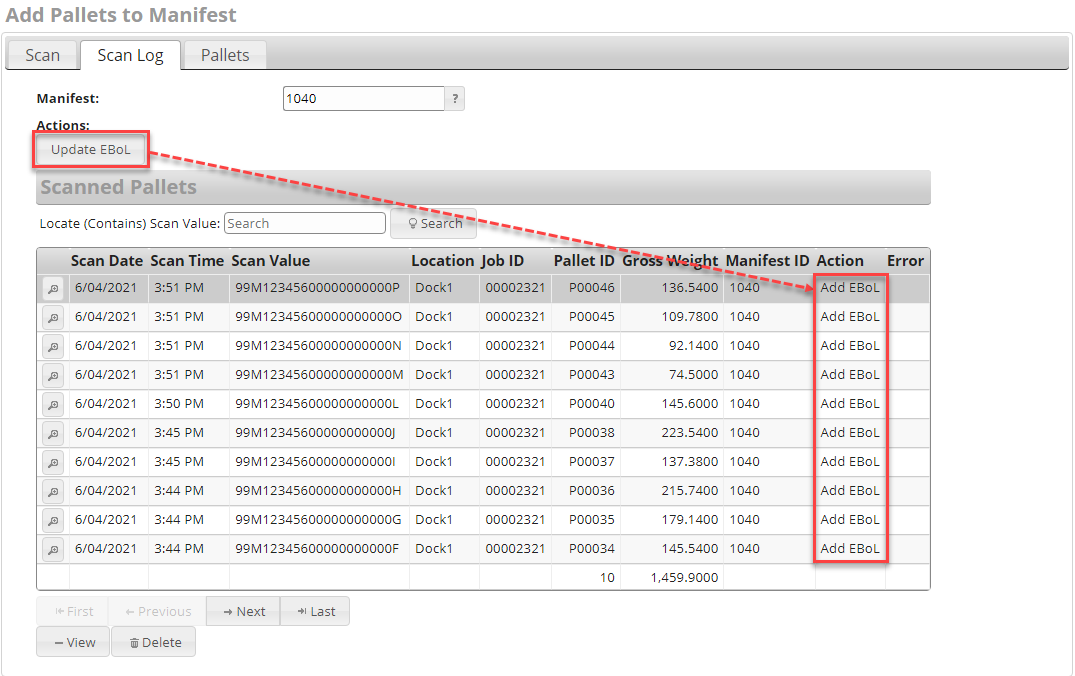
Add Pallets to Manifest – Scan Log tab
The Scan Log tab displays all of the pallets that have been scanned for adding to a selected manifest. Scanning, in essence, creates an order. If a manifest was selected on the Scan tab, it will automatically be selected, and the pallets displayed for it in the Scan Log page as well. To select a different manifest, click the Manifest field’s corresponding question mark.
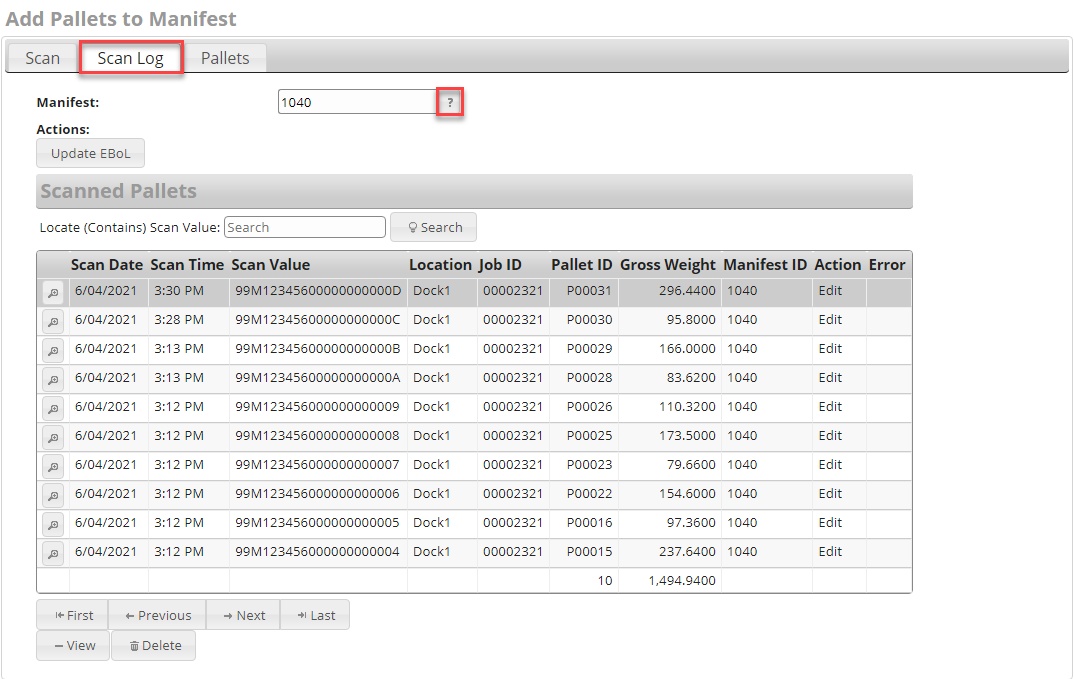
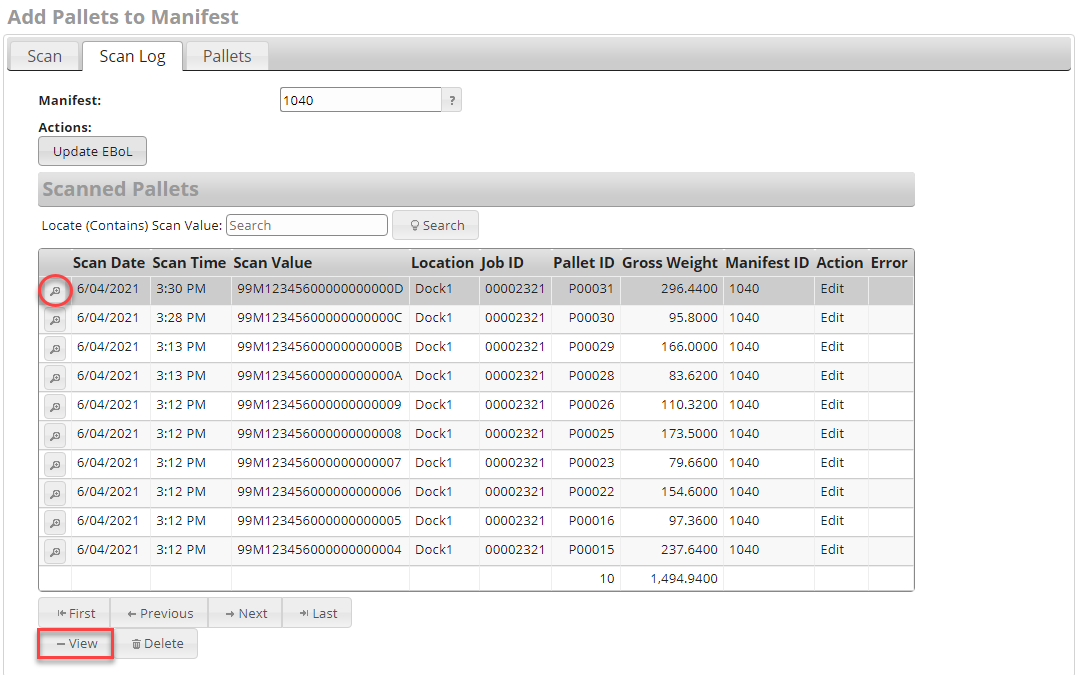
The details of a particular scan can be viewed by selecting/highlighting the scan’s line item and clicking View or clicking the  view button located to the left of the Scan Date column.
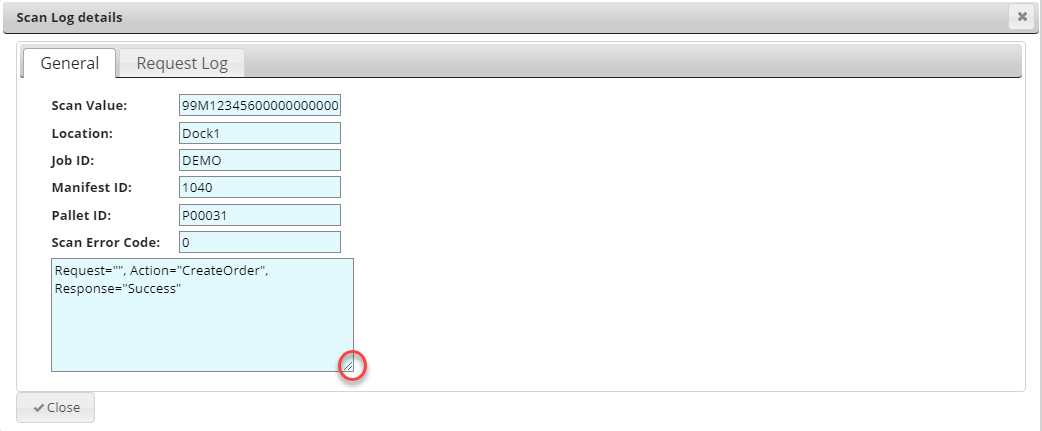
The Scan Logdetails screen will display. Information provided for the selected scan is the Scan Value; Location (if assigned); Job ID; Manifest ID; Pallet ID; Scan Error Code (if one exists); and a log of the various scan-specific actions that were performed by the system. The log window can be resized if necessary/preferred by clicking and dragging the bottom right corner.
Click Close to close the screen and return to the Scan Log screen.
Until the user clicks Update eBOL, the pallet(s) will not be associated with the manifest in DAT-MAIL. Until you see the Action column change from Edit to Add EBoL
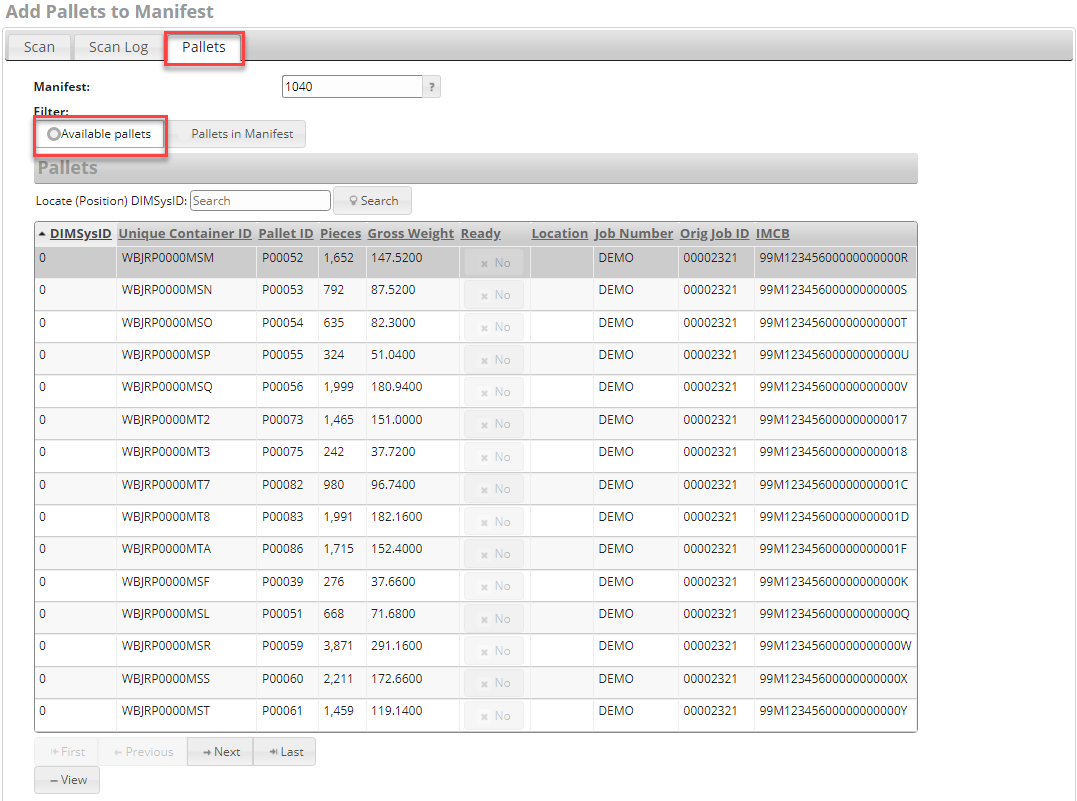
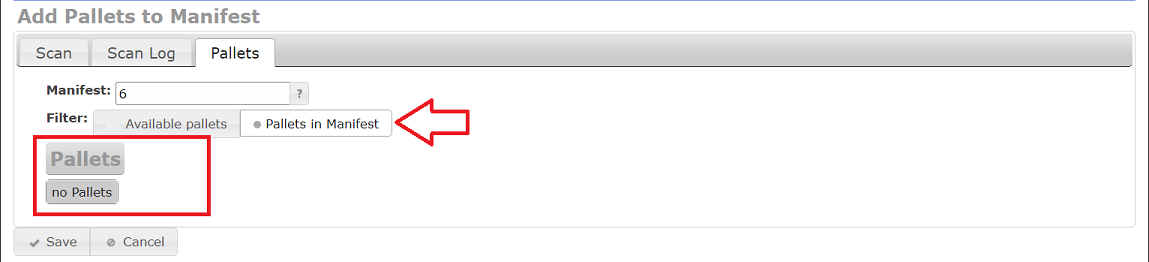
Add Pallets to Manifest - PALLETS tab
The Pallets tab within the Add Pallets to Manifest screen displays all of the available pallets in the system that have not been assigned to a manifest.
To see pallets specific to a manifest, click Pallets in Manifest and select the Manifest ID.
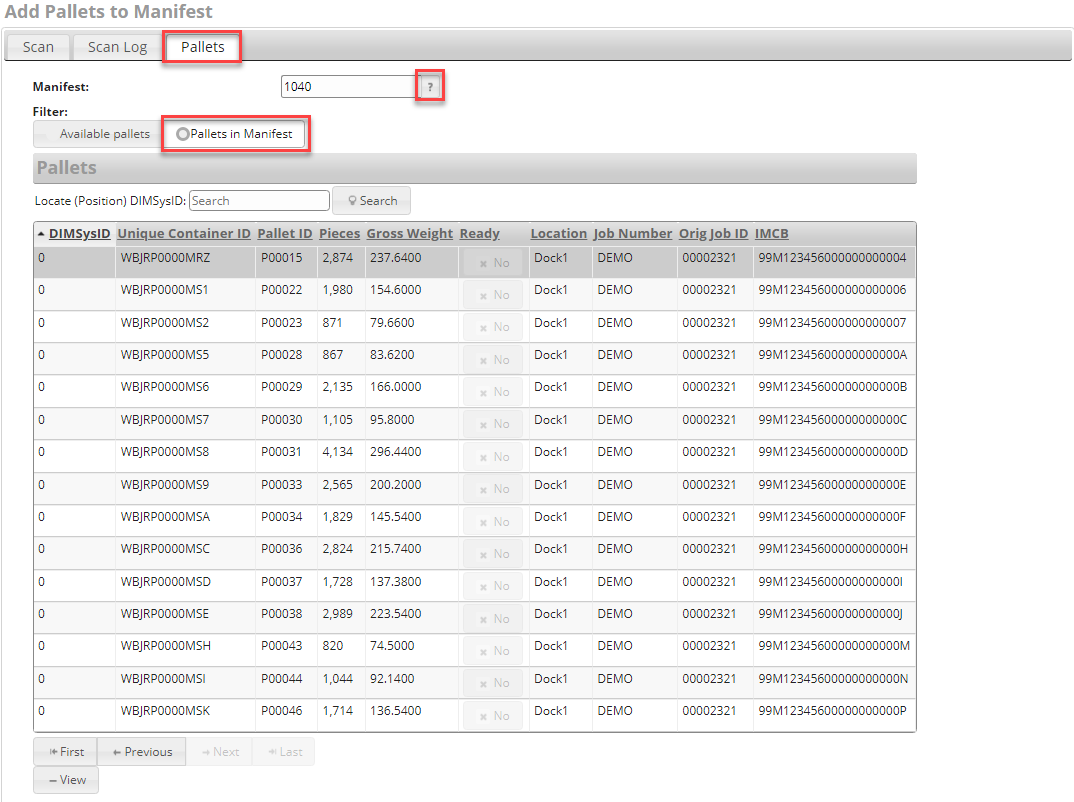
If no pallets have been associated with the manifest, no pallets will display.
The following information is provided for each pallet in the list:
-
Manifest ID (DIMS ys ID): The manifest number or ID. If using MCTM, this ID also corresponds with the same Manifest ID in DAT-MAIL.
-
Unique Container ID (User Container ID): The unique value associated with the pallet. This same ID is also present in DAT-MAIL.
-
Pallet ID: The Pallet ID corresponds to the Mother Pallet ID in DAT-MAIL.
-
Pieces: The total number of pieces on the pallet.
-
Gross Weight: The gross weight of the pallet.
-
Ready: This field displays whether or not a pallet is ready to ship.
-
Location: The Location assigned at time of scan.
-
Job Number: The job number assigned to the job upon import to DAT-MAIL.
-
Orig Job ID: The job ID that was assigned to the job upon import to DAT-MAIL.
-
IMCB (Intelligent Mail Container Barcode): A value applied to mailer-generated container labels used for scanning to uniquely identify pallets. This value will correspond with the same field found in DAT-MAIL for the same job.
Highlighting a pallet and clicking View will display all of the pallet-specific detail information. Refer to Verify Pallets in Manifest – Pallets tab for a screen image of the screen containing the pallet details.
Add Pallets to Manifest- Scan2Pay tab
This tab is only displayed if Add Pallets to Manifest is enabled as a trigger for the Scan2Pay function. Scan2Pay is a wbSCAN feature that allows mailers to scan pallets as they are produced and let the shop floor staff either mark the pallet for payment or pay postage for the scanned pallets in PostalOne! Refer to Scan2Pay for more information.
Return to Scan Menu List
See also